Car diagnostic tools information by obd2tool

Welcome to my blog,here some auto diagnostic tools will be displayed. If you want to know more information,you can visit our official website: www.obd2tool.com.

Car diagnostic tools information by obd2tool

Welcome to my blog,here some auto diagnostic tools will be displayed. If you want to know more information,you can visit our official website: www.obd2tool.com.

Possible to use AppCar FCA software with Micropod 2

Topic: Can you use AppCar FCA software with Micropod II?

what-is-Appcar-DiagFCA

What is Appcar DiagFCA:

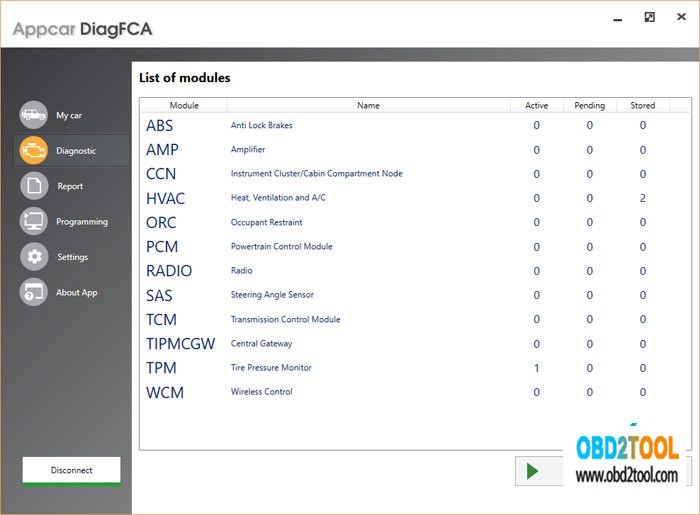
Appcar DiagFCA is a professional diagnostics & programming software for Chrysler, Dodge, Jeep and RAM vehicles

The Appcar DiagFCA software allows you:

Read and erase all DTC Fault codes from all systems available on the vehicle,
Read identification data from all vehicle systems, such as part numbers and software versions, VIN numbers recorded in each module,
Show Live Data – current parameters available on each of the systems ,
Test and control of selected actuators such as valves, relays, lighting and more,
Programming and configuring some unique features,
Activation and deactivation of selected vehicle equipment.

what_is_micropod-ii

What is Micropod 2:

Mircropod II is the same diagnostic and programming tool the dealerships are using. It replaces your StarMobile, StarScan, and wi-TECH POD, and enables technicians to increase their productivity and provide world-class diagnostic services to users/owners. It offers 100% CAN coverage for Chrysler, Dodge, Jeep, and Fiat vehicle

MOPAR MicroPOD II Features:
Support all the latest technologies and vehicle platforms including the latest Chrysler and Fiat Vehicles.
Work as a direct replacement for the wiTECH POD
Work with the current wiTECH software
No smart cables required but PC-based

AppCar FCA Software and Mircropod2:
Because i work with FCA diag software on a daily basis i can share some experience.
There is a standard adopted by most automakers in 2002? So just about any cheap chinese obd tool (if it supports the appropriate communications protocol) can read basic trouble codes populated on the databus. But that’s all.
To dig deeper into other control units, make adjustments and programming you need more sophisticated devices

When talking about OEM tools, then for almost anything up to 2005 (some dodge trucks up to 2007) you need a DRBIII
WiTech DRB Emulator is NOT a 100% replacement for a real DRB Scan tool.
From 2007 up to 2009 you can use StarScan or StarMobile. basically the same device with the same capabilities. The only difference ist that Starscan is a standalone handheld unit with color LCD and Starmobile uses the VCI pod as an interface and needs a PC as a desktop client. Now obsolete, no FCA support nor flash files anymore.
Still both work pretty well in standalone mode, you can do almost anything dealer can, except flashes.

WiTech (or WiTech1) – can use the same communication interface as starmobile did. Or can use the new Micropod. Can work in standalone mode. Supports vehicles up to 2015. Again, can do just about anything the dealer can, including flashes (if you have paid access to techAuthority service). Lot of clones on the market, also same used units from closed dealerships…
BUT!!! You go online and play with FCA and do not have registered micropod or VCI pod it will be rendered locked and useless.

Today state of art is Witech2.
This is online only solution. No standalone software or application. Works with just about any internet browser or operating system (win, apple, unix, linux android…..) Does not work without internet connection.
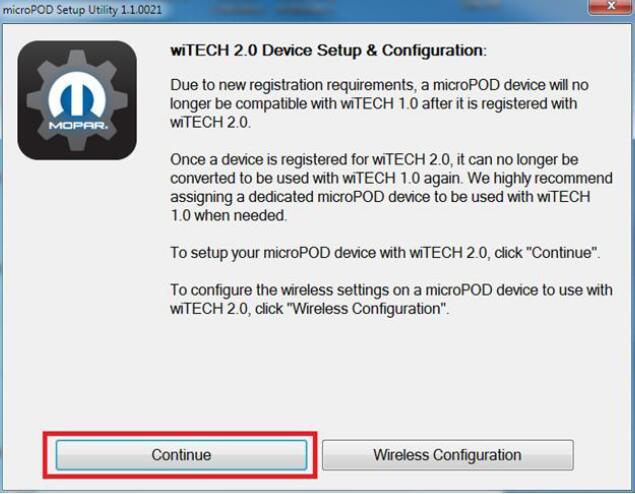
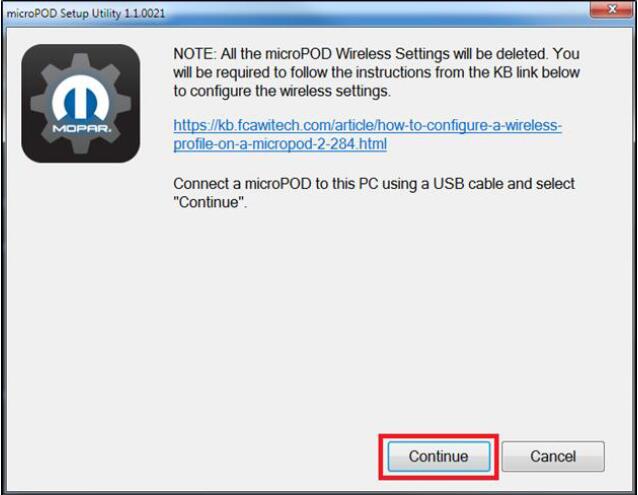
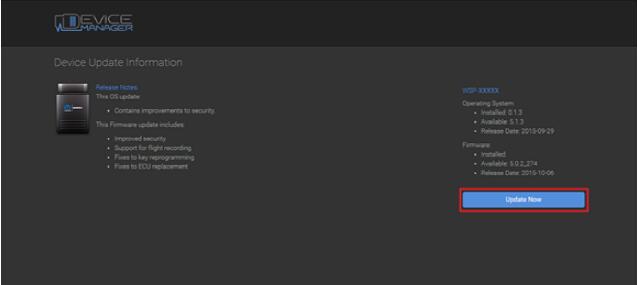
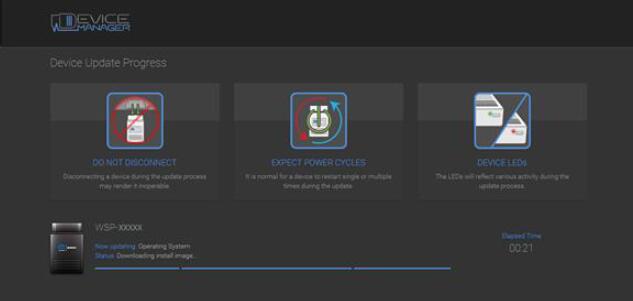
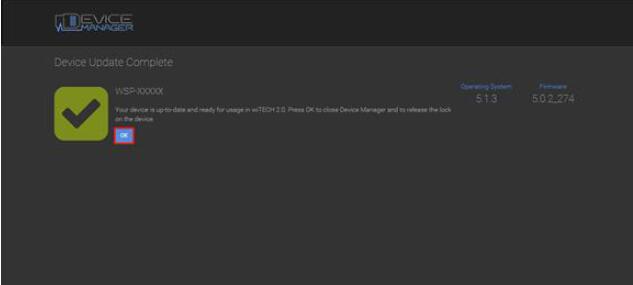
Uses the same micropod2 bud you need an utility to change firmware. this can be done only once. So if you still plan to use Witech 1, you need another micropod which will be dedicated to Witech2 only.
Then you need a $$$ subscription from FCAWitech. In USA it is also available for an aftermarket shops, in Europe it is a dealer-only option.
Works also with some clones, but it is a hit/miss. Good clones which work run about $500 in the net. Not cheap, but still better than $1800

Regarding the AppCar FCA software – it works. I know who made it and have a multi license version (not single vehicle). can do a lot but not everything.
But in some cases it can go beyond the capabilities of dealer tools.
You can change gear ratios, tyre circumference/size, enable/disable TPMS, program DRL, program voltages for PWM (good for LED headlamps) and a lot of other stuff.

quite long post, but hope someone finds this info useful.

wiTECH MicroPod II 2 setup instruction

If your dealership purchased a new microPOD and you would like to convert your existing microPOD for using with wiTECH 2.0 System, you need to download and install the microPOD Setup Utility to configure/setup your microPOD for witech 2.

11-0
NOTE: microPODs with a serial number beginning with “WFP” should NOT be used with this utility.

PROCEDURE
If you have a restricted network, you must first make sure that all sites listed below are enabled to be able to successfully use microPOD Setup Utility and the Professional Diagnostic Tool wiTECH 2.0 System.
mixpanel.com
bugsnag.com
fcawitech.com
chrysler.com
dealerconnect.com
jeep.com
witechsystem.com

Note: Please disable any Anti-Virus software that you have on your computer in order to allow the microPOD Setup Utility to install and run properly.

How to download and install the microPOD Setup Utility

IMPORTANT: Once the microPOD is configured using the microPOD Setup Utility, all the microPOD Wireless Settings will be deleted. You will be required to follow the instructions from the KB link titled “How to configure a Wireless Profile on a microPOD II“.

To download the application, please login to DealerCONNECT > Service > wiTECH Information > microPod Setup Utility

Step 1
Click on “Run” to begin the downloading process of microPOD Setup Utility.

11-1

Step 2
The install wizard will appear to install the OBD2 scan tool wiTECH Driver x64 onto your computer if your PC has not been installed with wiTECH 1.0 application.
If the PC has been installed with wiTECH 1.0 App, you will not see the screen below and proceed to Step 6. Otherwise, click “Next” to proceed.

11-2

Step 3
Read the License Agreement carefully, and accept the terms in the license agreement.
Then, click “Next” to continue.

11-3

Step 4
You are now ready to start the actual installation of the driver. You now need to click on “Install” for it to start.

11-7
Step 5
This will now install the wiTECH Driver x64. Once complete, the program will automatically proceed to the next step.

11-4
Step 6
Once the installation has completed, click “Finish”. Proceed to the following section, “Using the microPOD Setup Utility”.

11-5

Using the microPOD Setup Utility

NOTE: Please make sure that your computer is connected to the internet and the microPOD is connected to the computer via USB before starting this process. This application will help you configure your microPOD for wiTECH 2.0.

Step 1
Start microPOD Setup Utility by clicking the icon on the desktop:

11-6

If the microPOD Setup Utility that is installed is out of date, you will be forced to update to the newer version of the application.
Step 2
Please make sure your microPOD is connected to the PC via USB.

11-8

Step 2a
If you see the following screen you may not be connected to the internet, or have a firewall that blocks 1 or more of these websites.

Select “Continue” on the next screen for wiTECH 2.0 Device Setup and Configuration.

11-9

NOTE: If you only want to configure the wireless setting on a microPod device to use with wiTECH 2.0, click “Wireless Configuration” and follow instructions.

Select “Continue” on the next screen to begin attempting to connect to the microPOD device.

11-10

Step 3
Once your microPOD II is recognized by the utility, select “Continue” to proceed with the configuration.

11-11

NOTE: microPODs with a serial number beginning with “WFP” should NOT be used with this utility.

Step 3a
If the utility does not find the microPOD device, please assure that the microPOD is connected via USB and click “Refresh”.

11-13

Step 5
The following screen will appear for up to 15 minutes while the microPOD device is being configured.

11-14

Step 6
The following screen will appear when the utility completed the configuration of microPOD for wiTECH 2.0 Application.

Note: After microPOD Setup Utility is ran, all existing wireless networks will be removed from the microPOD.
Important! Leave the microPod Setup Utility window running as you will be required to complete software updates to the microPod device before configuring the wireless.

Step 6a
Login into wiTECH 2.0. The microPOD II that was just configured using the microPOD Setup Utility should appear in the wiTECH 2.0 discovery. You will need to update the operating system of your microPOD II before it can be used with wiTECH 2.0. Click “Continue”, and your web browser will redirect you to the page to download and install the operating system update as seen in the following step.

11-15

*NOTE: If microPOD II does not show up in discovery after a couple of minutes please power cycle your microPOD II by unplugging it and plugging it back in.

Step 7
Click “Update Now” and your microPOD II should continue to the update screen. Once updating, do not interrupt your microPOD II at any point until the update is complete.

11-16

*NOTE: This can take upwards of 9 minutes. It is normal activity for the microPOD II to reboot.

Step 8
Click “OK” and you will be navigated back to the wiTECH 2.0 discovery page. Your microPOD II should appear updated and ready for use.

11-17
11-19

Step 9
With the microPod Setup Utility still running, configure wireless on the wiTECH microPod 2 device.
Enjoy!

BIG THANKS to the one who share the wiTECH microPod 2 setup manua!!!