Car diagnostic tools information by obd2tool

Welcome to my blog,here some auto diagnostic tools will be displayed. If you want to know more information,you can visit our official website: www.obd2tool.com.

Car diagnostic tools information by obd2tool

Welcome to my blog,here some auto diagnostic tools will be displayed. If you want to know more information,you can visit our official website: www.obd2tool.com.

High-quality witech micropod system vs. bad micropod 2 china clone

Here’s a comparison chart of genuine vs. clone wiTech MicroPod 2 system, incl. High-quality witech micropod system vs. bad micropod 2 china clone.

Genuine WiTech Micropod2 vs. Clone wiTech Micropod II

4-1

4-2 4-3 4-4

witech micropod2 for sale:

http://www.obd2tool.com/goods-5172-wiTech+MicroPod+2+for+Chrysler+Diagnostic+Tool.html

4-5

– the copy is 1:1 of the genuine, of high quality and good stability, its connector matches the car OBD plug perfectly.

– With high-quality USB cable which transfer data stably and reliably

– The package is anti-static, moisture-proof, anti-electromagnetic interference

– Workable with your current wiTECH software

– No smart cables required

– No drivers needed

micropod 2 ebay?

Ebay should be a good place to buy items. But for professional vehicle diagnostic tools, a site with experienced experts and technical support teams like www.obd2tool.com

witech micropod II HQ Clone Customer Review:
Just ordered a chinese clone MicroPod II and it has been working exactly like an OEM unit. No errors so far and tested functions on 3 different vehicles. It has been confirmed working with unmodified software wiTECH v17.03.10 (downloaded directly from Chrysler). For now it works fine.

I have tested Dodge also. I just used it on a 2014 dodge avenger just fine.

I don’t have experience with Windows XP. This version of Witech works fine on Windows 7 and Windows 10.

I have also uploaded pictures of the internals for those who are curious.

4-6 4-7 4-8 4-9 4-10

witech software download:

http://cheapobd2tool.com/2017/09/13/free-download-v17-03-01-witech-micropod-2-for-chrysler/

micropod 2 login, setup

http://cheapobd2.com/2017/09/13/how-to-set-up-witech-micropod-2-chrysler-diagnostic-tool/

witech micropod 2 review:

http://hmilycar.blog.fc2.com/blog-entry-61.html

Kess v2 fw v4.036 Add Tokens Manual

This is a user manual of how to add tokens to KESS V2 Firmware V4.036; also with how to fix “NO VALID TOKEN FILE” error when fail to add tokens.

NOTES:

1- this manual is used for Kess v2 tuning kit firmware v4.036

2- must be used for Kess v2 without a token reset button

21-1

3- Disable all local area connection and wireless network connection, otherwise the KESS V2 hardware would be damaged.
Process of adding tokens:
Extract “Tool” Zip File;
Copy all the files under “Tool” Folder to the desktop;
Copy “K-Suite_tokens” zip File into Local Dick C and unzip the file;
Run “K10033818 K2-TR ECU TUNERS”;
Click “OK” to continue;

21-2

Browse the folder to C:\\KSuite tokens\KSuite;
Click OK;

21-3
Click “Rest Token Count” button;

21-4

Click OK and then wait for loading;
Next close the window;
Delete previously unzipped “K-Suite_tokens” Folder in C:\\;
Re-extract “K-Suite_tokens” Zip File again;
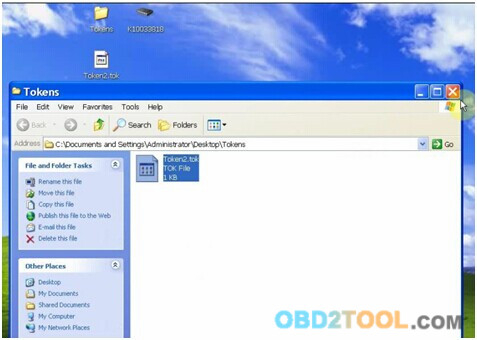
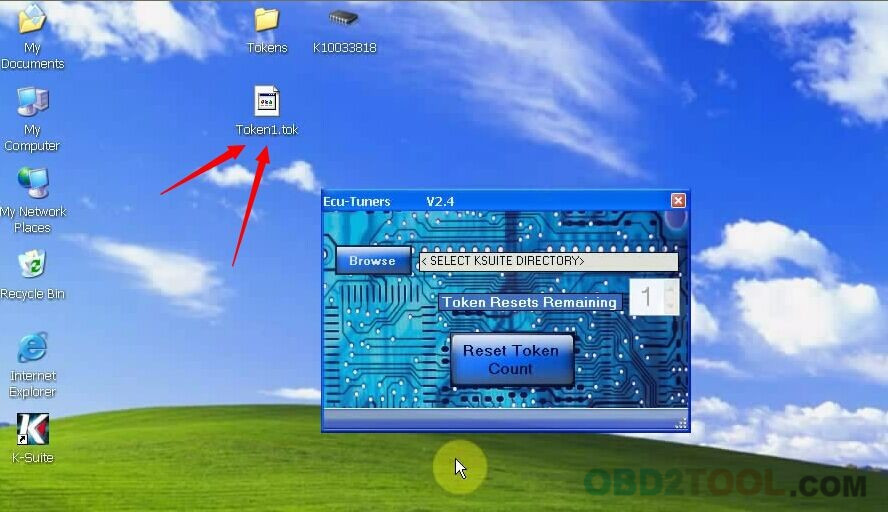
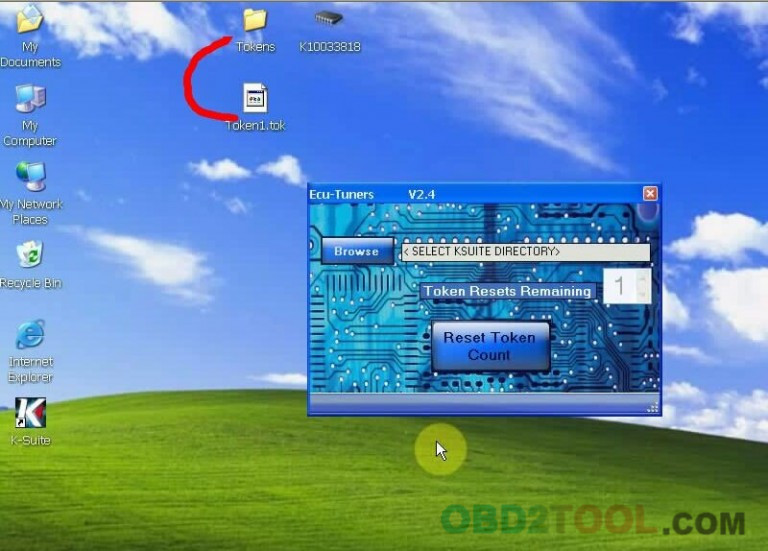
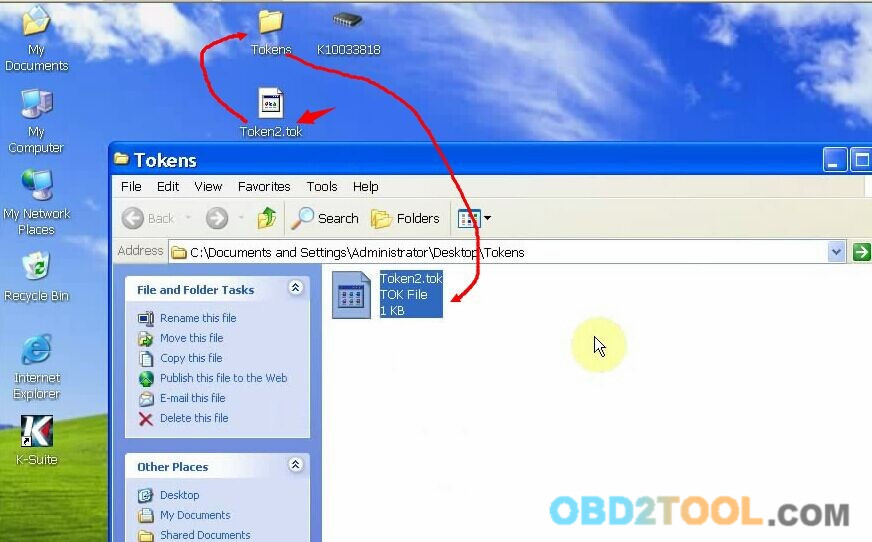
Re-name “Token1.tok” on the desktop as “Token2.tok”;
Copy “Token2.tok” to the “Tokens” Folder;

21-5

Open “K10033818 K2-TR ECU TUNERS” again;
Select location as C:\KSuite tokens\KSuite again;
Click “Rest Token Count”;
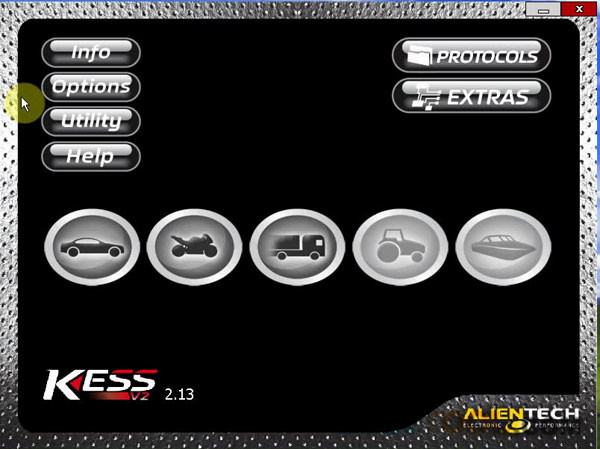
Wait until the KESS V2 main menu window displays;
21-6

kess v2 v4.036 adds tokens SUCCESS!

How to solve “Add Tokens Failed:NO VALID TOKEN FILE”

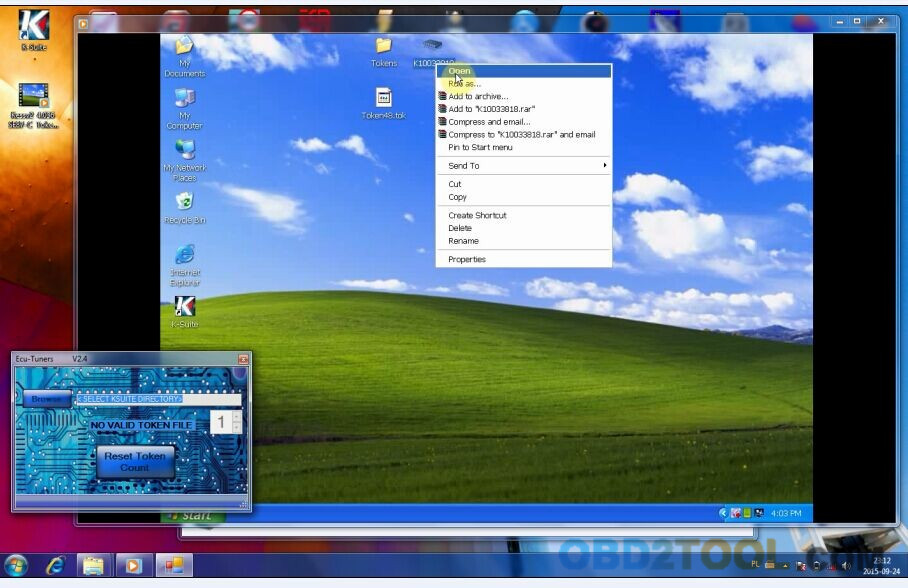
Tokens for Kess v2 Chip Tuning Tool is used out. Open the file “K10033818” and meet the following situation.

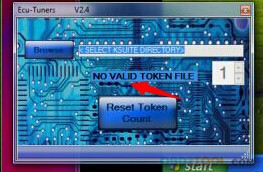
ECU-Tuner error: NO VALID TOKEN FILE

21-7

21-8
solution:
1. rename the token file(“token1.tok”) as “token3.tok” or “token5.tok”

21-9

2.copy the file you renamed just (“token3.tok” or “token5.tok” ) now to the folder “Tokens”Ksuite-3

21-10

note: make sure that there is only one file (“token3.tok” or “token5.tok” ) in the folder “Token”

21-11

normally, the first 10 tokens in “token1.tok” “token2.tok” will be used, you may use tokens from 11th token to the 100th.
it is limited to 100 tokens. so when you use all 100 tokens, you can change the laptop or restore the system and then use tokens from 11th token.

if you follow the 2 steps above but it doesn’t work, please try to install our windows XP

4. If you cannot add tokens according to the instruction above, change the TF card and follow step 1 & 2.

https://www.gamerlaunch.com/community/users/blog/4750493/1890889/ecu-programming-tool-ktag-%26amp%3B-kess-v2-explanatio

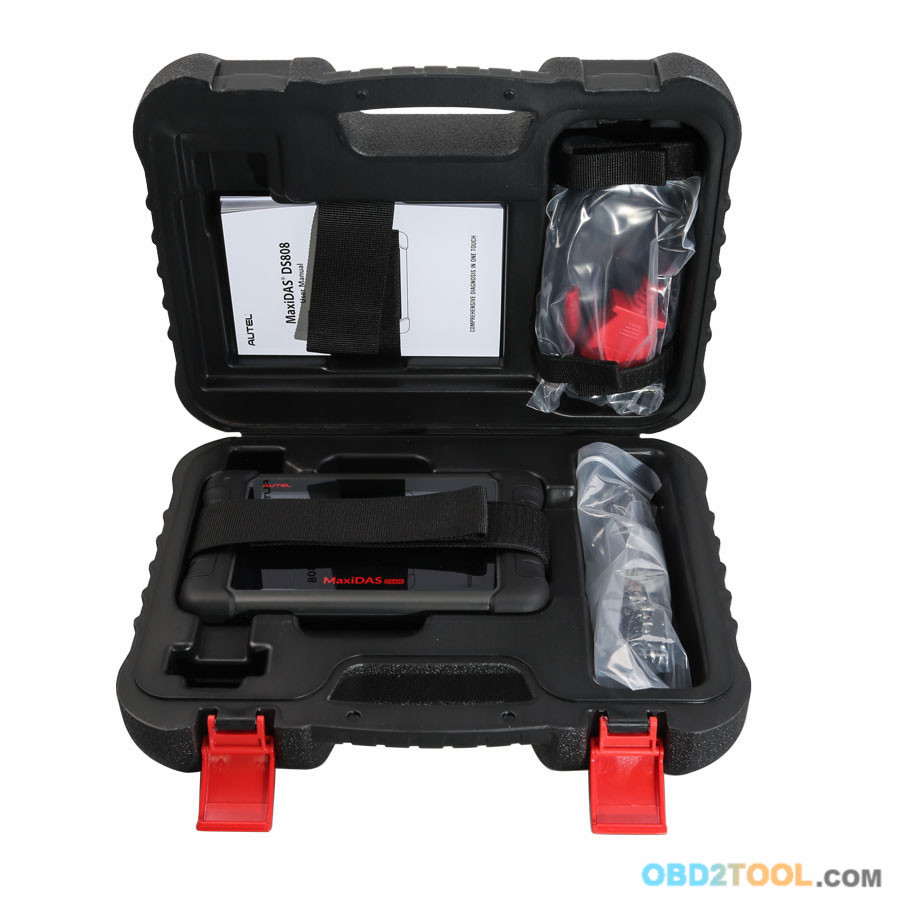
Original AUTEL MaxiDAS DS808K remplace AUTEL DS708

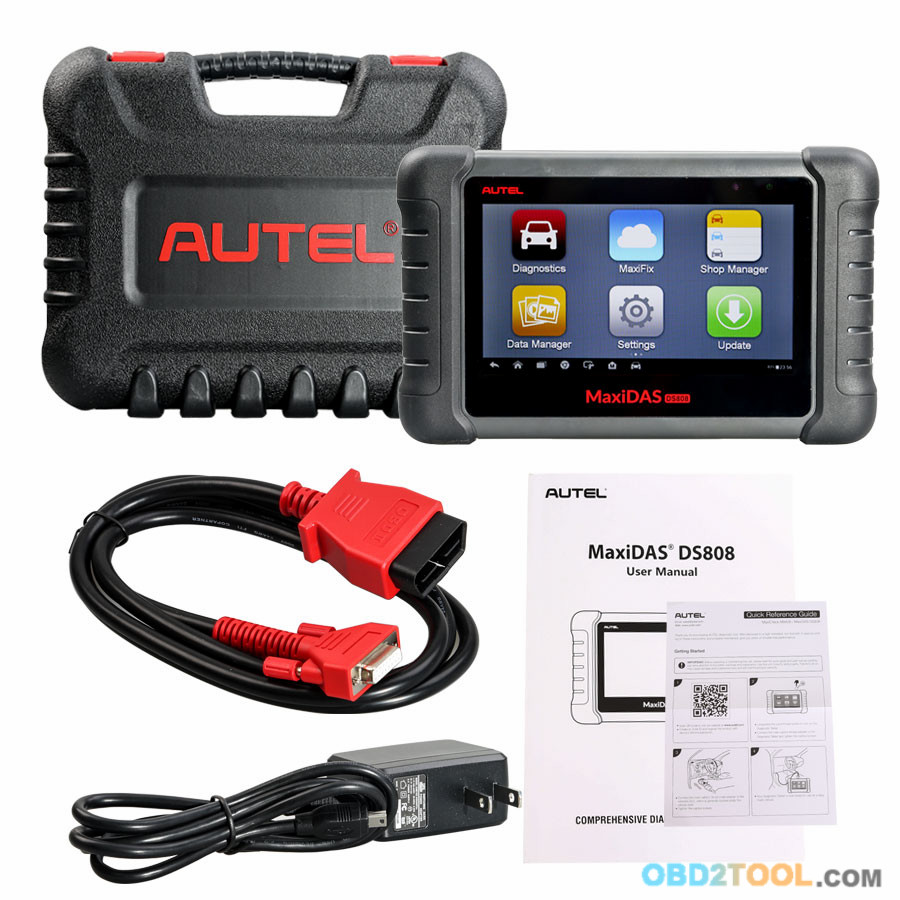
Basé sur le système d’exploitation Android et avec l’écran tactile LCD 7-inch (résolution 1024 * 600), le MaxiDAS DS808K Full (Avec Conkit) est présenté avec une couverture étendue du diagnostic de niveau OE. Installé avec un processeur quad-core rapide, DS808K (Avec Conkit) OBD2TOOL  offre le maximum de confort et d’efficacité pour votre diagnostic et votre analyse.
Mise à jour gratuité un an, après un an, frais de mise à jour est 332EUR par an

AUTEL MaxiDAS DS808K full set VS Autel DS808 :
La seule différence: MaxiDAS DS808 Kit est full, MaxiDAS DS808 est standard set. Veuillez confirmer en vérifiant leur liste de colis.
Même: mêmes fonctions et même spécification MUX
Comment mettre à jour Autel DS808K (avec Conkit) software:
1. Assurez-vous que la tablette d’affichage est connectée à une source d’alimentation avec un accès stable à Internet.
2. Appuyez sur le bouton Mettre à jour l’application dans le menu de travail MaxiDAS;
Ou appuyez sur le message de notification de mise à jour lorsqu’il est re?u un;
Ou appuyez sur l’ic?ne Mise à jour sur le menu Véhicule dans l’application Diagnostics.
L’écran Application de mise à jour s’affiche.
3. Vérifiez toutes les mises à jour disponibles:
Si vous décidez de mettre à jour tous les éléments, appuyez sur le bouton Mettre à jour tout.
Si vous souhaitez seulement mettre à jour un ou un élément, appuyez sur le bouton Mettre à jour dans la colonne de droite de l’élément spécifique.
4. Appuyez sur le bouton Pause pour suspendre le processus de mise à jour. Lorsque vous appuyez sur Continuer pour renouveler la mise à jour, le processus de mise à jour reprendra
Du point de rupture.
5. Lorsque la procédure de mise à jour est terminée, le microprogramme sera installé automatiquement. La version précédente sera remplacée.

3-1 3-2 3-3 3-4

http://obd2lily.mee.nu/autel_maxidas_ds808k_

KESS V2 WARNING the tool is not updated

Useful tips of truck kess v2 ksuite warning “the tool is not updated”.

Symptom:

Kess v2 ksuite warning: the tool is not updated. Connect the PC to the Internet and run again the software.

5-1

Optional solution:

1.Try different USB cable. Some users with the same problem fixed the problem by a new USB cable .

2.Reflash with J-Link …

Notice:
1. Do not update this tool online, or It will get damaged
2. Do remember disconnect internet when you use it

If you connect to internet with this clone kess v2 at www.obd2tool.com, or make online update. The interface is destroy/broken.

1.–Buy a new NPX chip with 60 tokens inside. Desolder the old NPX and change it with new. It cost 14-20

5-2
2.–or you have to weld a connector on backside of interface ,and plug the J-link programmer.
You can reset the ECU Chip Tuning Kess v2 to virgin.

5-3

Our customers feedback some problem about kess v2,we sovled it and have written below,if you have same problems,it will help you

http://obd2lily.nation2.com/kess-v2-not-works-with-k-line-or-does-not-work-wel

How to install SD Connect C4 WiFi on Windows 10

Have good success with MB SD Connect C4 windows 10.

I’m running Win10 on a Dell XPS15 9550 laptop with Intel AC 8260 internal wireless card installed.

After days of investigation and testing, the most important thing to understand is this. The drivers for your wireless card MUST support AdHoc functionality. The Benz diagnostic tools are the secret sauce that makes this possible. This can be verified at the DOS command prompt. The command is: netsh wlan show drivers
This command will show “Yes” or “No” on the line for “Hosted Network Support”.
If this line says “No”, AdHoc will not work properly.

Although I’m running Win10, Intel has drivers for the 8260 wireless card for Win8 which will enable proper AdHoc functionally.

The trick is to download the driver first, prior to removing your existing wireless driver. Download the driver ONLY, not any driver file with additional driver management apps included in the downloaded file.

Now you can go into Device Manager and remove your existing wireless card AND check the box that removes all software associated with it. My Win8 driver download file was a .exe file. I double clicked on it and the Win8 driver for my Intel 8260 card was installed. Went to Device Manager, right clicked on my 8260 wireless card and selected Properties. Clicked on Advanced and was able to see several AdHoc related entries. These AdHoc entries were not visible using the Win10 drivers.

AdHoc can now be verified at the DOS command prompt. The command is:
netsh wlan show drivers
This command will show “Yes” on the line for “Hosted Network Support”.
If this line says “No”, AdHoc will not work properly

With AdHoc functionality confirmed, additional DOS commands can now be used to enable Road24h wireless connectivity. The procedures for the additional steps required are well documented in OBD2TOOL or GOOGLE.

This is what worked for me. Depending on your computer skills, your results may vary.

If you find my posting to be of help to you, Thanks and Rep would be most appreciated.

Happy motoring

http://cheapobd2scanner.com/2017/07/27/how-to-install-sd-connect-c4-wifi-on-windows-10/!