Car diagnostic tools information by obd2tool

Welcome to my blog,here some auto diagnostic tools will be displayed. If you want to know more information,you can visit our official website: www.obd2tool.com.

Car diagnostic tools information by obd2tool

Welcome to my blog,here some auto diagnostic tools will be displayed. If you want to know more information,you can visit our official website: www.obd2tool.com.

VAS5054A ODIS 4.3.3 ODS2522E Error Solved on 64 bit Windows

Device: VAS 5054A clone interface
Software: ODIS-S version 4.3.3
Laptop: Panasonic cf53
Connection: Bluetooth

Error message:
After paring 5954A unit with my Panasonic cf53 and setting up the Bluetooth and EDIC ok then open Odis 4.3.3 while it’s connecting I get error message:
ODS2522E

Infrastructure:
The vehicle interface hardware used here is not supported.

16-1

Thinking it could be a laptop issue as I can pair the 5054a with a later cf54 and it works fine also try to connect it to 2 other cf53 and get the same error

Suggestion & Solution tested by OBD2TOOL professionals:

Pls try odis 4.3.3 on 64 bit Windows
Then solved!
Note that you’d better have tested odis 4.3.3 software esp. cheap cracked version
It’s not a good idea to get free odis from forums coz many posters just tested on their own cars and have no enough knowledge of software compatibility that they cannot offer good tech support when someone has issues. Anyway, good luck!
This is odis 4.3.3 cracked but tested on hundreds of cars…

Solution from folks:

Follow this steps :
1.- Install ODIS-S as usual but NO restart !
2.- Rename the folder Softing from Program Files (x86) (or Program Files) to Softing.ori
3.- Copy the downloaded Softing folder to Program Files (x86) (or Program Files).
4.- Restart
5.- Install Postsetup
6.- Install ODIS-E 8.1.3 as usual
7.- Thats All !

UPDATE :
1.- Replace Softing directory with the updated directory and you get this…
DOWNLOAD Softing OK UPD:

https://mega.nz/#!FcVgxSYT!6mEcIN2nQqMcwF4TZA31JVJx3WEGI4pjuAb1TyPmO7Q

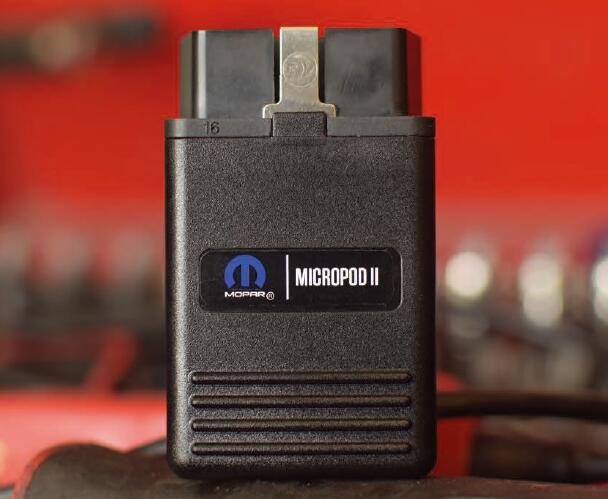
wiTECH MicroPod II 2 setup instruction

If your dealership purchased a new microPOD and you would like to convert your existing microPOD for using with wiTECH 2.0 System, you need to download and install the microPOD Setup Utility to configure/setup your microPOD for witech 2.
11-0
NOTE: microPODs with a serial number beginning with “WFP” should NOT be used with this utility.

PROCEDURE
If you have a restricted network, you must first make sure that all sites listed below are enabled to be able to successfully use microPOD Setup Utility and the Professional Diagnostic Tool wiTECH 2.0 System.
mixpanel.com
bugsnag.com
fcawitech.com
chrysler.com
dealerconnect.com
jeep.com
witechsystem.com

Note: Please disable any Anti-Virus software that you have on your computer in order to allow the microPOD Setup Utility to install and run properly.

How to download and install the microPOD Setup Utility

IMPORTANT: Once the microPOD is configured using the microPOD Setup Utility, all the microPOD Wireless Settings will be deleted. You will be required to follow the instructions from the KB link titled “How to configure a Wireless Profile on a microPOD II“.

To download the application, please login to DealerCONNECT > Service > wiTECH Information > microPod Setup Utility

Step 1
Click on “Run” to begin the downloading process of microPOD Setup Utility.

11-1

Step 2
The install wizard will appear to install the OBD2 scan tool wiTECH Driver x64 onto your computer if your PC has not been installed with wiTECH 1.0 application.
If the PC has been installed with wiTECH 1.0 App, you will not see the screen below and proceed to Step 6. Otherwise, click “Next” to proceed.

11-2

Step 3
Read the License Agreement carefully, and accept the terms in the license agreement.
Then, click “Next” to continue.

11-3

Step 4
You are now ready to start the actual installation of the driver. You now need to click on “Install” for it to start.

11-7
Step 5
This will now install the wiTECH Driver x64. Once complete, the program will automatically proceed to the next step.

11-4
Step 6
Once the installation has completed, click “Finish”. Proceed to the following section, “Using the microPOD Setup Utility”.

11-5

Using the microPOD Setup Utility

NOTE: Please make sure that your computer is connected to the internet and the microPOD is connected to the computer via USB before starting this process. This application will help you configure your microPOD for wiTECH 2.0.

Step 1
Start microPOD Setup Utility by clicking the icon on the desktop:

11-6

If the microPOD Setup Utility that is installed is out of date, you will be forced to update to the newer version of the application.
Step 2
Please make sure your microPOD is connected to the PC via USB.

11-8

Step 2a
If you see the following screen you may not be connected to the internet, or have a firewall that blocks 1 or more of these websites.

Select “Continue” on the next screen for wiTECH 2.0 Device Setup and Configuration.

11-9

NOTE: If you only want to configure the wireless setting on a microPod device to use with wiTECH 2.0, click “Wireless Configuration” and follow instructions.

Select “Continue” on the next screen to begin attempting to connect to the microPOD device.

11-10

Step 3
Once your microPOD II is recognized by the utility, select “Continue” to proceed with the configuration.
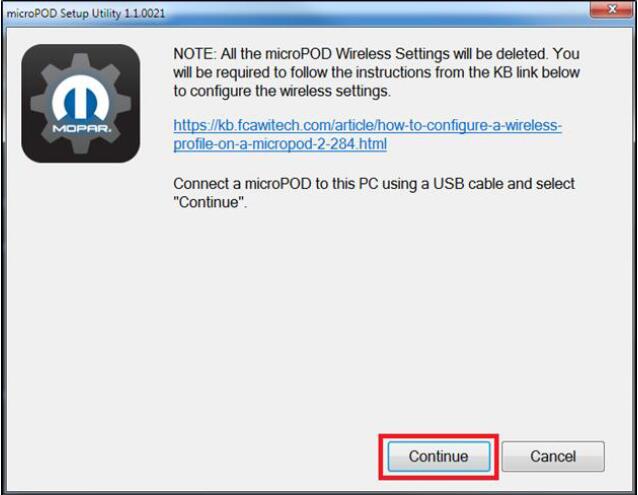
11-11

NOTE: microPODs with a serial number beginning with “WFP” should NOT be used with this utility.

Step 3a
If the utility does not find the microPOD device, please assure that the microPOD is connected via USB and click “Refresh”.
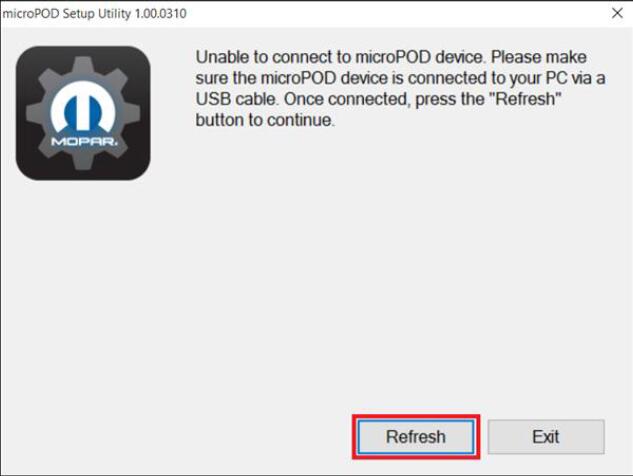
11-13

Step 5
The following screen will appear for up to 15 minutes while the microPOD device is being configured.
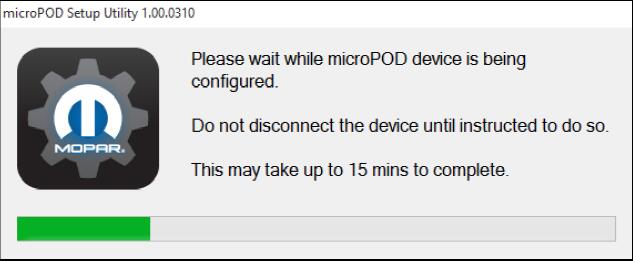
11-14

Step 6
The following screen will appear when the utility completed the configuration of microPOD for wiTECH 2.0 Application.

Note: After microPOD Setup Utility is ran, all existing wireless networks will be removed from the microPOD.
Important! Leave the microPod Setup Utility window running as you will be required to complete software updates to the microPod device before configuring the wireless.

Step 6a
Login into wiTECH 2.0. The microPOD II that was just configured using the microPOD Setup Utility should appear in the wiTECH 2.0 discovery. You will need to update the operating system of your microPOD II before it can be used with wiTECH 2.0. Click “Continue”, and your web browser will redirect you to the page to download and install the operating system update as seen in the following step.
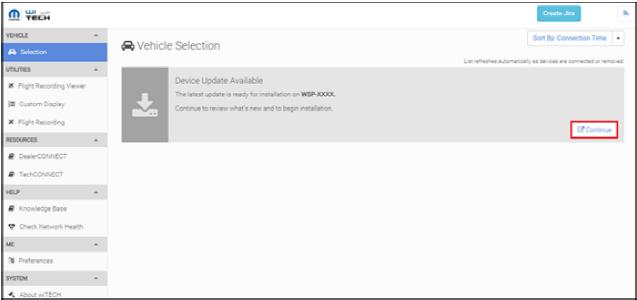
11-15

*NOTE: If microPOD II does not show up in discovery after a couple of minutes please power cycle your microPOD II by unplugging it and plugging it back in.

Step 7
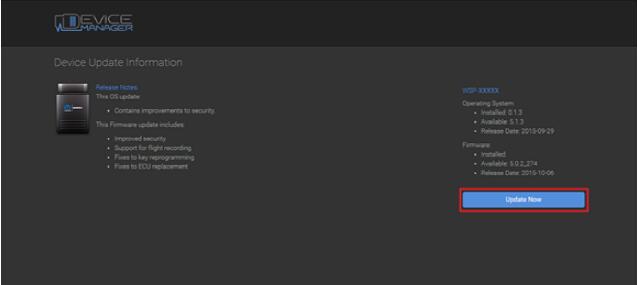
Click “Update Now” and your microPOD II should continue to the update screen. Once updating, do not interrupt your microPOD II at any point until the update is complete.
11-16

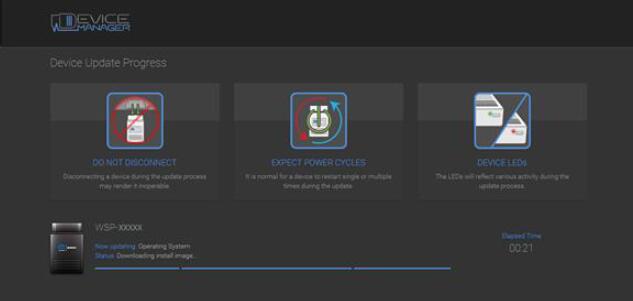
*NOTE: This can take upwards of 9 minutes. It is normal activity for the microPOD II to reboot.

Step 8
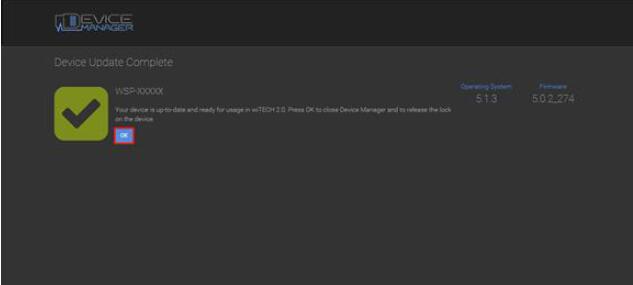
Click “OK” and you will be navigated back to the wiTECH 2.0 discovery page. Your microPOD II should appear updated and ready for use.
11-17
11-19

Step 9
With the microPod Setup Utility still running, configure wireless on the wiTECH microPod 2 device.
Enjoy!

BIG THANKS to the one who share the wiTECH microPod 2 setup manua!!!

RECOMMENDATION YOU Autel MaxiSYS MS 908 CV

36-1
Are you a heavy duty truck mechanic or a professional DIY owner of a commercial vehicle?

If yes, then this incredible Autel MaxiSYS MS908CV Heavy Duty Scan Tool is built for you.

It is a comprehensive diagnostic tool that can pinpoint problems in more than 80 commercial vehicles built in the US, Europe, and Asia.

The MaxiSys CV diagnostic tool takes commercial vehicle diagnostics to a new level. Built on Autel dynamic MaxiSys 908 Android-based platform, the MaxiSys CV performs enhanced system diagnostics on more than 60 light, medium and heavy duty commercial vehicle brands.

1. 9.7″ LED touchscreen
2. Diagnose manufacturer-specific systems including Allison transmissions, Bendix ABS Brake systems, 3. Detroit diesel engines and Eaton and Wabash ABS trailer brakes
4. Compatible with over 60 light, Medium and heavy duty commercial vehicles

Do you want a detailed diagnostic report of your car? Or you simply want a tool-guided maintenance service for your car?

Whatever you need, Autel MaxiSYS MS 908 CV Heavy Duty Scan Tool will provide a fast and a detailed car diagnosis.

And the best part is that if you are a mechanic or professional car technician, you will be spoiled for choice as you can diagnose more than 80 vehicles with Autel MaxiSYS MS 908 CV Heavy Duty Scan Tool.

http://crp129.com/2018/06/25/recommendation-you-autel-maxisys-ms-908-cv/

Should I buy GM MDI instead of Tech 2 clone

The Tech2 clone is definitely fine, but I think people looking for a good tool now should really look at an MDI clone instead.

The Future of the Tech 2

The Tech 2 remains an essential tool through at least the 2010 model year. The GM MDI will not support past models when its diagnostic capabilities are introduced. And, the Tech2 will continue to be needed to diagnose all vehicles fromprevious model years. Remote programming with the Tech 2 will continue to be supported for use on all 2007 and previous vehicles.Additional information will be supplied in future.

HOW WILL THE G-M MDI BE USED?

The new G-M MDI can be used only in the Pass-Thru method. This means you can use it as your programming tool, while your Tech 2/CANdi remains available for diagnostics and other duties.

I have issues with it, however:

The GM MDI will not support past models when its diagnostic capabilities are introduced.
I’m not sure what this means. The GM MDI WILL clearly support past model years with the Tech2win applications. So I’m not sure what this statement actually means. The only thing I can think of is that GM will remove pass thru support at a later date, but since its all been cracked already, this shouldn’t matter.

The new G-M MDI can be used only in the Pass-Thru method. This means you can use it as your programming tool, while your Tech 2/CANdi remains available for diagnostics and other duties.
This statement implies that the pass thru method is a bad thing. Considering the Tech2win application works perfectly with EVERY function on all GM vehicles as far back as 1996, I don’t understand what this is really saying. It implies that you can’t do diagnostic troubleshooting using pass-thru, when in fact you can.

As far as I can tell from my testing, this is a basic sales pitch in order to encourage people to keep the Tech2 as well as purchase a MDI2 unit – both of which are incredibly expensive if purchased legitimately through GM.

In reality, you don’t need a  Obd2 scan tool Tech2 and a MDI2. An MDI interface is more than enough especially on our older cars like the C5 corvette which GM will unlikely ever release further PCM upgrades for given the fact they were discontinued over 10 years ago.

Mercedes S430 ETC SCN coding with SD Connect C4

This is a customer feedback working SCN coding on Mercedes S430 ETC with MB Star diagnostic SD Connect C4 diagnostic system.

Mercedes model:
Mercedes S430 Elongated (220.170)

Device to use:
Dell laptop D630
MB SD Connect C4

11-0

ETC SCN coding procedure:
Open XENTRY

11-01
Enter user ID and password to log in.

11-1

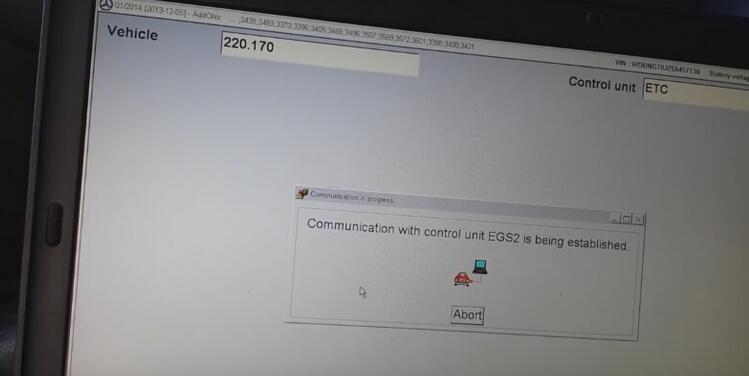
Communication with control unit EGS2…

11-2

Data are being determined…
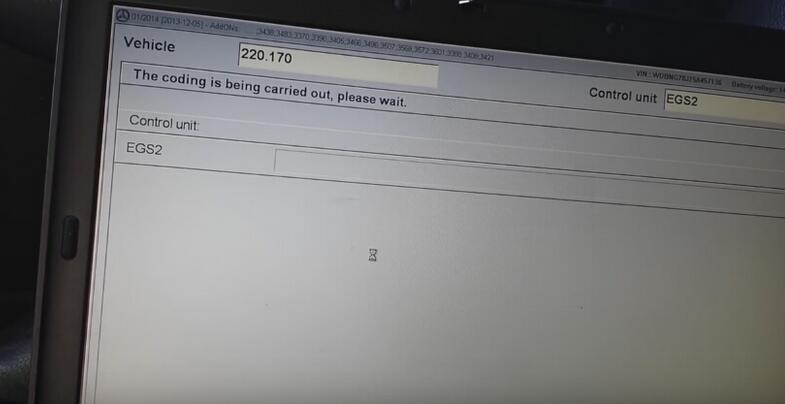
The coding is carried out…

11-3

Data are being determined…
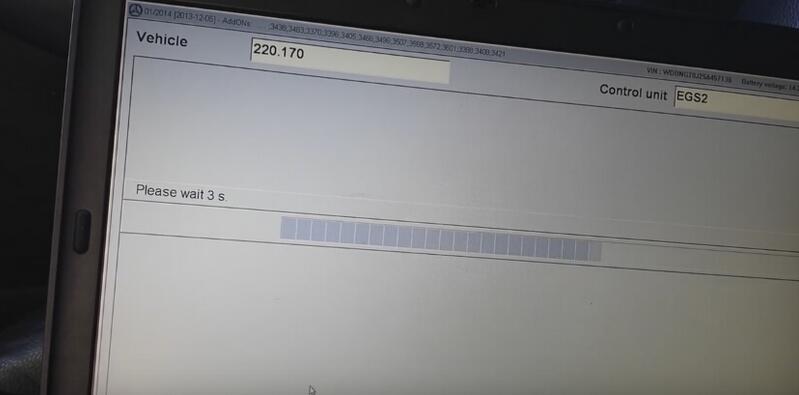
Wait 3 seconds…

11-4

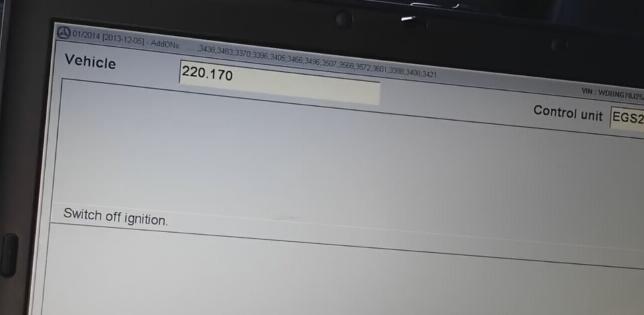
Switch ignition off

11-5

Wait 5 seconds…
Switch on ignition
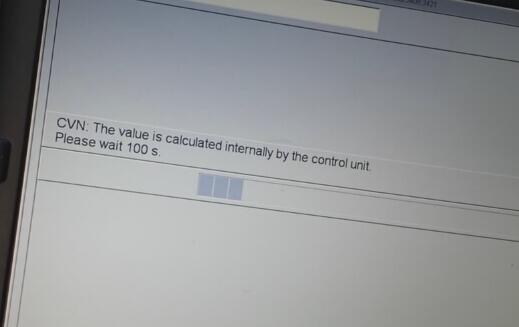
Control module reset, please wait…
CVN The value is calculated internally by the control unit
Wait 100 seconds…

11-6

Data are being determined…
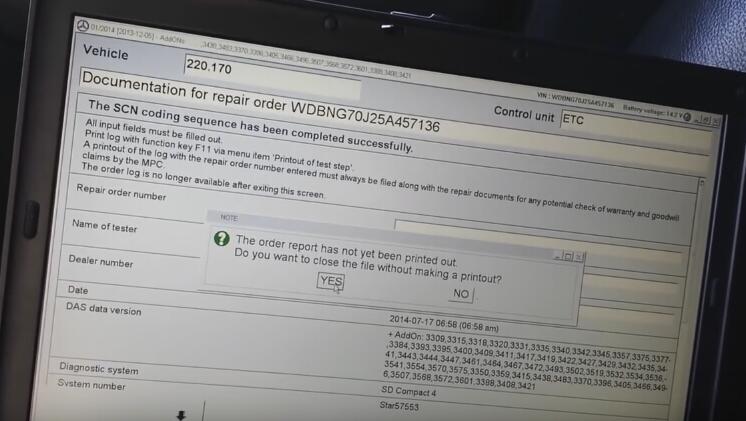
Documentation for repair order WDBNG70J25A457136
The SCN coding sequence has been completed successfully.

11-7

Click YES to close the file without making a printout.
Data are being determined…
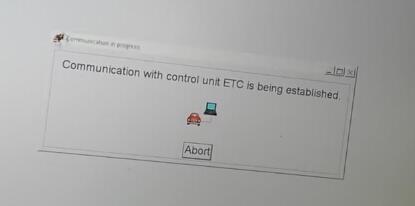
Communication with control unit ETC…

11-8

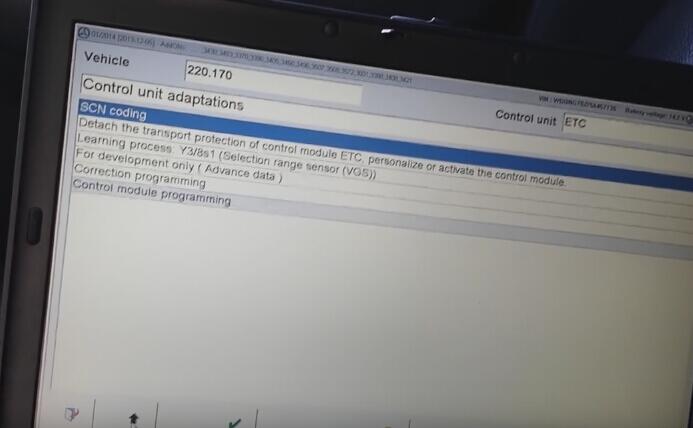
Go to SCN coding

11-9

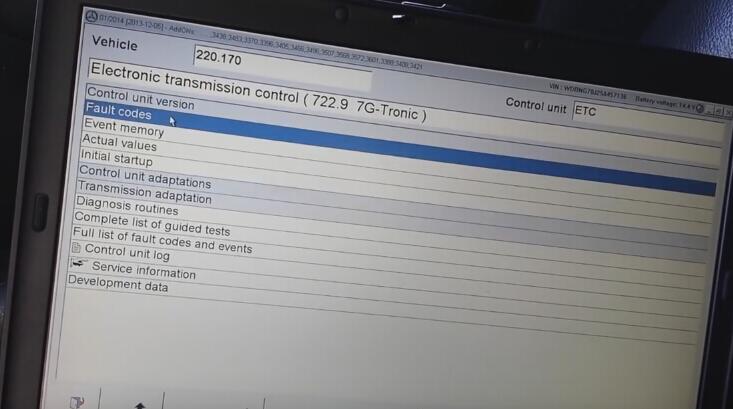
Select Fault codes

11-10

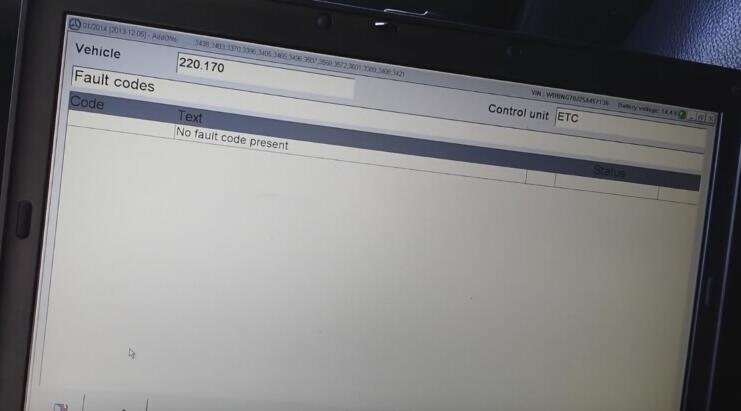
No fault code present

11-11