Car diagnostic tools information by obd2tool
Welcome to my blog,here some auto diagnostic tools will be displayed. If you want to know more information,you can visit our official website: www.obd2tool.com.Car diagnostic tools information by obd2tool
Welcome to my blog,here some auto diagnostic tools will be displayed. If you want to know more information,you can visit our official website: www.obd2tool.com.How to Solve Launch X431 V+ Bluetooth Connector Poor Contact Problem
Customer problem:
I have a Launch X431 V+ and use it many times, it always works fine. But recently it cannot work normally. There is poor contact on the Bluetooth connector, I need to unplug and plug it in over 3 times so that it can work.
Obd2tool.com engineer replied:
Check if you contact with an extended line, if yes, remove the line to try again.
If it still failed to use, please open X431 APP and go to the personal center to fix the firmware.
For further problems, please feel free to contact our customer service.
How to Restore ICOM Next with All LEDs Red and System LED Blink Red/Yellow
Problem with BMW ICOM Next: did an update on my motorcycle and everything went fine and today when I connect icom to OBD – all leds are just on with red color, system one is blinking red/yellow.
Please do exactly as follow:
1. Disconnect the ICOM Next device from the power supply or vehicle.
2. Go to the directory
C:\ProgramData\BMW\ISPI\data\TRIC\ICOMNext\ICOM-Image-xx-yy-zz.
Note: This directory is hidden. Please see [?00045002EN].
2.1. Copy the file ICOM_Next-rootfs-xxxxxx.tar.gz to the root directory of the USB flash drive.
2.2. Copy the file ICOM_Next-app-yyyyyy.tar.gz to the root directory of the USB flash drive.
Note:
– An ICOM_Restore.bin file is not available. Please use the files from the ICOM Next firmware package as described above.
– xxxxxx and yyyyyy in the file names represent the version numbers of the respective files.
– If the directory contains more than one ICOM-Image-xx-yy-zz folder,
please choose the most recent one, i.e. the folder with highest number.
The ICOM Next will then be ready to use without further updates.
– It is important that the files are copied to the root directory of the USB flash drive.
3. Connect the USB stick to the BMW Diagnostic Tool ICOM Next.
4. Press and hold the button located on the right-hand side of the ICOM Next, next to the OBD II cable connection socket.
5. Continue to hold the button, connect the device to the vehicle’s OBD
II jack and keep the button pressed until the LEDs on the ICOM Next glow
red.
6. Release the button and within five seconds, push the button three times. This starts the firmware update.
Note: The update may take several minutes. Do not disconnect the ICOM Next as long as any LED glows red.
7. When all LEDs on the ICOM Next have stopped glowing, the Emergency
Firmware Update is complete. You can now disconnect the USB flash drive.
8. IMPORTANT: When the Emergency Firmware Update is finished, the ICOM
Next must be connected to your network with a LAN cable in order to be
reconfigured since all previous settings have been lost. If there is a
“user.settings” file on the USB flash drive, it will be installed after
the firmware update.
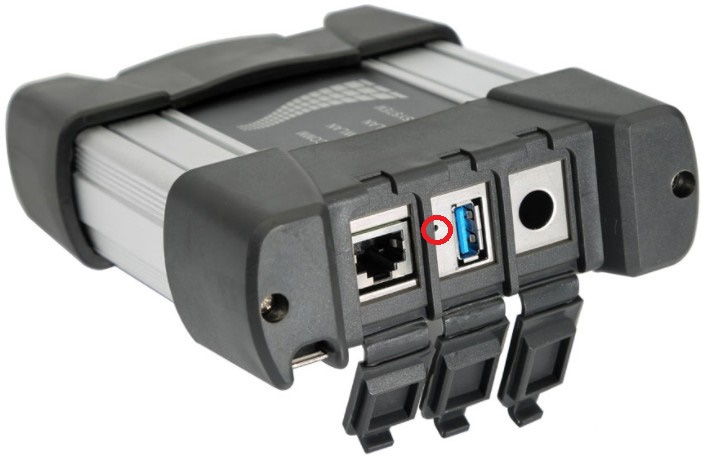
The RIGHT reset button on Original ICOM Next the button behind the tiny black hole! (in red circle).
WARNING!
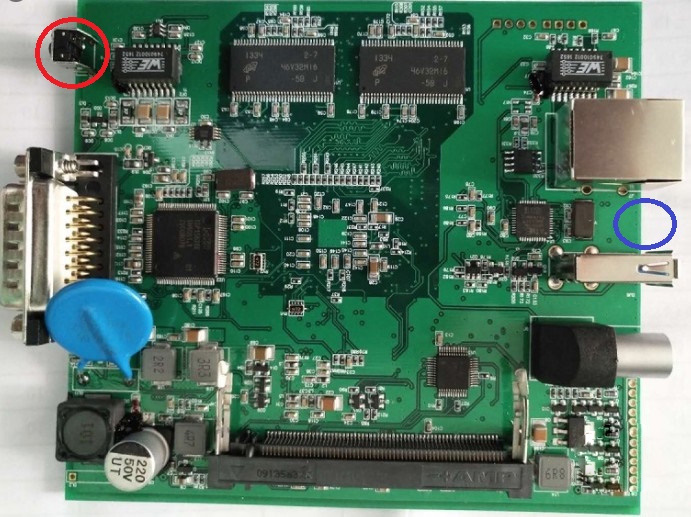
Not Orig ICOM NEXT has another reset button!!!!
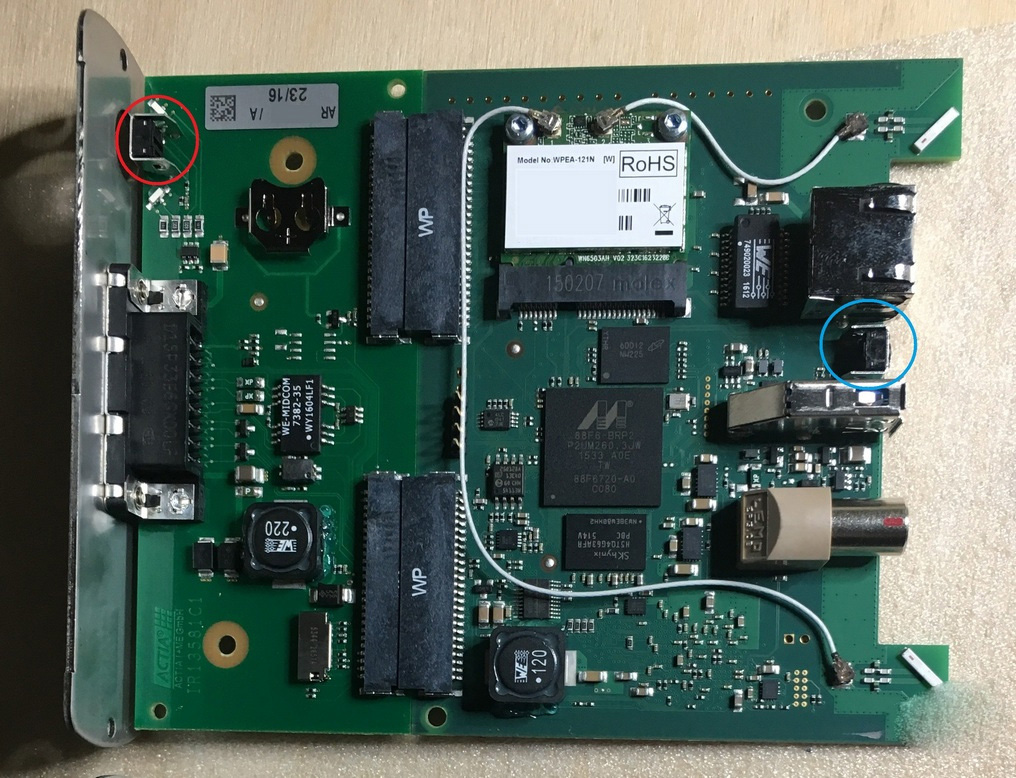
The red circle is a NON OEM ICOM NEXT reset button, and the blue is the OEM ICOM NEXT reset button!!!!!
And there is one original ICOM NEXT PCB where a reset button in the blue circle! (NOT THE RED!!!)
Question: what icom_restore.bin is doing?
Answer: The existing restore.bin is for ICOM A or A2!
And here is one user’s success feedback: Yesterday out of a blue my ICOM Next OEM has stopped to work, ethernet can’t find IP address. In about 2 minutes ICOM was recovered and connected to the ethernet network. PS: He follow the above ICOM Next store procedure.
How to Adapt VAG ECU to Micronas / NEC cluster via Xhorse VVDI2
Problem: I have Xhorse VVDI2 programmer, I want to adapt PCR 2.1 and I get “security access failed. operation not completed.”
Solution: this is how to adapt PCR and similar
How to adapt ECU to Micronas / NEC cluster via Xhorse VVDI2.
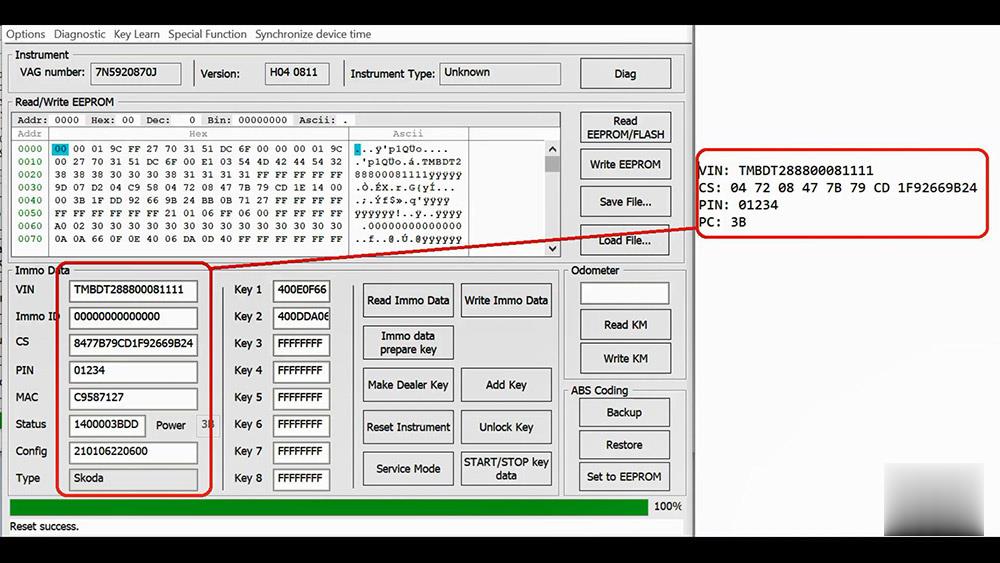
Read cluster IMMO data and copy to TXT file
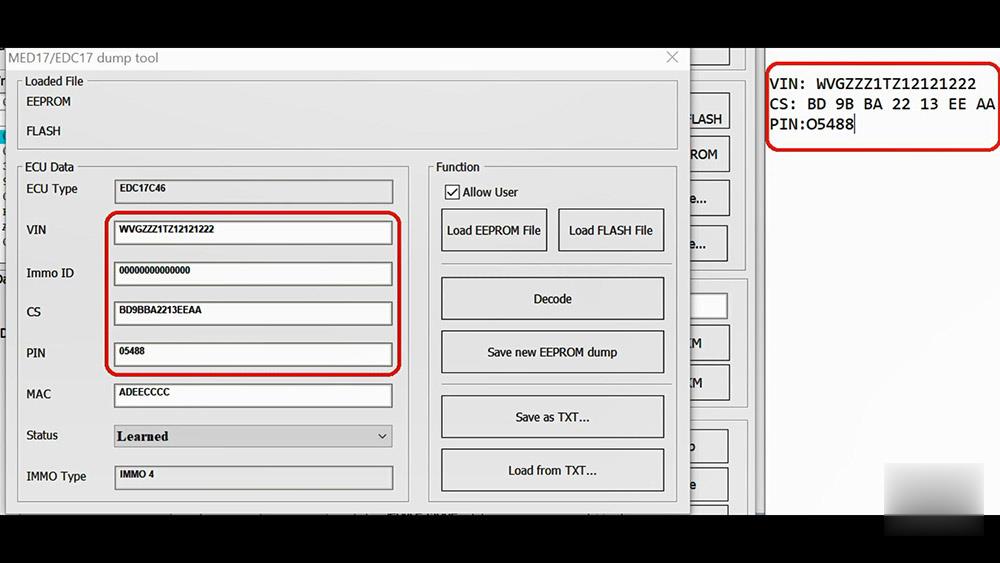
Read IMMO data from ECU and paste to TXT file.
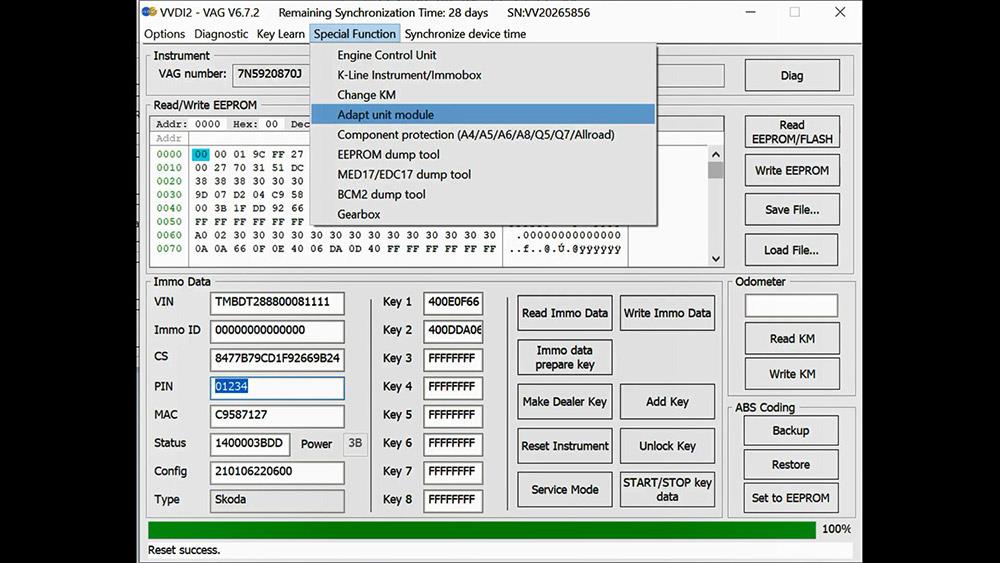
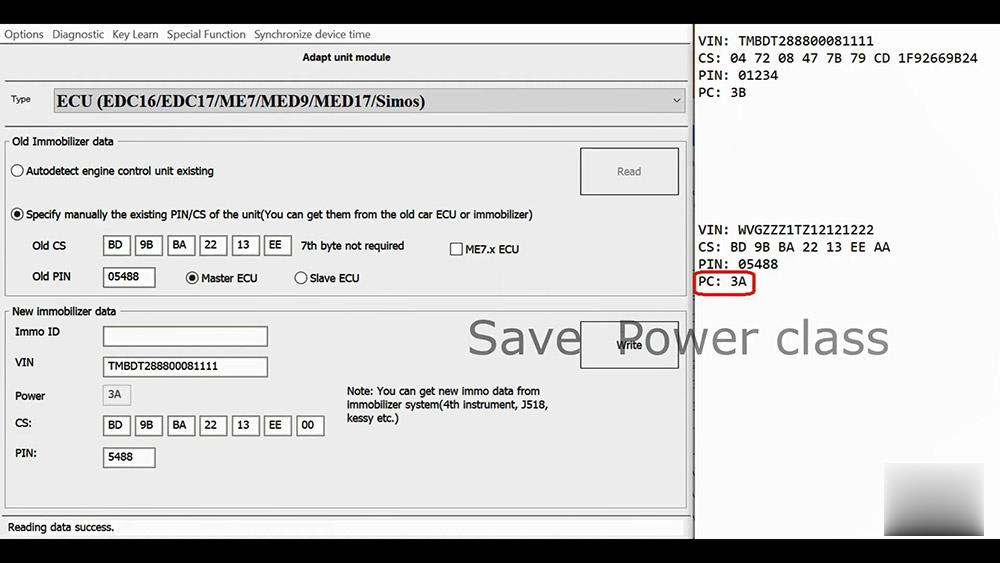
Go to adapt unit module
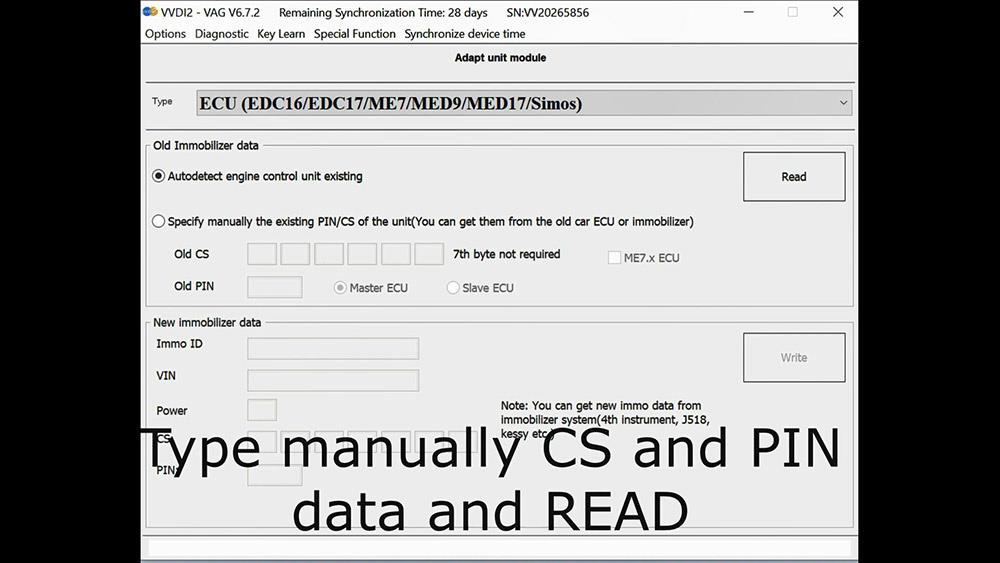
Select: ECU EDC16/17
Type manually CS and PIN data and Read.
and wait till data read.
Save power class
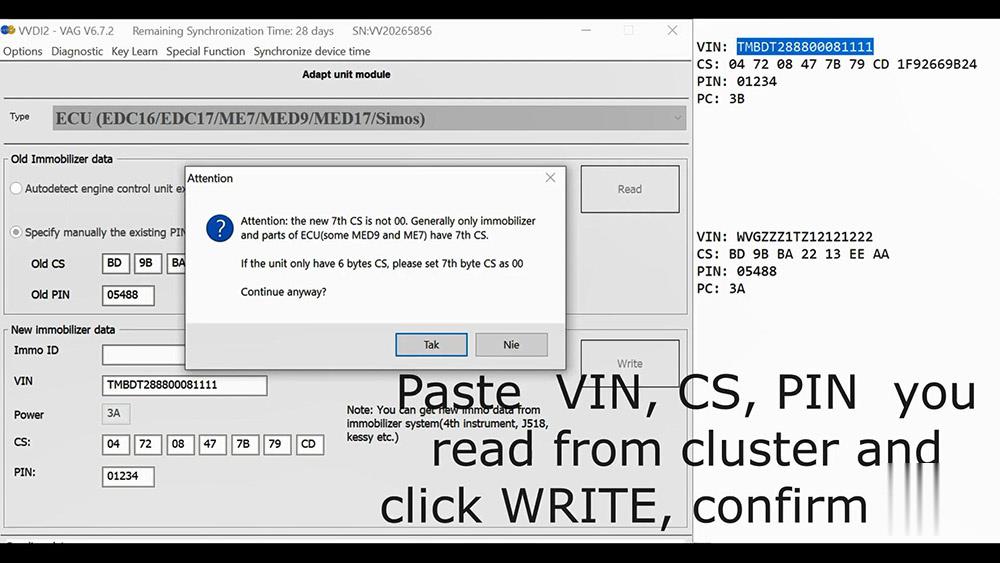
Paste VIN, CS, PIN, you read from cluster and click “Write”, confirm yes.
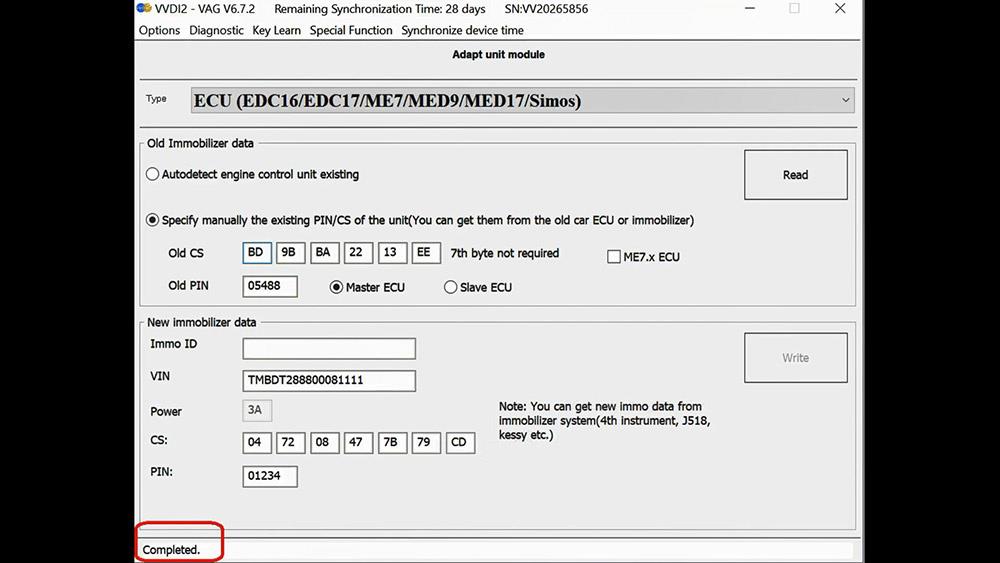
Completed.
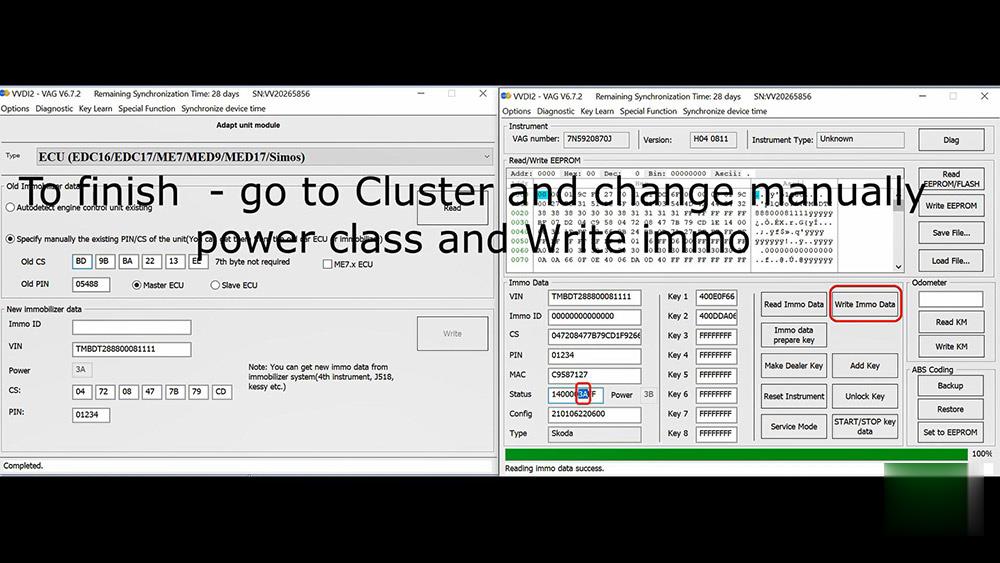
To finish – go to cluster and change manually power class and write immo.
Enjoy!
How to use Diagimaster 3 Mileage Adjustment Tool
How to Operate Digimaster 3 ?
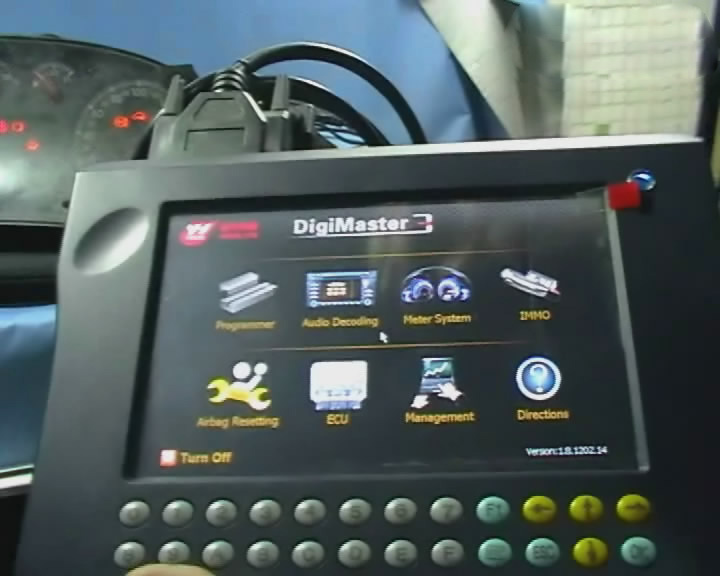
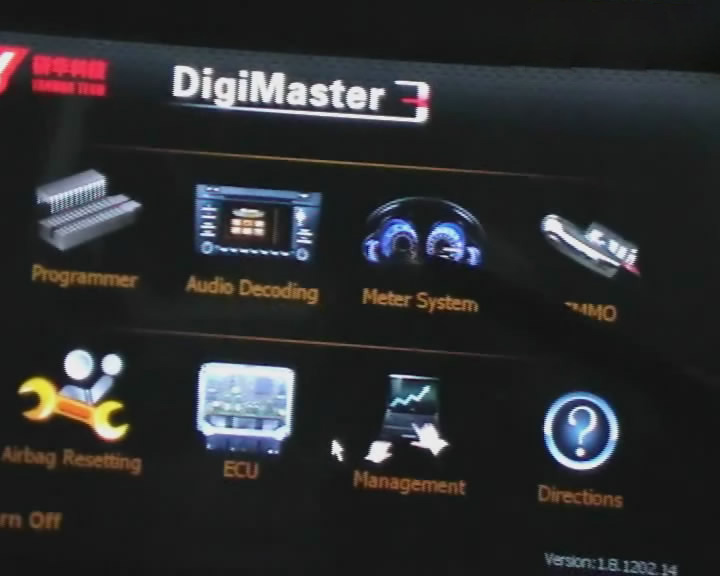
Step 1. Digimaster 3 Function Menu
Step 2. Digimaster 3 Function
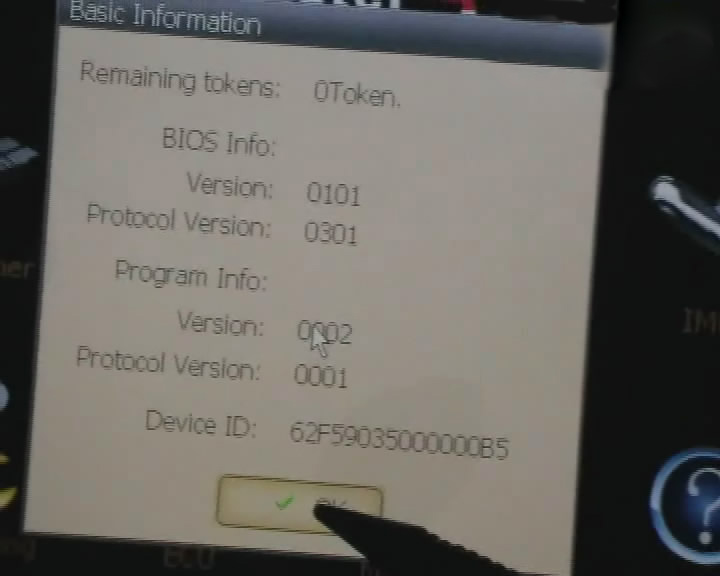
Step 3. Digimaster 3 Basic Info
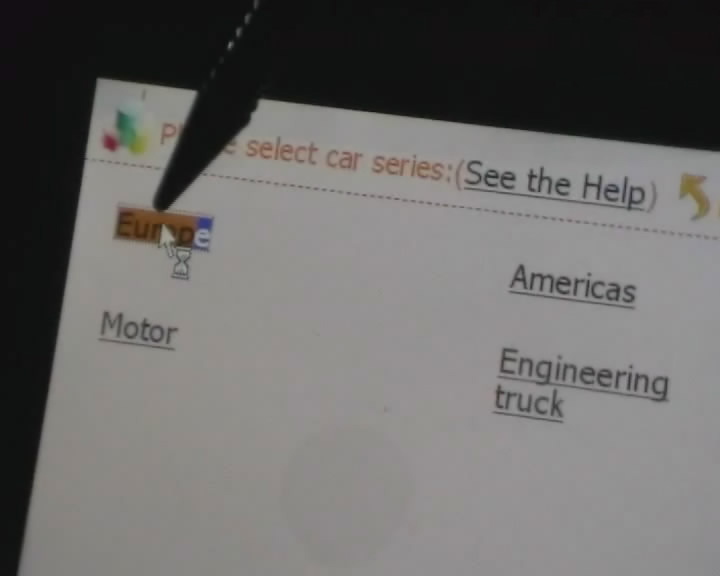
Step 4. Digimaster 3 Select Car Series
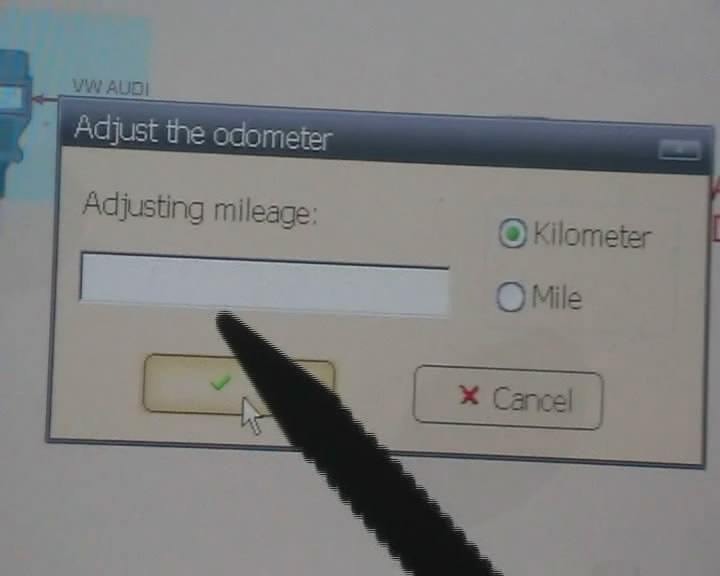
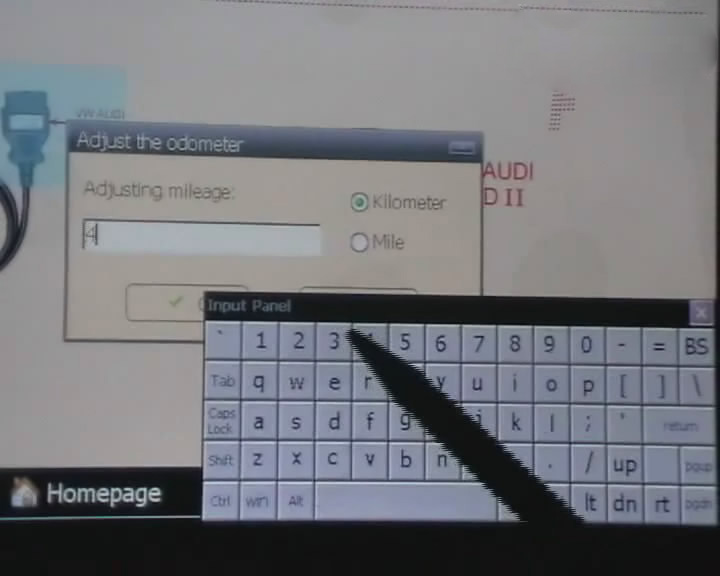
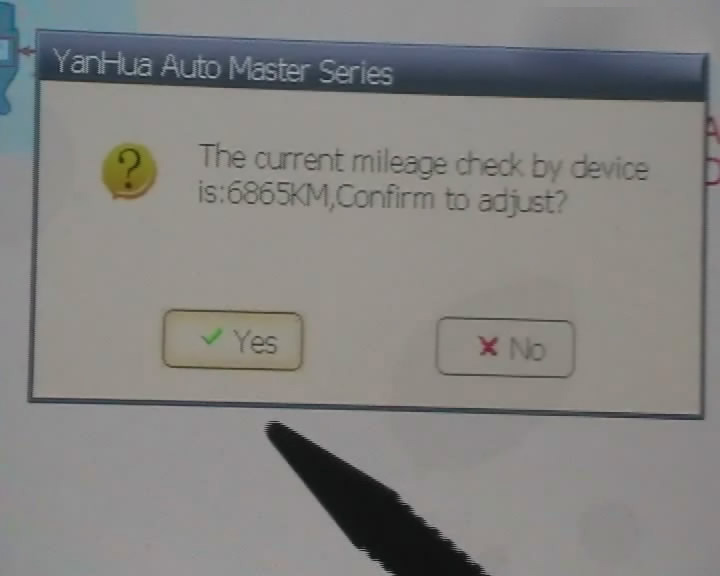
Step 5. Digimaster 3 Adjust Odometer
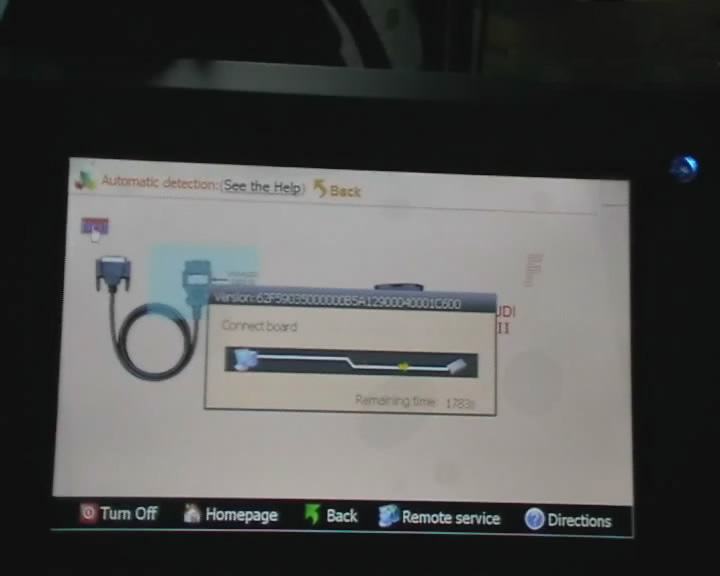
Step 6. Digimaster 3 OBD2 Odometer Correction Tool Adjust Odometer
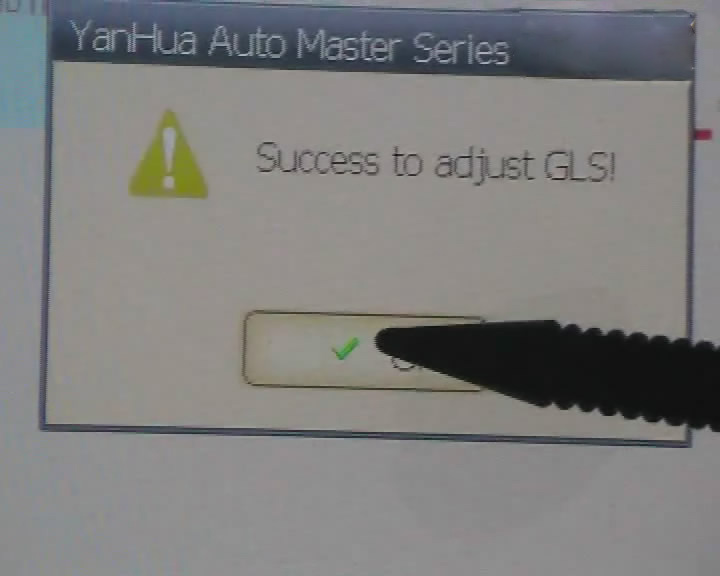
Step 7. Digimaster 3 Adjust GTS
Step 8. Digimaster 3 Success Adjust GTS
Step 9. Digimaster 3 Adjust Mileage
Digimaster 3 Update Kernel
After update EBOOT, it is necessary to update kernel.
Tips: Before update EBOOT, please install D3 TOOL first.
Step 1: Press button number 8 and button OK at the same time, and turn the power on. When you see “Press OK to confirm and continue update Firmware” press OK, then it enter the procedure of updating.
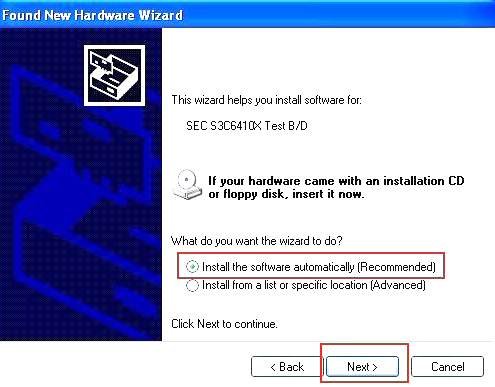
Step 2: Connect D3 with a computer through Mini USB (purple color), you can see a tip “Found New Hardware wizard”.As the image shown below.
Step 3: choose “install the software automatically”, click “click”
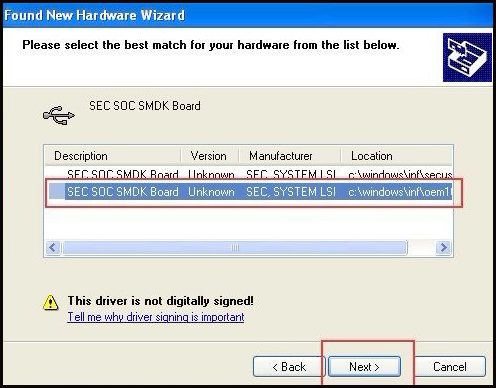
Step 4: If DIGIMASTER 3 have been installed already, choose the second “SEC SOC SMDK Board” in dialog box as shown below, and click “Next” to complete driver installation.
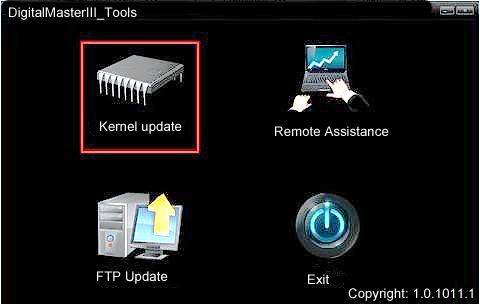
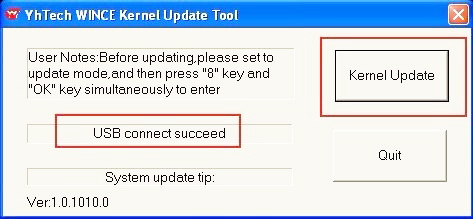
Step 5:Double-click Digimaster 3 PC Tools and choose “Kernel Update”.
Step 6: Make sure the purple Mini USB is connected, then you can see ” USB connect succeed”
Step 7: click “Kernel Update” and choose “EBOOT_20110427.bin” then click “OK” to start EBOOT program update.
Step 8: After 10sec. the DIGIMASTER 3 screen appears a twinkling red ‘YH’ logo which means EBOOT update is complete.
After update EBOOT successfully, please turn the power off and choose a appropriate way to update the kernel.
TIPS: Please uninstall the anti-virus software and firewall temporarily in order to run the software normally.
After Update EBOOT, Still Not Work?
Second way, please operate by following the next tips:
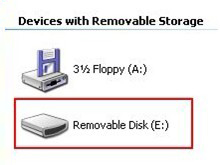
1.Remove SD card from D3 to cardreader,and connect to PC. After successful connection, click “Removable Disk(E:)” as showed in the picture.
2. Delete the old file “YHTech” which is inSD card.
3. Copy the “YHTech” files from CD, and save it in SD card.
4. Please insert SDcard into D3 after successfully copy and paste. Then
connect to network andturn on D3, click “OK” for downloading when appear
remark of “Pleaseconnect network download hypervisors!” in the
interface. It can befunctioned after successful download.”
Note:
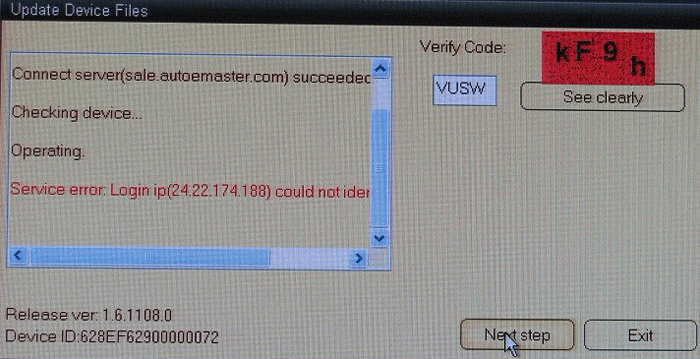
1) When you use digimaster3 ck1200, if the following error appears, this is IP restriction,
please tell us, we will help you remove restriction according to IP.
2) The following digimaster3 BMW adapter has not been concluded:
Now it is replaced by this one:
3) Digimaster 3 English version doesn’t have TMS370 Programmer adpater, only Chinese version has.
Digiprog3 compare with Digimaster 3
| Digiprog3 | Digimaster 3 | |
| Software Version | V4.94 | 1.8.1407.14 |
| Screen Size | Smaller | Bigger |
| Power- on password | 1 | No need password |
| Language Supported | Deutsch, English, Espanol, French,
Portuguese,Italiano, Turkish, Nederlands |
English |
| Way to change mileage | By OBD2 or dashboard | By OBD2 or dashboard |
| Update | Users are not allowed to update by
themselves (Need to update by update email of or send the interface back to update.) |
Original and update online by
users anywhere anytime, and one year free update. |
| Vehicle list | For universal car, but cover less vehicle
models than( digimaster 3. Cannot do well For Ford, For Benz, BMW, Opel , digimaster 3 can do. |
The Best odometer tool for universal car,
such as it can change mileage For ford, BMW, Toyota, Benz, VW, Audi,Volvo, Renault,Peugeot and high-end cars. |
| Vehicle year | Covers vehicles from 1996 to 2013(some
can do 2014 year) the vehicle year it covers differs one from the other based on specific vehicle |
Covers vehicles from 1996-2014,
the vehicle year it covers differs one from the other based on specific vehicle. |
| Tokens | No tokens limited | Item No.SP78 no token limitation,
Item No.SP78-B with 980 Tokens |
| Function | Mainly for setting and programming
digital speedometer. |
odometer correction, Audio
decoding, airbag resetting engine ECU resetting, IMMO, programming key for Benz &BMW etc |
| Difference | If you want one mileage correction device to do most normal
brand cars, you can choose Digiprog3 is enough.But for the new and high-end cars,
you need to use Digimaster 3. At the same time, if you want to choose one multi-function mileage correction, the Digimaster 3 is the best choice. Digimaster 3 contains the advanced technology of programming new keys for BMW and Benz, CAS-BDM reading/writing and resetting; 35080V6 erasure etc. |
|
How to setup ICOM Next A WLAN connection
ICOM Next Wireless diagnostic
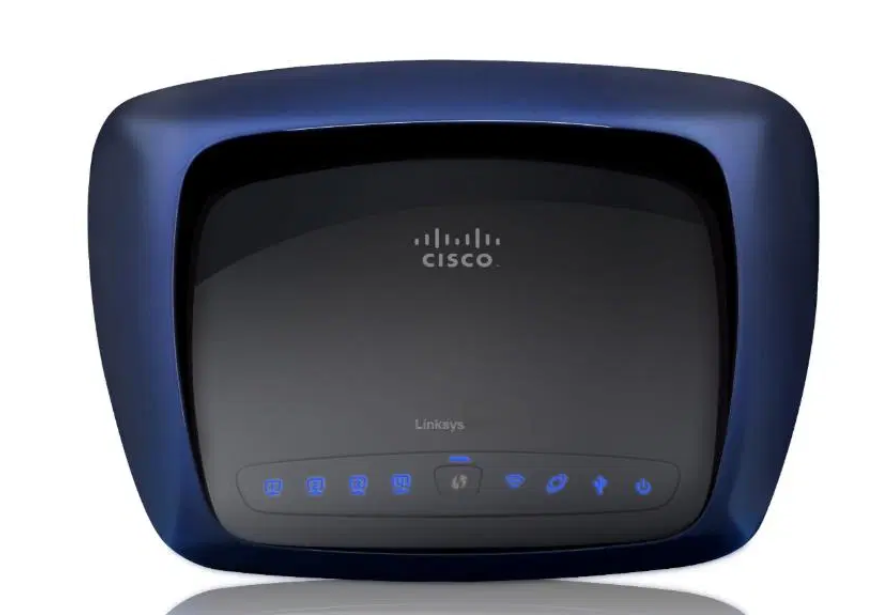
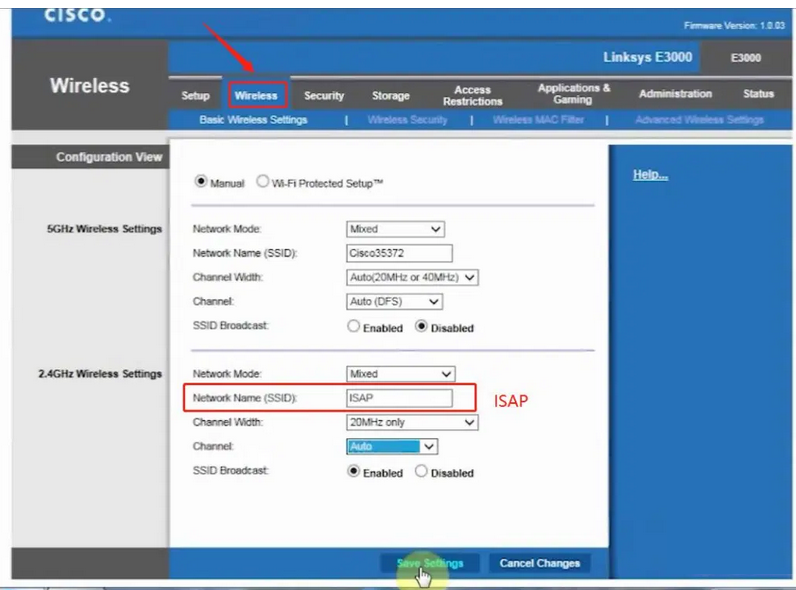
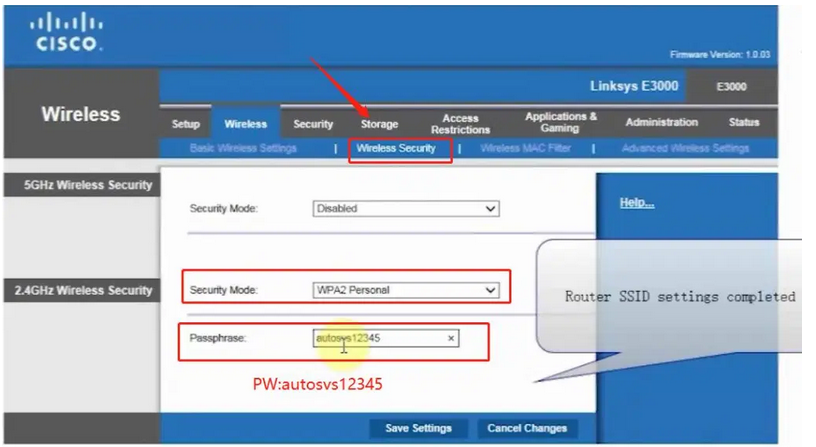
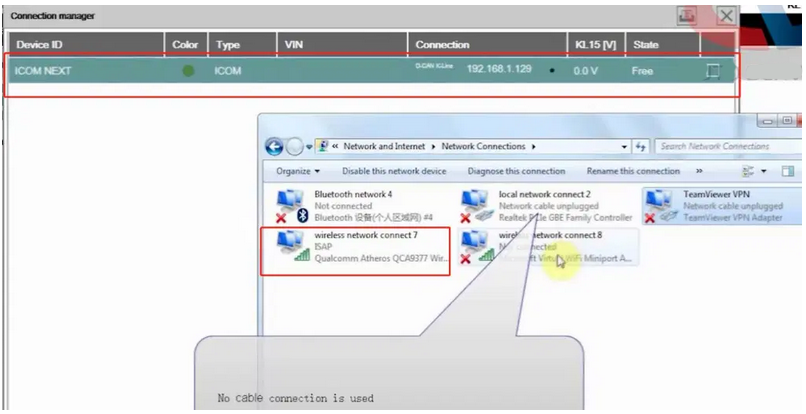
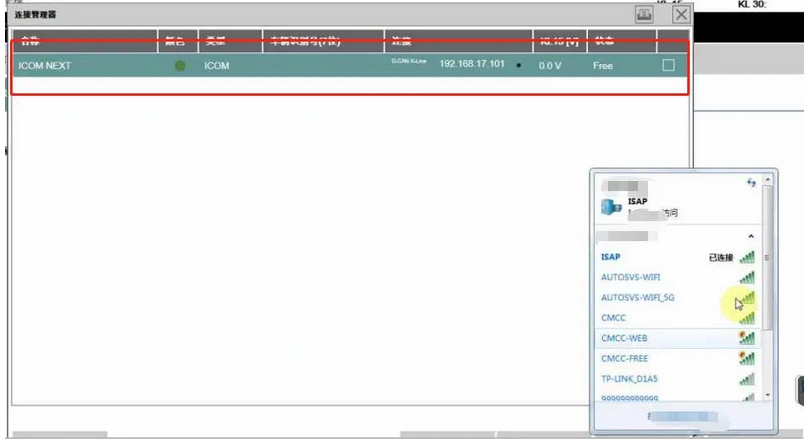
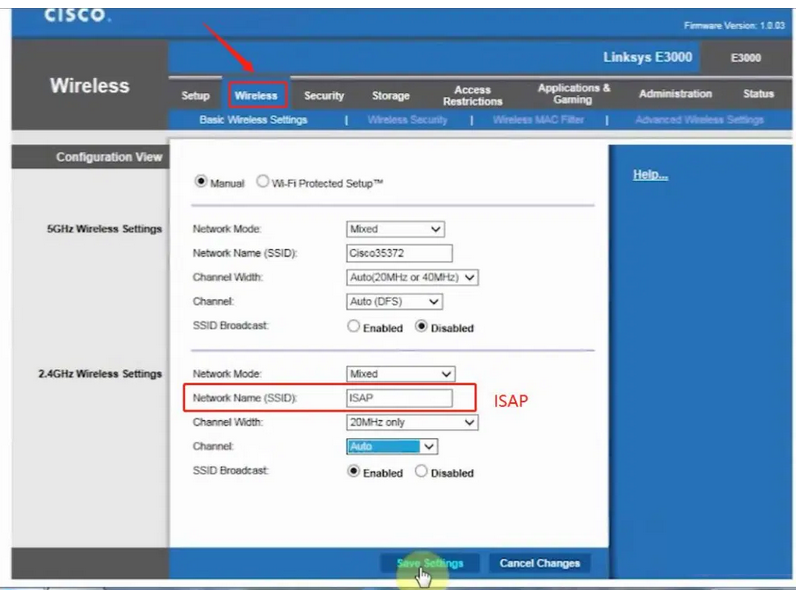
1.Set router wireless, wireless SSID name:ISAP,password:autosvs12345
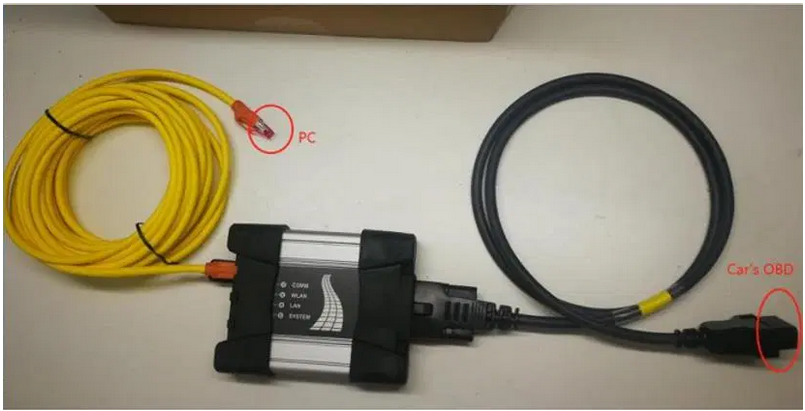
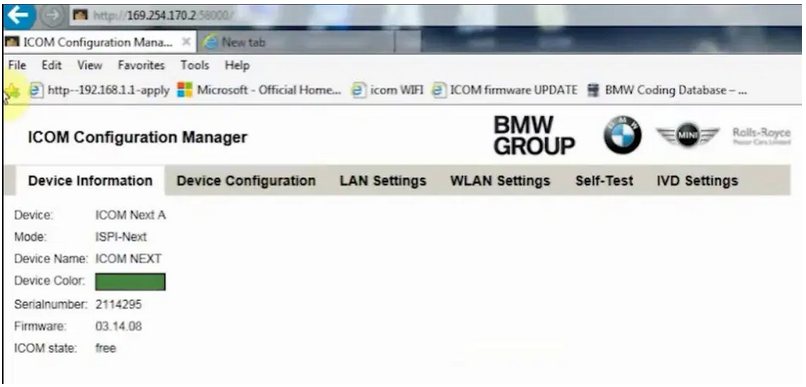
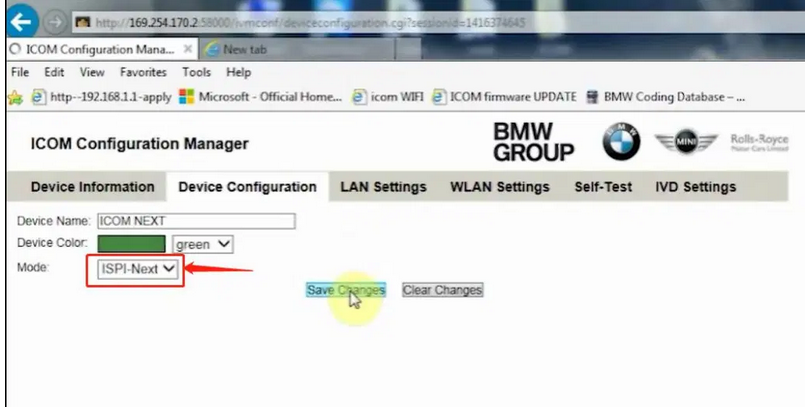
2.Set ICOM NEXT A wireless, connected to the router,
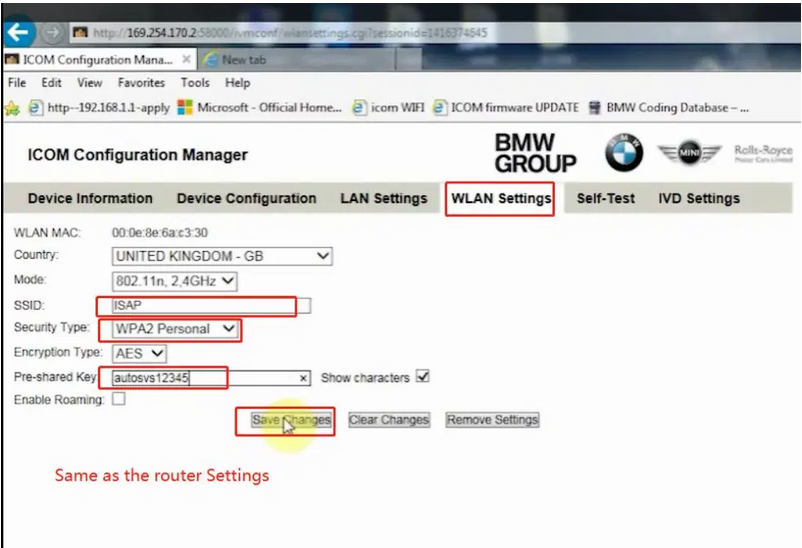
wireless SSID name:ISAP,password:autosvs12345,
(Same as router setting, After setting the ICOM NEXT need to reconnect to vehicle)
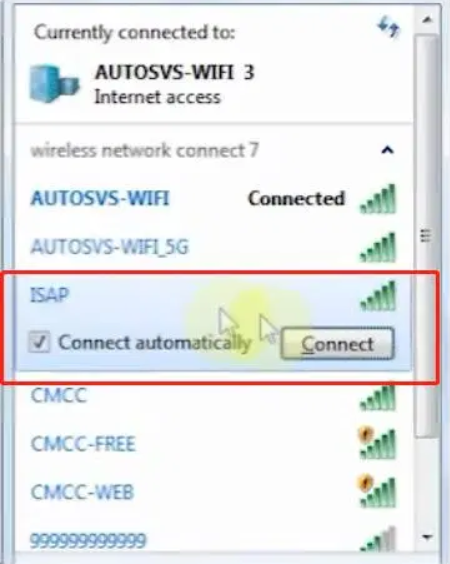
3.BMW diagnostic PC connect to wireless router ISAP, you can start wireless diagnosis.
01.Configuration router
2.Configuration ICOM NEXT A
3.Same as the router configuration;
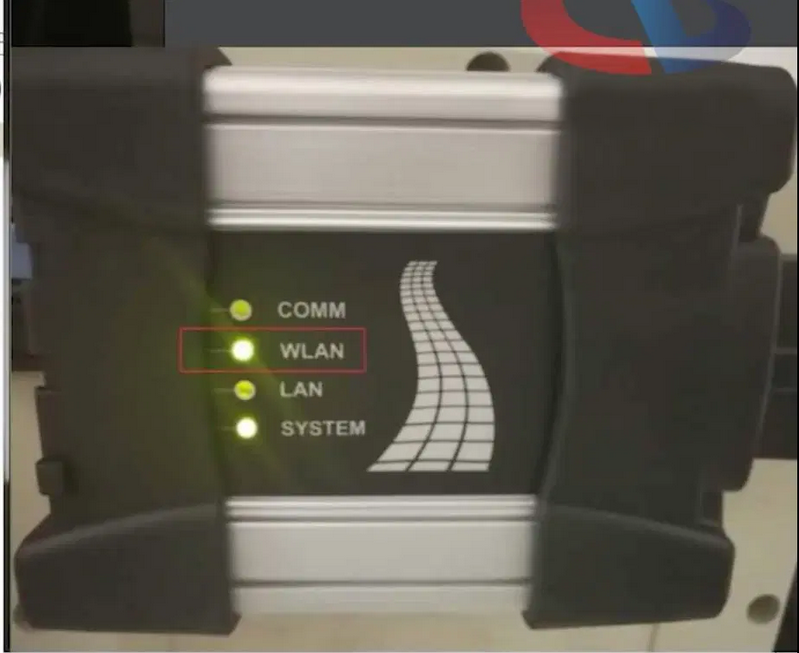
4.After ICOM NEXT configuration is completed, you need to reconnect,
ICOM NEXT will automatically open the WLAN connection function;
5.Connect ISAP WIFI;
6.After the ISAP WIFI connection is successful, you can use the ISTA diagnostic test
If you want to know more about BMW ICOM, please visit our website:https://www.obd2tool.com
