Car diagnostic tools information by obd2tool
Welcome to my blog,here some auto diagnostic tools will be displayed. If you want to know more information,you can visit our official website: www.obd2tool.com.Car diagnostic tools information by obd2tool
Welcome to my blog,here some auto diagnostic tools will be displayed. If you want to know more information,you can visit our official website: www.obd2tool.com.Program 2011 BMW CAS3+ Key by OBDSTAR X300 DP PLUS
It’s tested ok to add new key to 2011 BMW CAS3+ using OBDSTAR X300 DP Plus key programmer.
Car: BMW CAS3+ 2011
Device: OBDSTAR X300 DP Plus 8 Inch tablet key programmer full version
Step-by-step guide to add new keys:
Connect X300 PAD2 to vehicle OBD port
Then operate OBDSTAR X300 DP Plus tablet
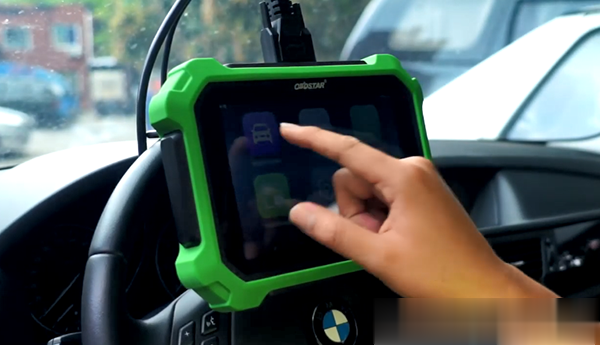

Select Diag Program-> IMMOBILISER-> BMW-> BMW/Mini V30.36

Initializing diagnostic data…
Choose CAS1/CAS2/CAS3-> AUTO
Note: This function is available by connecting the server, please ensure the internet connection is normal.
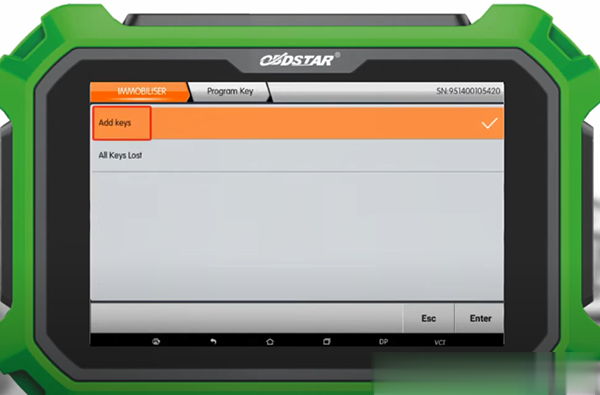
Select Program Key-> Add Keys

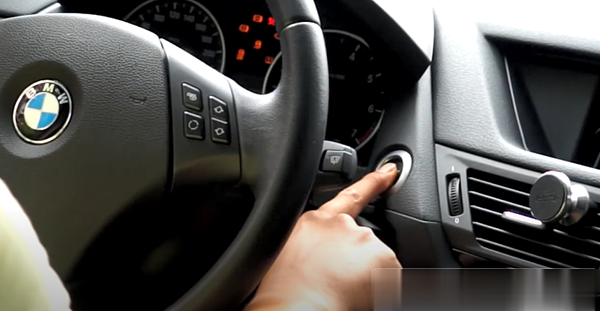
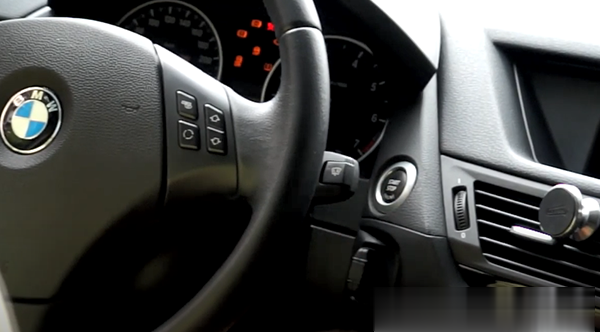
Turn on the ignition
If all keys are lost, insert a blank key and press the Start button
It will take about 2 minutes to read RAM…
Remove the key from the ignition
If it’s a smart key, please take it out of the car.
Reading key information…
Select one key position not used to program

Connect P001 with X300 DP PAD2
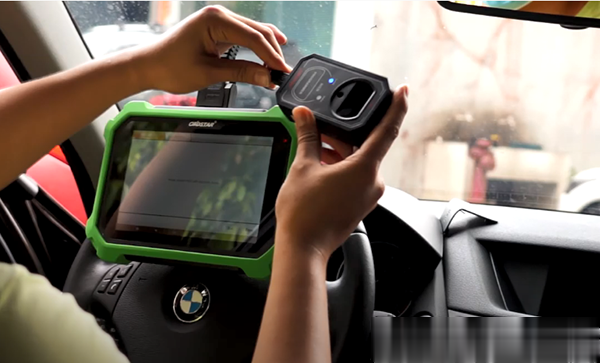
Place an original key into the P001 adapter

Then take out the original key and insert the new key into P001 adapter

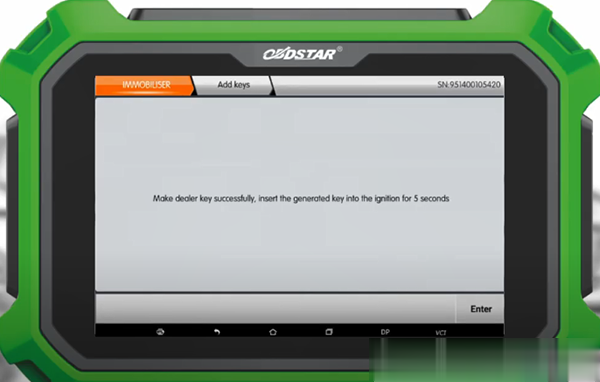
Make the dealer key successfully
Insert the generated key into the ignition for 5 seconds
Finally, test the new key
Attach the full BMW IMMO function list supported by X300 DP Plus for reference.
BMW V30.34(H):
| Brand | Area | Model | Key Type | Show key count | Pin Code Read | Add Keys | All key Lost | Progr
am Remote |
Other Function | Marks |
| BMW/
MINI |
ALL | CAS1
/CAS2 |
REMOTE
/PR OXI MITY |
 |
|
|
|
Vehicle Information
Backup And Restore Key Data Program And Erase Key Enable And Disable Key Synchronize ELV Synchronize DME Erase DTC Transport Mode |
gene
rated key only via P001 |
|
| BMW/MINI | ALL | CAS3 | REMOTE
/PROXI MITY |
|
|
|
|
|
Vehicle Information
Backup And Restore Key Data Program And Erase Key Enable And Disable Key Update CAS3(ISTAP) Synchronize ELV Synchronize DME Erase DTC Transport Mode |
Supp
ort CAS3 /CAS3+ genre ated key only via P001 |
| BMW
/MINI |
ALL | CAS(K LINE) | REMOTE
/PROXI MITY |
|
|
Version Information Reading
Key Information Reading Key Enable Key Disable |
||||
| BMW
/MINI |
ALL | DME
/DDE ISN |
REMOTE
/PROXI MITY |
|
ECU Information
Read ISN Delete Transport Mode Support List |
|||||
| BMW
/MINI |
ALL | CAS4 | REMOTE
/PROXI MITY |
|
|
Key Information Reading
Key Programming Key Enable Key Disable |
There is only one year free update online for OBDSTAR X300 DP Plus.
After the first year, the original update cost is 499USD/year, but now
if you order from www.obd2tool.com, you just need to pay 381 euros for 13 month update subscription.
No need shipping! After your payment, please send the serial number of your x300 dp plus device to your dealer.
The promotion is from May 13th to June 30th. Don’t miss it!
Launch X431 V Program Key Fobs for 2017 Chevy Silverado 5.3L
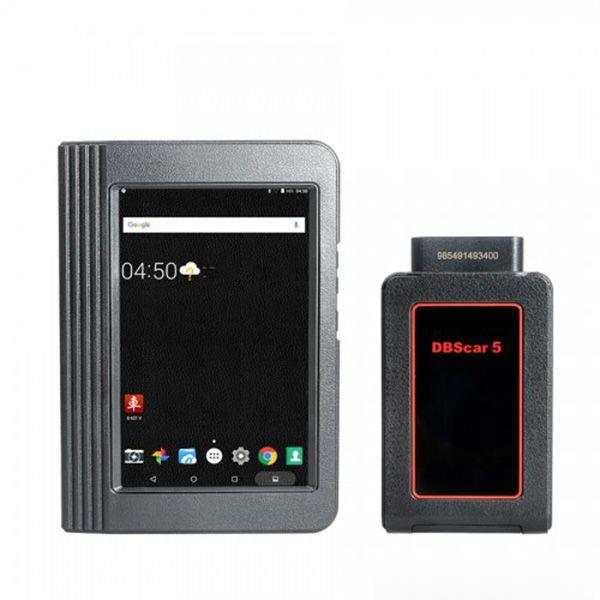
Launch X431 V 8 inch tablet diagnostic tool supports full system diagnosis and 20 special functions. This article mainly introduces the guide to program key fob on a 2017 Chevy Silverado 5.3L by X431 Pro.
Car info:
Vehicle source: United States
Vehicle make: Chevrolet
Vehicle model: Silverado
Vehicle year: 2017
Vehicle type: Light Duty Truck
Device: Launch X431 V 8 inch tablet global version
Procedures:
Connect X431 pro to the vehicle
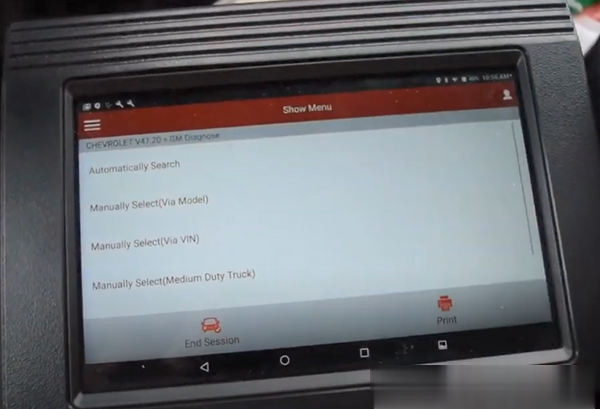
Select American-> CHEVROLET
Reading data…
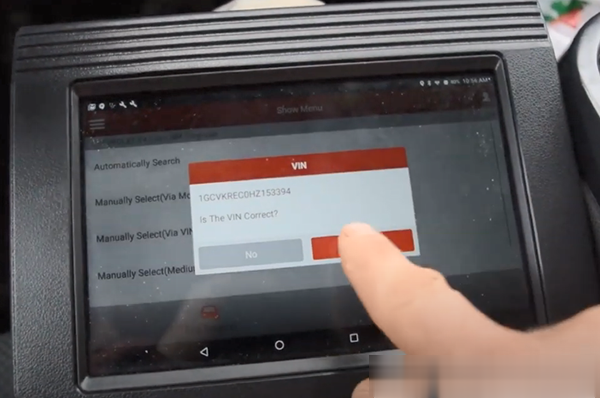
Tap Automatically Search
Confirm the VIN and vehicle info

Go to System Selection
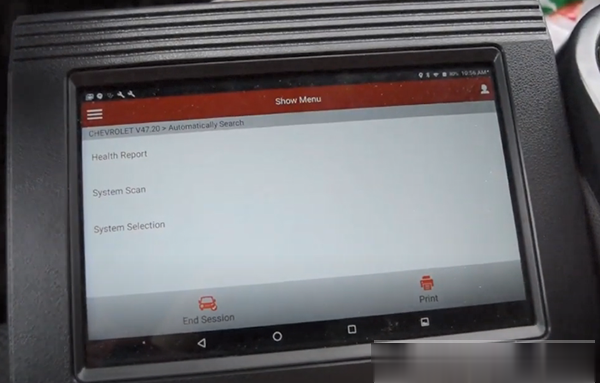
It will show a list of all the modules in the vehicle.
Look for the module you desire by scrolling down or up the list.
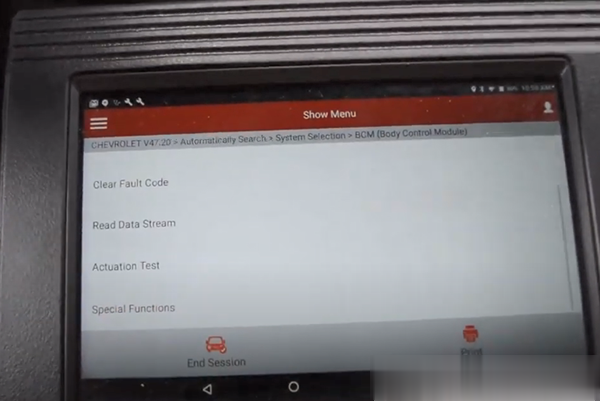
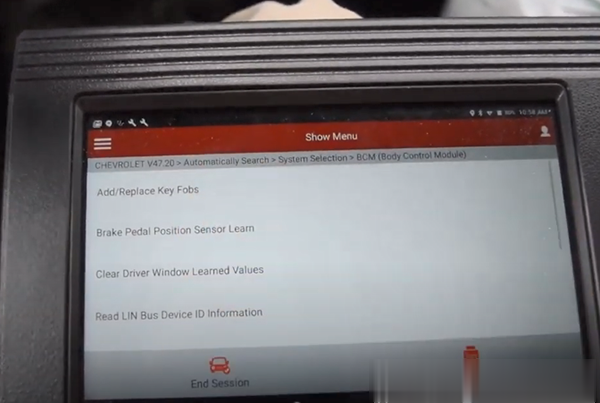
Here select BCM body control module-> Special Functions-> Add/Replace Key Fobs-> Erase/Program All Key Fobs
Pay attention to the instruction of Erase/Program All Key Fobs:
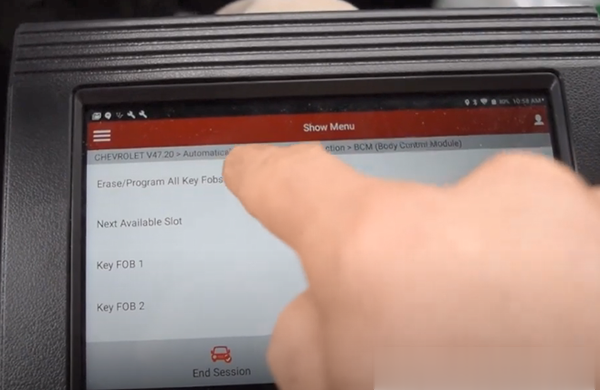
-This procedure is only for vehicles without PRO ATH. Vehicles with ATH need to use SPS for programming.
-This procedure will erase all key fob(s) from the modules’ memory.
Before starting this procedure, ensure all key fobs to be programmed are
present.
-Place in learn mode by selecting [Learn]
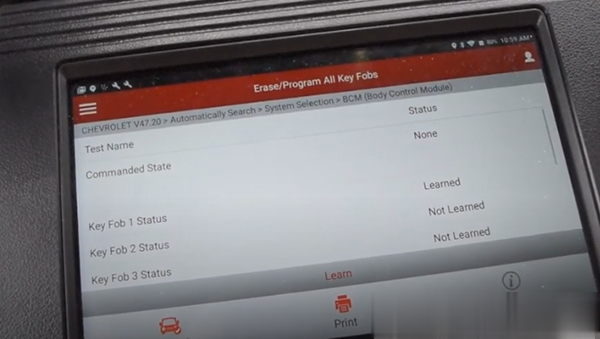
-Select the key fob to be added. Simultaneously press and hold the LOCK and UNLOCK buttons.
When the fob is successfully added, the parameter will display learned.
-Repeat step 2 until each desired fob is learned.
-Exit procedure when complete
Notice: Each fob may take 5-8 seconds to program.
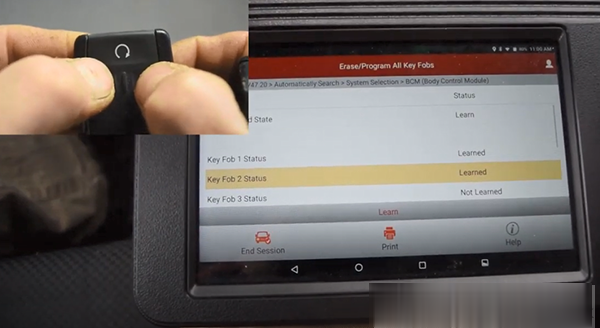
Now only there is one key learned, so select any “Not learned” key fob and click Learn button
Press and hold the lock and unlock button on the new key fob
Learn key fob2 successfully
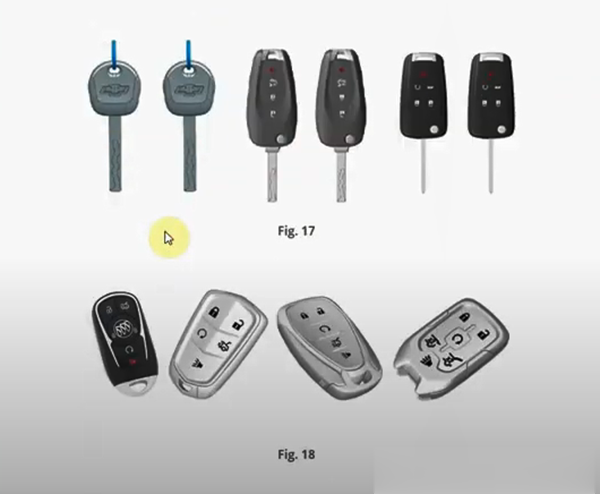
Something to know about procedures for programming 2017MY Keys and Key Fobs:
New for 2017 year vehicles, two keys that are already programmed or two previously learned Remote Keyless Entry (RKE) transmitters (key fobs) need to be present in order to use the quickly learn procedure for adding keys (Fig.17) or key fobs (Fig.18) to all GM models (Fig.19), excluding 2017 Acadia Limited, Enclave, Traverse, Express and Savana.
In 2016 and earlier models, only one learned key fob is needed to perform the quick learn procedure.
Programming additional keys:
Tips: If only one learned key is present, SPS must be used to add
additional keys. The quick learn procedure will not complete with only
one leaned key. Using only one learned key for the quick learn procedure
will cause the theft of security light to illuminate when attempting to
start the vehicle.
To program a new key for keyed vehicles:
1. Insert the original, already programmed key in the ignition and turn the key to ON/RUN.
2. Turn the key to LOCK/OFF, and remove the key
3. Within five seconds, insert the second already programmed key in the ignition and turn it to ON/RUN
4. Turn to the key to LOCK/OFF, and remove the key
5. Within five seconds, insert the new key to be programmed and turn it
to ON/RUN. The theft security light will turn off once the key has been
programmed.
6. Repeat these steps to program additional keys.
The adding keys procedure does not erase any keys prior to programming. The procedure will simply program the key into the next available slot. Use this procedure when adding an additional key to the vehicle.
If all keys are lost, the 30 minutes learn procedure should be used. Once a key is learned with 30 minutes learn procedure, all previously known keys will no longer work with the vehicle.
Check the full X431 PRO car models list, here can go: https://qcar.x431.com/newqcar/
Original Scorpio-LK Tango Excellent Transponder Key Programmer
Do you know transponder keys are more secure than traditional ignition keys? Why does car transponder key replacement cost so much? How can I get a copy of a transponder key at much lower price than car dealerships charge? Read this on and you’ll find more.
Transponder devices use microchips, which are programmed by the manufacturer with a unique serial number. When the key is inserted, the signal is sent to the receiver located near the ignition. If the digital S/N in the transponder matches the one programmed in the car, it will start when you turns the key. If the car doesn’t detect the key’s microchip or the correct serial number, then it won’t start. So a transponder key’s digital ID is virtually unique, which is why makes it more secure than traditional ignition key, which only has a few standard cut combination.

But microchips are quite expensive, and getting a key with a microchip copied costs much more than traditional re-keying. What’s more, car dealerships usually charge more than you expect for a new transponder key.
You can ask locksmiths for help. They have the same equipment as car dealerships to program new transponder keys. Or you can just settle this by yourself, with this small and amazing Original Scorpio-LK Tango Transponder Key Programmer, specially designed for transponder key programming.

Tango Programmer, created by Scorpio-LK, founded over twenty years and focusing on transponder keys creation and functions that are useful for locksmiths worldwide, and has become one of the most widely used and recognizable RFID transponder key programmer which is developed to cover, read, write and generate the latest transponders used in the latest vehicle immobilizer technologies.
Original Tango Key Programmer Highlights:
1. 100% Original Scorpio-LK Tango
2. Supports Daihatsu G Chip Function ( Need to pay)
3. Latest Version: V1.116
4. Free update online: Connect your TANGO to a computer with internet,
start the software to [help]>>[check update], then you can update
Tango to the latest software.
5. Operating system: Win98, WinXP, Vista, Win8, Win8/8.1, Win10
6. With Free TANGO OBD Cable
Tango Software V1.116 Feature:
Again First in the World!
TangoPlus for Subaru V1.0
True Emulation via OBD of all SmartKeys
The only right conception to solve the “All Keys Lost” problem
Key maker Toyota H-Immo (All Keys Lost), based on Barracuda Image
Dump: added cars Toyota Aygo, Citrone C1, Peugeot 108
Key maker Mercedes Benz Actros 2015 – (95128, M13)
Added Auto Update framework for supplementary files
Some bugs fixed
You can check the features of other software versions via:
https://www.chinacardiags.com/wholesale/tango-key-programmer-with-basic-software-tango-transponder-programmer-fast-shipping-197.html
Tango Key Programmer Supported Transponders List:
Philips transponders:
PCF7930-31 writing, reading
PCF7935 writing, reading, shadow memory, crypto calculator
PCF7936 writing, reading, modes password, crypto, Manchester & Biphase encodings
PCF7941 transponder, remote, eeprom, Manchester & Biphase encodings
PCF7942 transponder, remote, eeprom, Manchester & Biphase encodings
PCF7943 transponder, remote, Manchester & Biphase encodings
PCF7944 transponder, remote, eeprom, Manchester & Biphase encodings
PCF7945 transponder, remote, eeprom, Manchester & Biphase encodings
PCF7946 transponder, remote, Manchester & Biphase encodings
PCF7947 transponder, remote, eeprom, Manchester & Biphase encodings
PCF7952 transponder, remote, eeprom, Manchester & Biphase encodings
PCF7961 transponder, remote, Manchester & Biphase encodings
*Auto switching between PCF7936-PCF7961 windows if invalid type detected.
*Autodetect manchester / biphase
Temic transponders:
Temic 11 reading , writing to T5
Temic 12 reading , writing to T5
Megamos transponders:
Megamos (13) reading , writing to T5 , emulating on PCF7930-35
Megamos (48) reading, writing, PIN, unlock by PIN, full range of memory contents, crypto calculation
Megamos CRYPTO-2 (8E) read ID, read/write EEPROM, write Cryptokey
Texas transponders:
Tiris (4C) reading
Tiris (4D) DST crypto reading, writing, crypto calculator
Tiris (4E) DST crypto reading, writing, crypto calculator
Tiris (8C) reading
Atmel transponders:
TK5551M (T5 replacement)
SAAB reading , writing to T5
Kindly reminder: Tango programmer is in working out stages, therefore the list of the supported transponders will be developed in the future. Let’s wait and see what happens!
97 Chevrolet 3.1 Lumina loss of power solved with GM Tech2
Car model and year: 1997 Chevrolet 3.1 Lumina with 90K.
Issue:
A bit of a very slow coolant loss, and the pump was found leaking. Replacing that, about a month ago, it started having a loss of power between 20-40 mph. I took the car and found misfire codes on cylinders 2, 4, 5, and 6. I cleaned the MAS, replaced the spark plugs and wires, checked all the coil-packs with a spark tester (they checked out with strong spark), and checked the fuel pressure at the fuel tube that feeds the injectors.
With that done and the problem persisting (especially when the car warmed up to operating temp), I had Cottman transmission (very reputable guys at this local shop) and they checked it out and found the same engine codes, but stated the transmission was working fine.
What I did:
I took it for a test drive and here’s what she did:
1) Starting it, it had a slightly rough idle but moved easily at low speeds.
2) Upon pulling out of the neighborhood and onto a State road that
headed uphill, I pressed the accelerator about 1/2 way as typical.
Initially it accelerated as expected, but after about 30 yards it
started to run at a lower speed and engine rev as if I reduced the pedal
to about 1/4.
3) When the car reached the crest of the hill, even though I didn’t
alter the pedal position, it began accelerating to a more expected 1/2
pedal acceleration.
4) The above was typical on all uphill slopes… oh, and when I got out with it running, I could smell un-burnt gas.
5) Noting the engine service light was on, I had the code pulled and
received the following: PO301 “cylinder misfire detected – cylinder
number 1”
6) I pulled the #1 wire (wires and plugs are new) and did a spark test,
it was sparking strong and quickly at a separation of 36-38.
I’m going to pull the plug and check it for damage, but that is an extremely remote issue. I don’t even understand why 1 cylinder misfire would cause the acceleration issue that she has, it just doesn’t add up. Previously, before the heads were pulled, the misfire codes were intermittent misfire in cylinders 2, 4, 5, and 6.
When I last had the code pulled, it was PO300.
Chevrolet OBD2 code reader to use:
Foxwell NT301 code scanner
March 10th, 2020 update:
Here’s an example of one of the “printable” moments that the Foxwell recorded, there are well over 50 pages:
Calculated Load Value(%)14.9
Engine Coolant Temperature(?C)93
Short Term Fuel Trim -Bank 1(%)-6.3
Long Term Fuel Trim – Bank 1(%)-2.3
Intake Manifold Absolute Pressure(kPa)71.0
Engine RPM(rpm) 1893
Vehicle Speed Sensor(km/h)20
Ignition Timing Advanece for #1 Cylinder(?)-1.5 Intake Air Temperature(?C)51
Air Flow Rate from Mass Air Flow Sensor(g/s)36.42 Absolute Throttle Position(%)43.9
Location of Oxygen SensorsB1S12–B2S—-
Oxygen Sensor Output Voltage Bank 1-Sensor 1(V)0.045 Short Term Fuel Trim Bank 1-Sensor 1(%)-3.9
Oxygen Sensor Output Voltage Bank 1-Sensor 2(V)0.105 Short Term Fuel Trim Bank 1-Sensor 2(%)N/A
OBD requirements to which vehicle is designedOBDII
March 11th, 2020 update:
Just test drove her again and got the error code:
PO102
Mass of Volume Air Flow A
Circuit Low
I replaced the MAF a few days ago. So I remeoved the new plastic one
and replaced it with the original aluminum one (that’s clean as a
whistle) and there was no change in the error code. Plus, I then tested
it with my multi-meter, here are the results:
1) With the harness disconnected and the engine/ignition off:
All three wires (red, black and yellow) ohm-ed out as ground.
2) With the key in the ignition and it turned to run position without the engine on:
The power wire (red) had almost 13 volts, the ground (black) wire was grounded, and the signal wire had about 6 volts.
3) With the engine running and the harness attached:
I tested the Hertz with my TEST BENCH set to 20 Hertz and the signal
wire (yellow) had a fairly consistent 2.14 hertz at idle (engine warm)
and when the engine revved it smoothly went to just above 14 hertz and
then evenly went back down to 2.14 when the idle was slowly released.
March 11th, 2020 update:
To add to my complex testing, I ran the car with my Foxwell attached and the Foxwell has a (g/s) reading for the MAF during the events in real time. It seems it was registering 4-5 during idle and was at the 40-50 range when it was bogging down, but when it cleared and accelerated as expected, it was well into the high 60s and into the 70s. Is this something that assists? Both the original GM MAF and the new replacement AC Delco MAF are performing the exact same way.
March 16th, 2020 update:
I found the yellow sensor wire that goes from the MAF sensor to the PCM wasn’t clean when I used my Ohm meter, it showed about 1.71. I ran a new wire along the same route and spliced it into the existing connectors. The new test drive was markedly better in acceleration and speed. However, after clearing the code, it still showed “”PO102, Mass of Volume Air Flow A, Circuit Low.”
I grabbed an older laptop in great condition with XP on it, so I could run the GM program to flash the PCM, I’m loading XP Professional on it with Service Pack 3 so it should run it properly, and I’ll “flash” the junkyard PCM first to my daughter’s VIN and see if that fixes the issue.
March 19th, 2020 update:
Finished (though I had to go to a shop with a GM Tech 2 and basically rent it with the mechanic).
Everything is factory spec, and it idles and revs without issue. No trouble codes. Everything is within spec. when we looked over all the info in his GM Scanner Tech 2 readings.
When driving (though markedly better and gets up to highway speed great), still it seems the engine, as it is accelerating: feels that it either adjusts the fuel/spark a bit, or the transmission shifts prematurely into a higher gear or something (that’s the only way I can describe it). It’s weird to feel the car do something without driver input. Whatever it is is keeps the car from continuing its acceleration for a few seconds. If I give it throttle during the event, it downshifts and accelerates great through the issue. If I don’t alter the accelerator, and keep it steady during the event, it waits a few seconds and then shifts to overdrive and feels normal.
Since I changed the fluid and filter when I first was alerted of the issue by my daughter during my maintenance work, and the old fluid was discolored (aged) and there was no metal dust or filings on the magnet, I’m wondering if I just need to allow her to drive it and change the fluid again in a few days and see if it flushes more of the old fluid that was trapped inside the torque converter?
March 27th, 2020 update:
PROBLEM SOLVED
So my friend has some awesome equipment to test Hz and other sensor
feedback and we looked at the Knock Sensor and the O2 Sensors (much more
sensitive than mine as well as had the exact ranges of signal that
should be expected). The Knock Sensor and the O2 Sensors both looked
slightly out of spec, enough to do a test drive with first the Knock
Sensor disconnected and then a drive with both the Knock Sensor as well
as the upstream O2 Sensor disconnected.
With the Knock Sensor disconnected the drag or delay in acceleration under load was gone, though it wasn’t completely smooth. With both disconnected, it drove really well and there was no drag or delay or alteration of power during driving. I replaced both the Knock Sensor as well as the upstream O2 Sensor and tested the car again. It drives as it should.
So, in the end, the car had these issues:
1) the #1 cylinder had a head gasket leak, fixed with head gaskets replaced
2) the MAF sensor was sending inaccurate info and had a damaged wire, replaced
3) the vacuum Transmission Modulator was broken, replaced
4) the upstream O2 Sensor was not within spec, replaced
5) the Knock Sensor was sending wildly inaccurate info, replaced
Interestingly, only item #2 above was determined by the PCM to be in error and would throw a Service Engine Soon light or throw a code, the PCM was silent on the other errors. I guess a ’97 GM PCM was not very sophisticated.
Toyota 8A H chip all keys lost program with Xhorse VVDI2
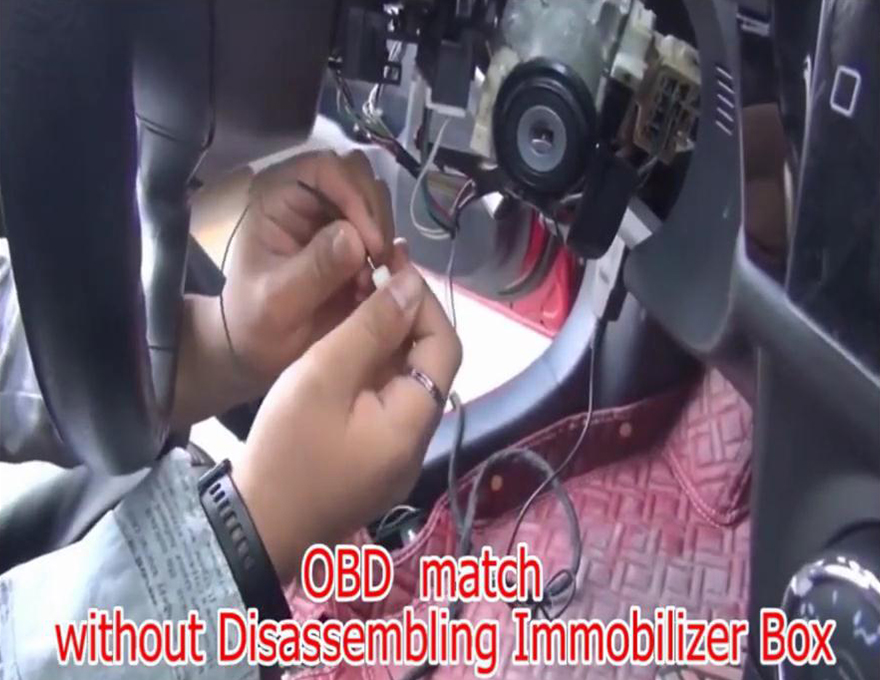
When Toyota 8A H chip all keys lost and need to program new keys without disassembling Immobilizer Box, Xhorse VVDI2 + Xhorse toyota 8A adapter, this job will be easily done.

Procedure:
Immobilizer Box off-line match
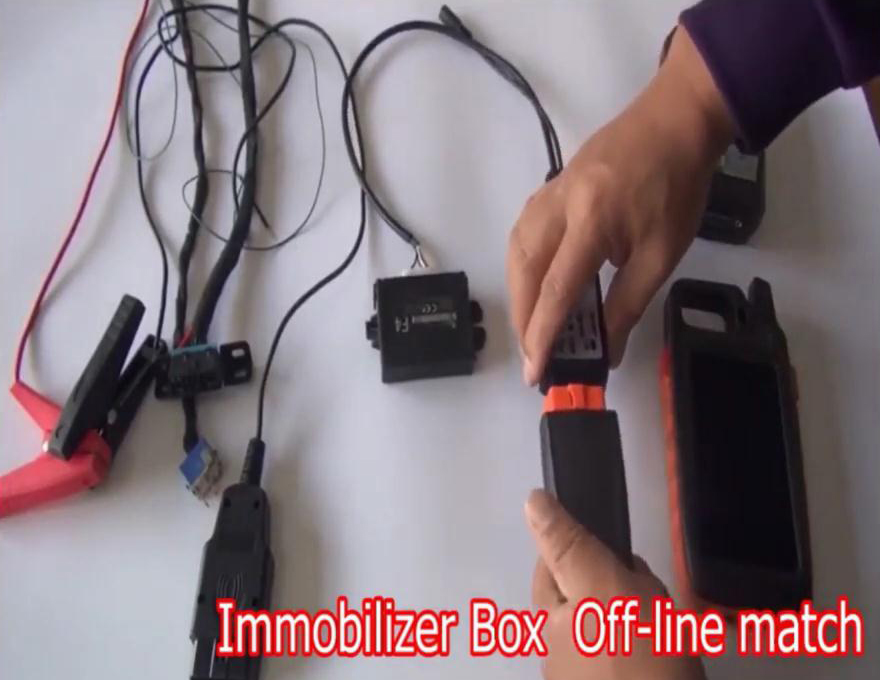
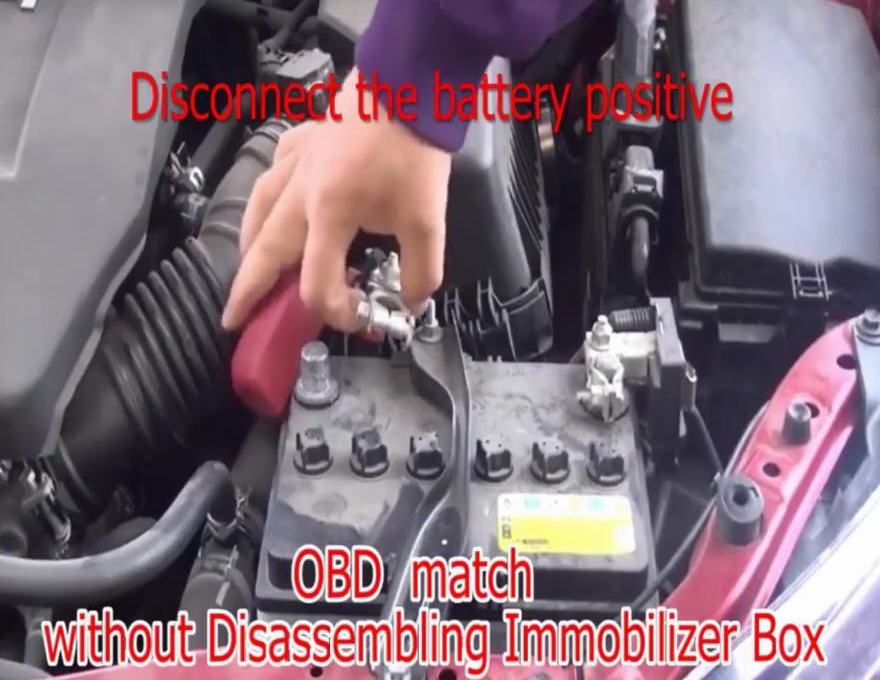
OBD match: without disassembling immobilizer box.
1). Disconnect the battery positive.
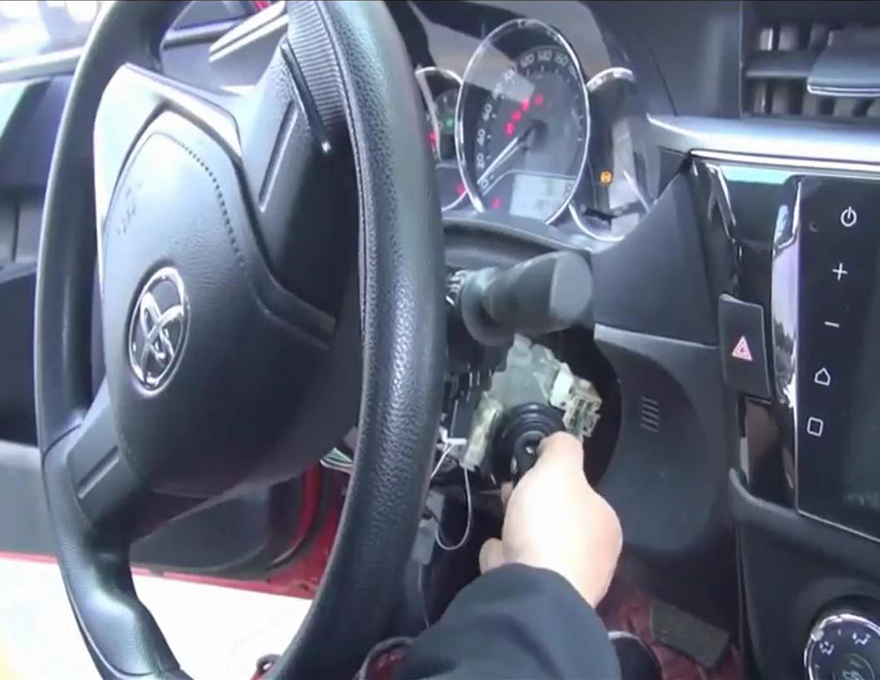
2) Locate the #2 ignition switch relay position and unplug the relay at the same time.
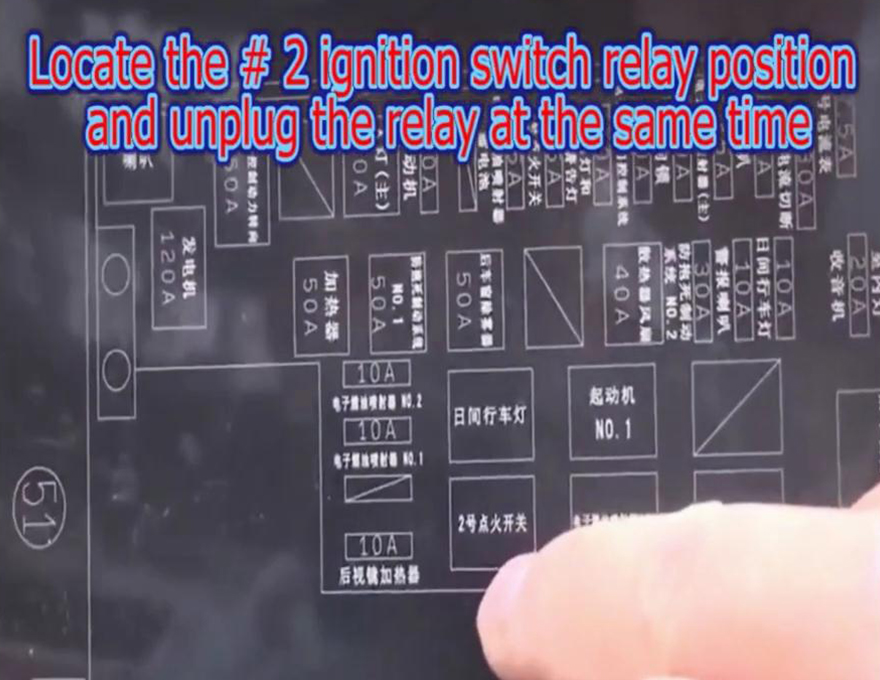


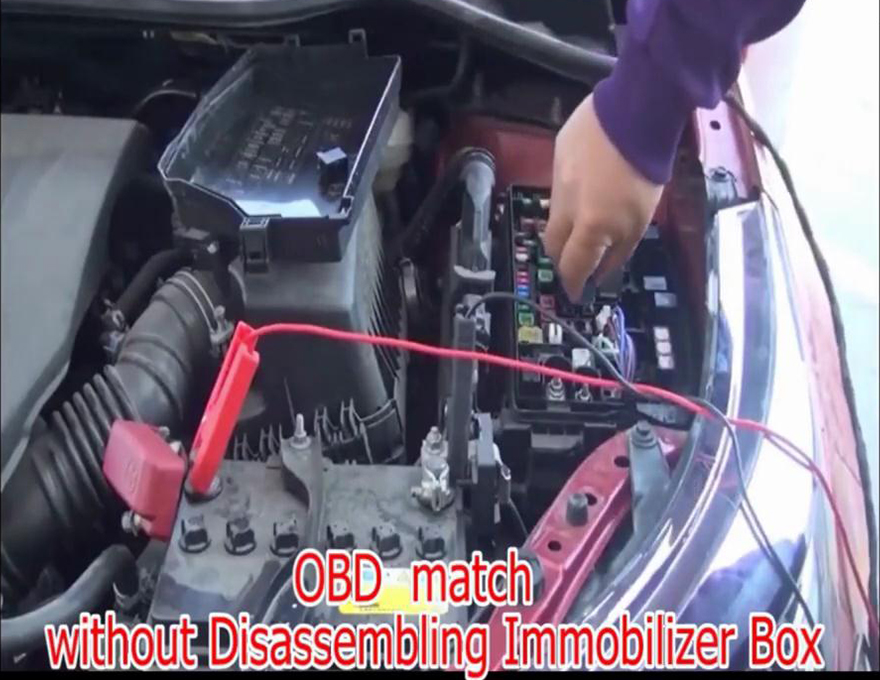
3). Plug the device into the obd2 port of the Toyota car.


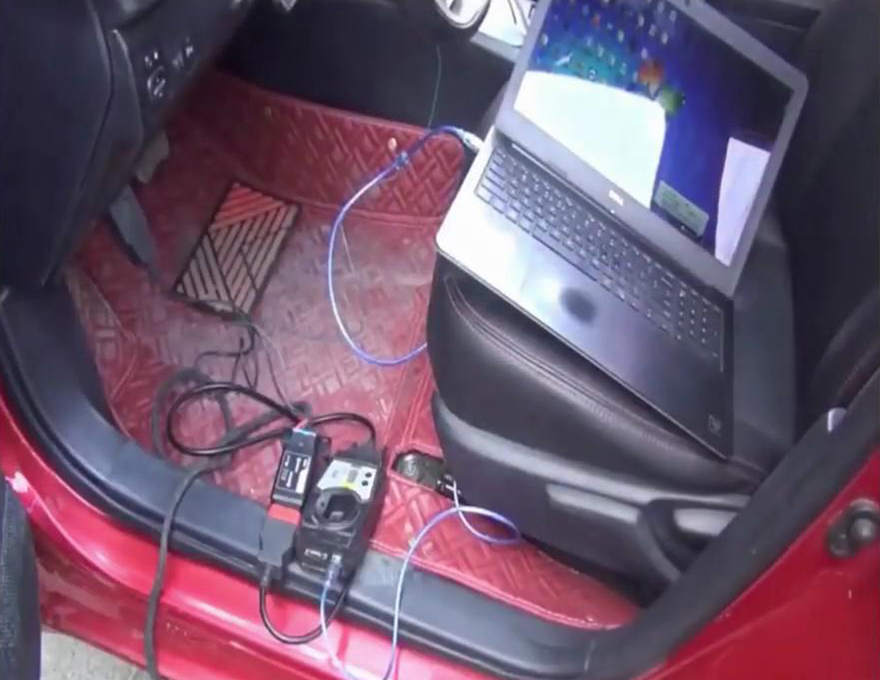
4). Look at how VVDI2, Cable Vvdi Toyota 8A and the computer connect.
Put in the VVDI super chip.
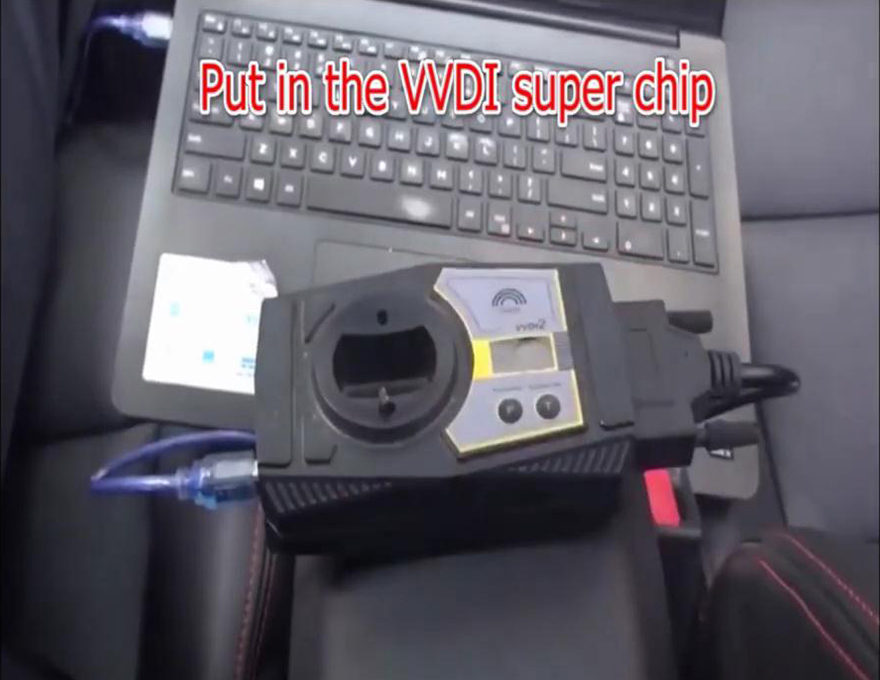
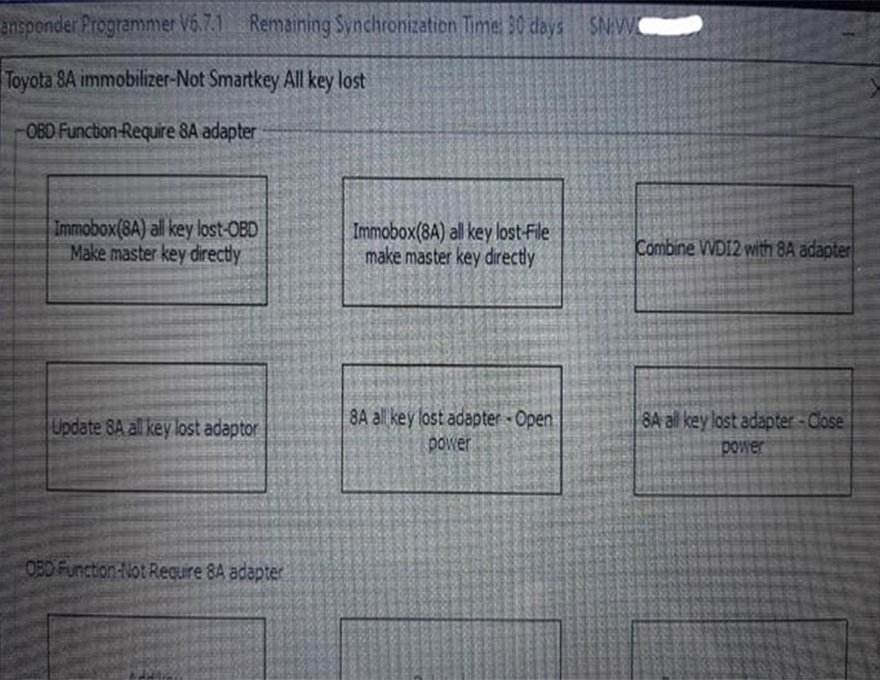
Click on “Check Toyota 8A adapter”, then “8A IMMO box all keys lost – directly generate the main key”.
Read data
upload data
computer data.
The device completes automatically.
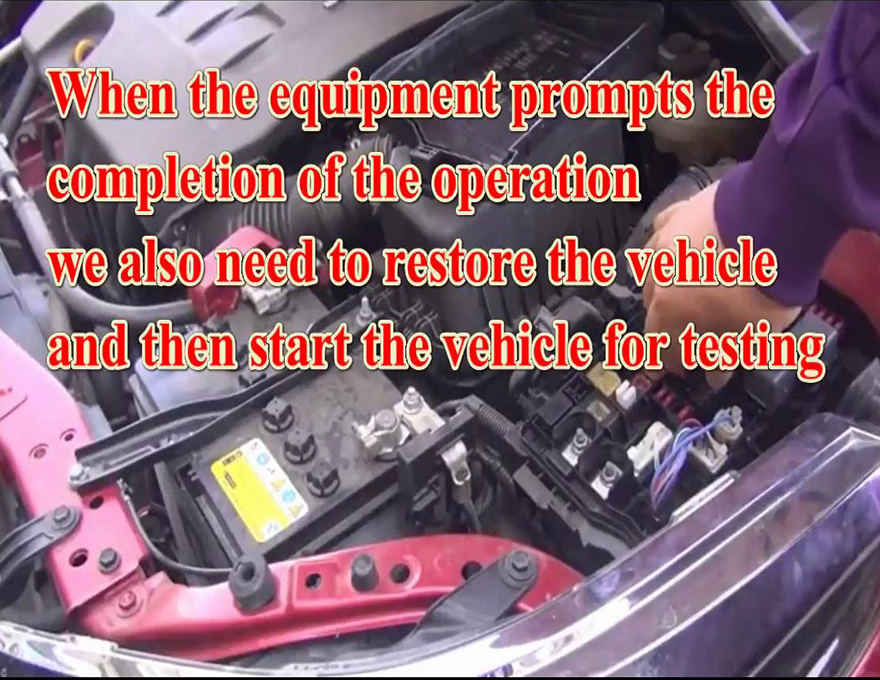
When the device prompts the completion of the operation, we also need to restore the vehicle and then start the vehicle for testing.

Done.