Car diagnostic tools information by obd2tool
Welcome to my blog,here some auto diagnostic tools will be displayed. If you want to know more information,you can visit our official website: www.obd2tool.com.Car diagnostic tools information by obd2tool
Welcome to my blog,here some auto diagnostic tools will be displayed. If you want to know more information,you can visit our official website: www.obd2tool.com.How to Install GM Tech2 TIS2000 CD
What the function of TIS2000 software CD?
GM Tech 2 is a standalone scan tool mainly used for diagnostic function, but with the additional TIS2000 software dongle, it is possible to carry out ECU programming for GM vehicle models (after 2007).
Operating system:
A laptop with COM port running Windows XP operating system
NOTE: PCs validated to function with all Tech line applications including TIS Service Programming System (SPS). Other laptops may not support SPS or communicate properly with the Tech 2 and will not be supported for hardware communication issues.
Window 64 bit or 32 bit:
64-bit versions of Windows contain backwards compatibility with 32-bit
applications, but not with 16-bit applications. And 32-bit versions of
Windows are backwards compatible with 16-bit applications. The problem
with installing TIS2000 on newer machines is that, while the TIS2000
program itself is 32-bit, the installer and drivers are 16-bit.
Therefore, you are able to install TIS2000 natively on ANY 32-bit
Windows system. This will just work, without having to run anything in
compatibility mode.
Windows 8 32 bit:
However, if you have a 32-bit copy of Windows 8 installed (I don’t wanna
know why you do), running 16-bit applications are disabled by default.
You can enable it by going to Control Panel and clicking on 16-bit
Application Support then clicking Enable.
Windows 7 with XP Virtual PC:
For those of you with genuine copies of Windows 7 Professional,
Enterprise, or Ultimate with a multi-core processor (who doesn’t run
Win7 on a multi-core these days); these versions of Windows 7 allow you
to use Windows Virtual PC, which lets you virtually run Windows XP Pro
without a disc or OS installation. You need to install Windows XP Mode
and Windows Virtual PC in order to use it. Before you can download these
updates, M$ makes you run a little .exe that checks if your OS install
is legitimate. Anyway, after you get that all installed and XP Mode is
booted, you can copy the OP’s cracked TIS2000.zip over to the WinXP
Desktop and follow the README.txt inside to install it. Here is a link
with the cracked TIS2000
https://www.obd2tool.com/goods-1603-OPEL+TIS2000.html
Step-by-step TIS2000 software dongle installation:
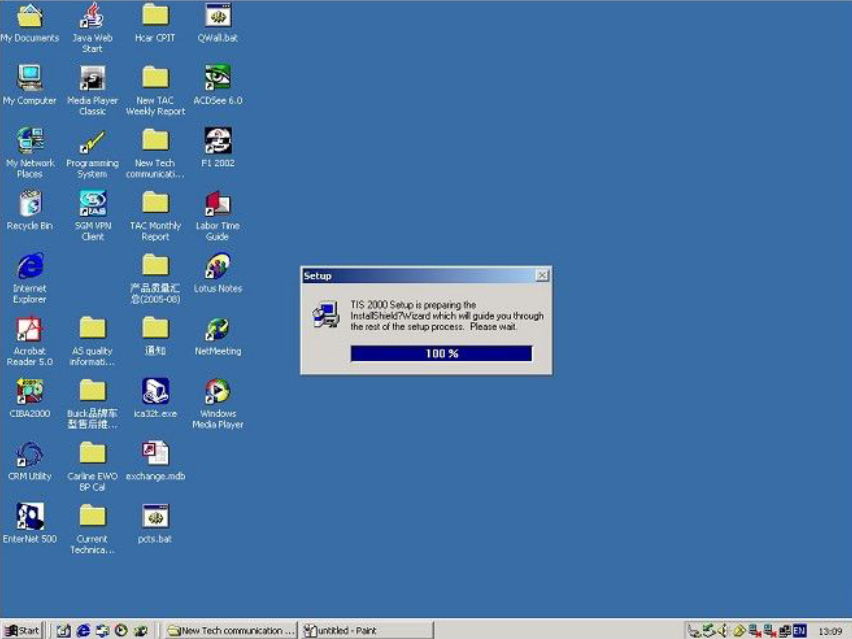
1. After loading the TIS2000 installation CD into the computer’s CD drive, the system will automatically execute the installation process: Be careful not to open other software
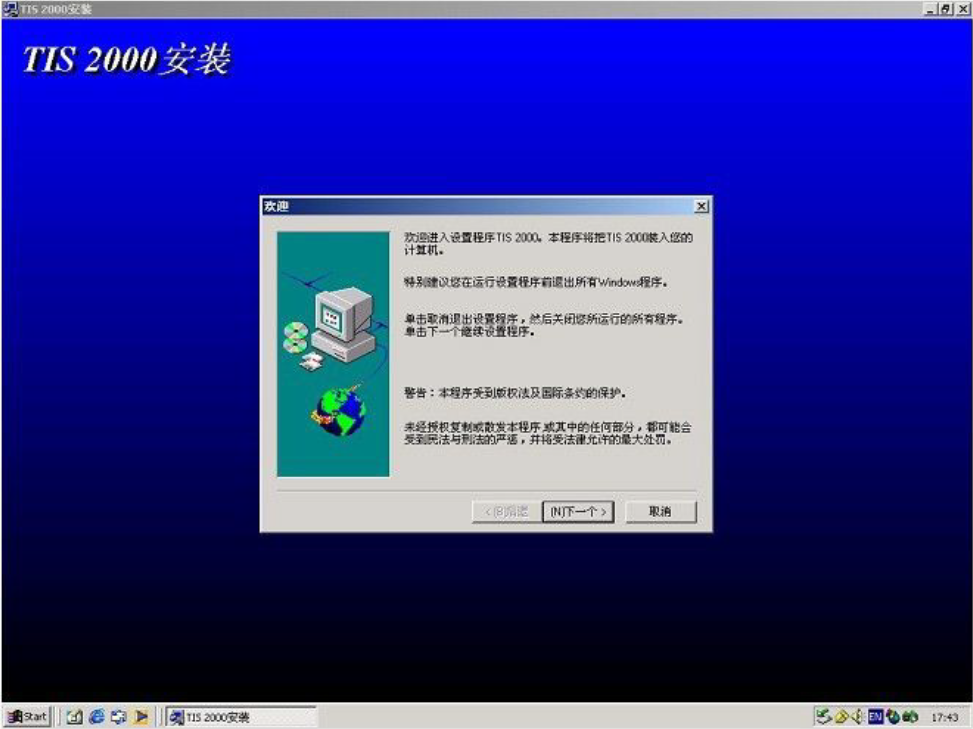
2. Select “Next”;
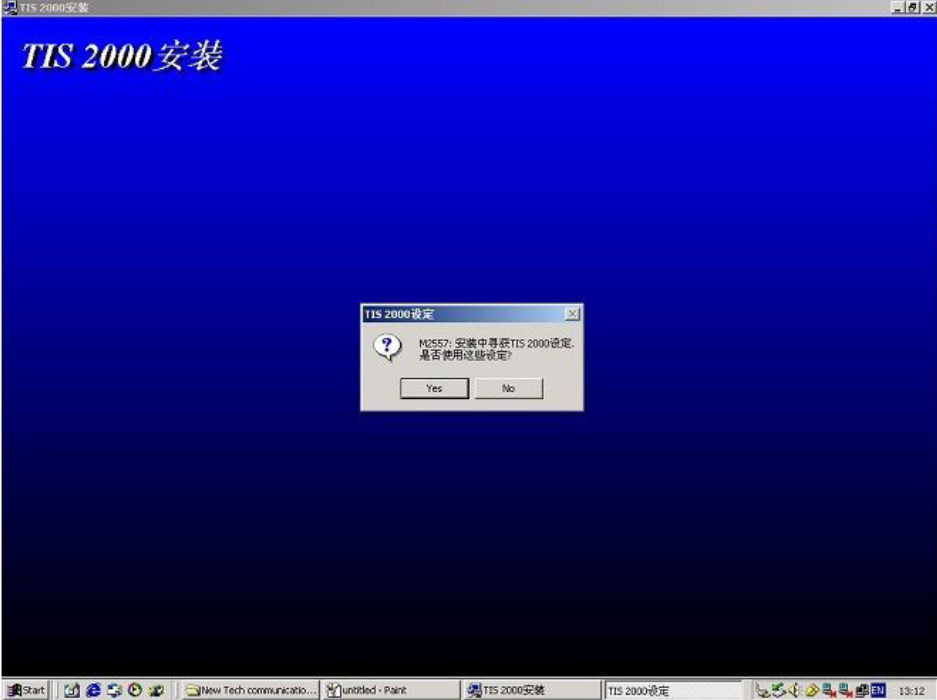
3. Select “Yes”
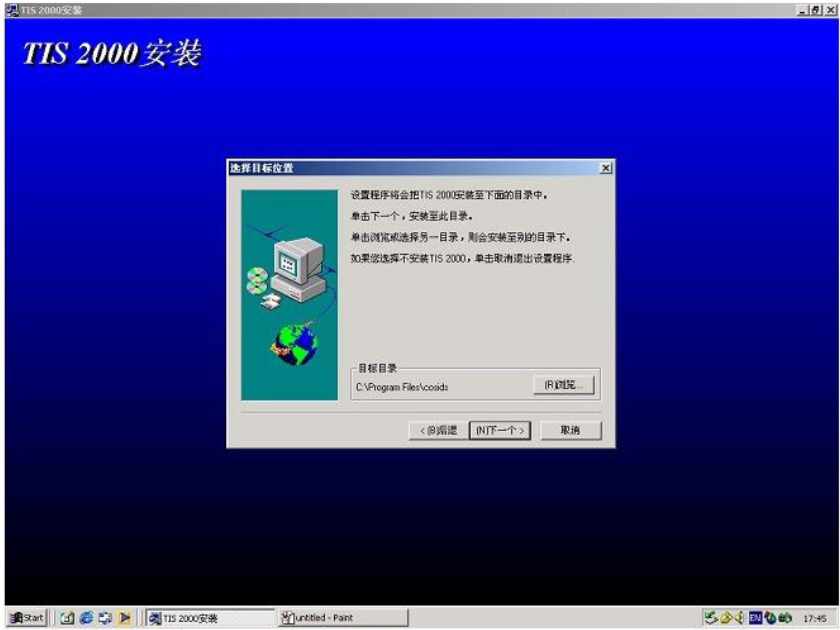
4. Under normal circumstances, the default installation area of TIS 2000 system is the “C drive” of the computer. It is recommended that the service center do not change its installation path, and select “Next” in the following interface;
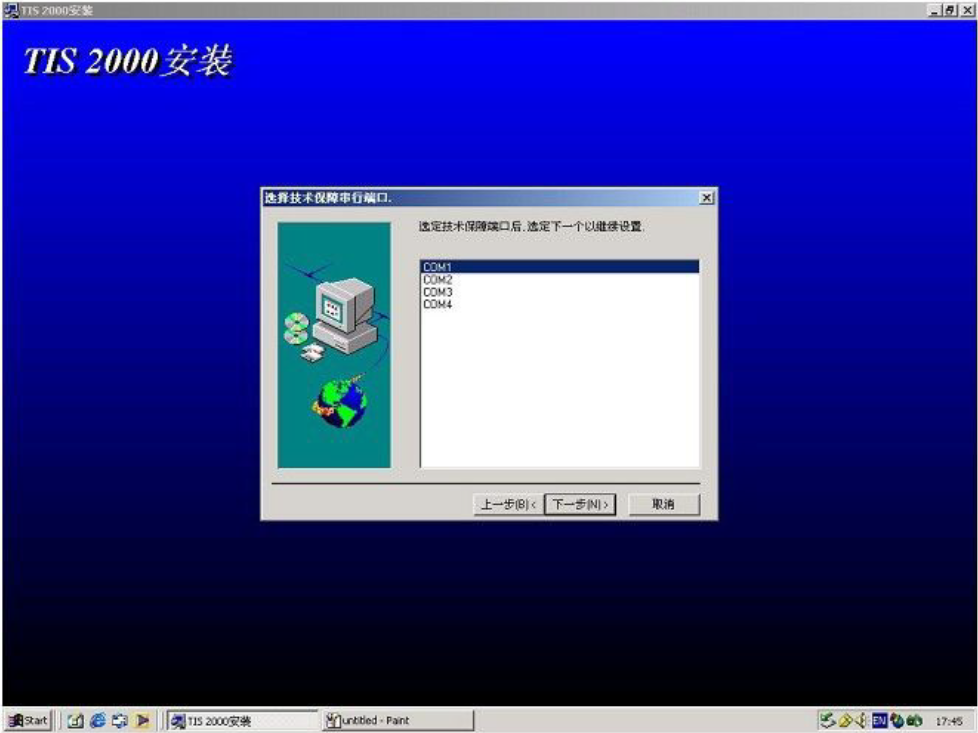
5. Select “COM1″;
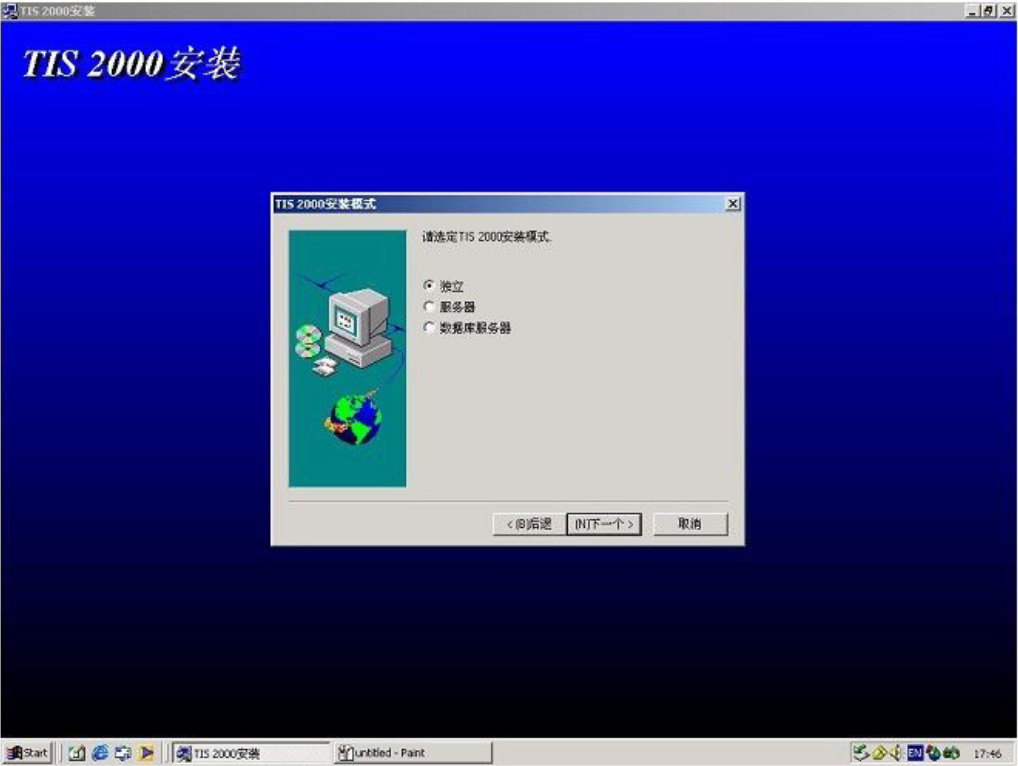
6. Select “Independent”
7. Select “NAO”

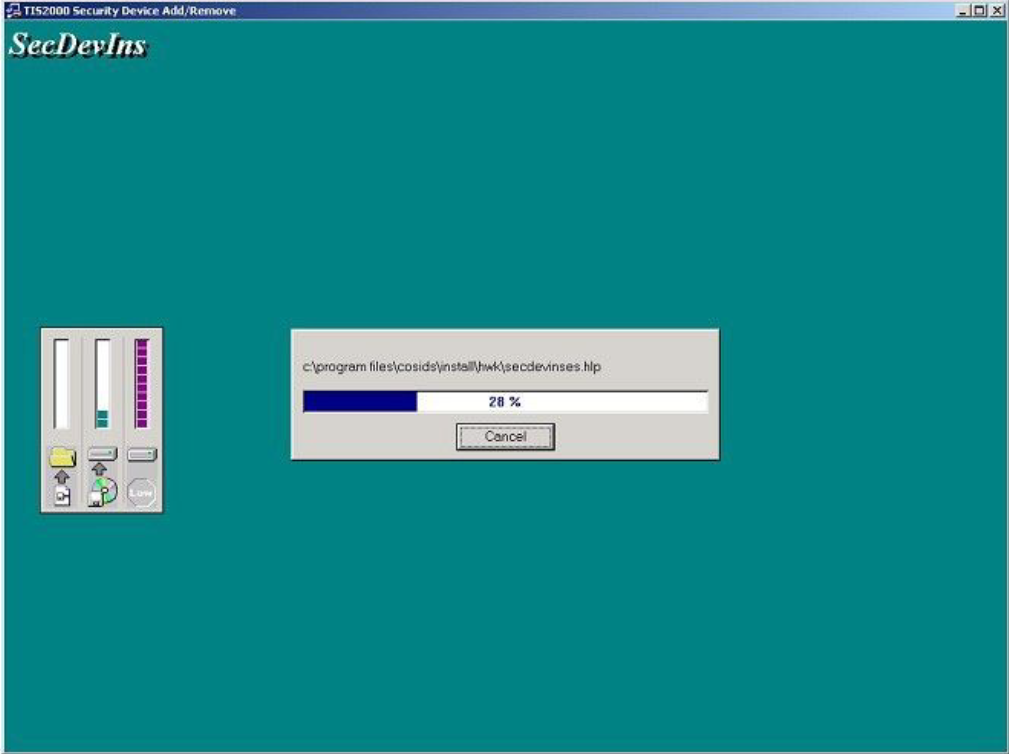
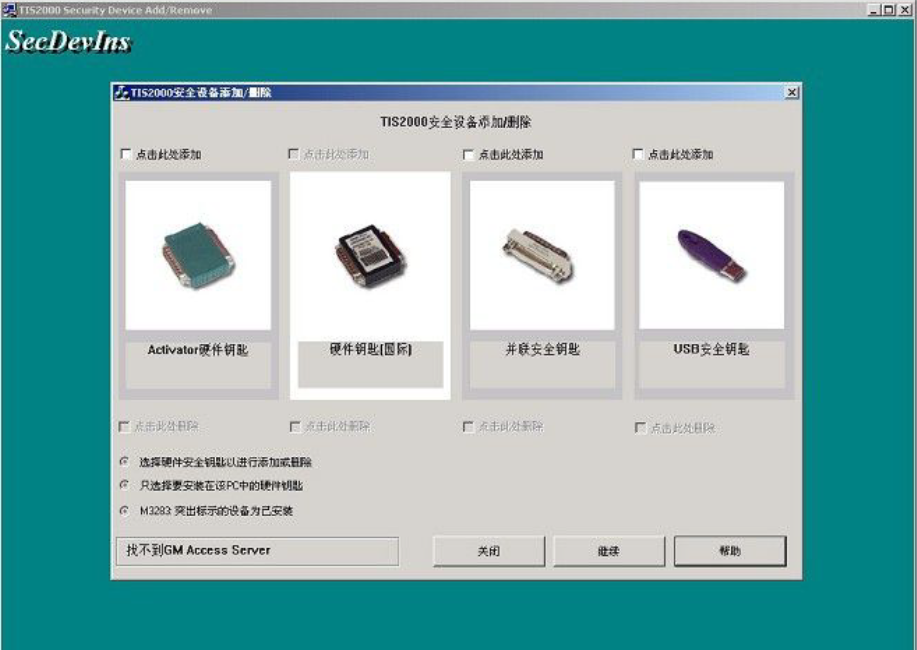
8. Please select the TIS 2000 hardware key according to the actual
situation in the following interface, and you can select it by “click
here to add”;
(1) The green “Activator hardware key” is the hardware key (Hardware Key) used by GM early;
(2) The purple “USB Security Key” is currently a commonly used hardware key

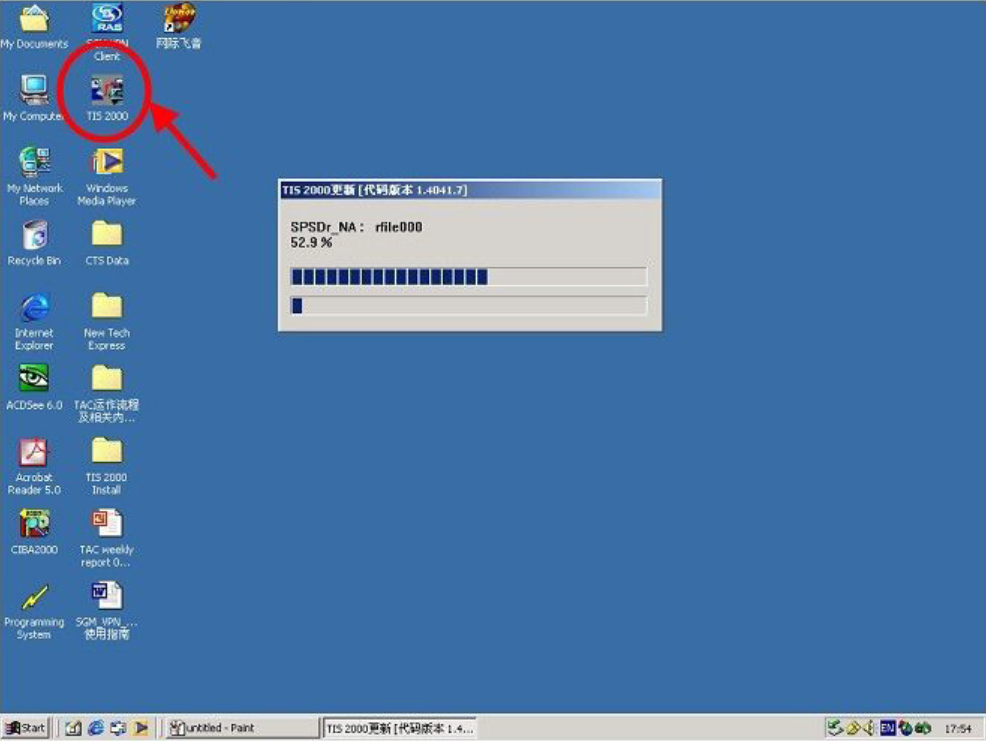
9. The following interface will display the installation process of the system:
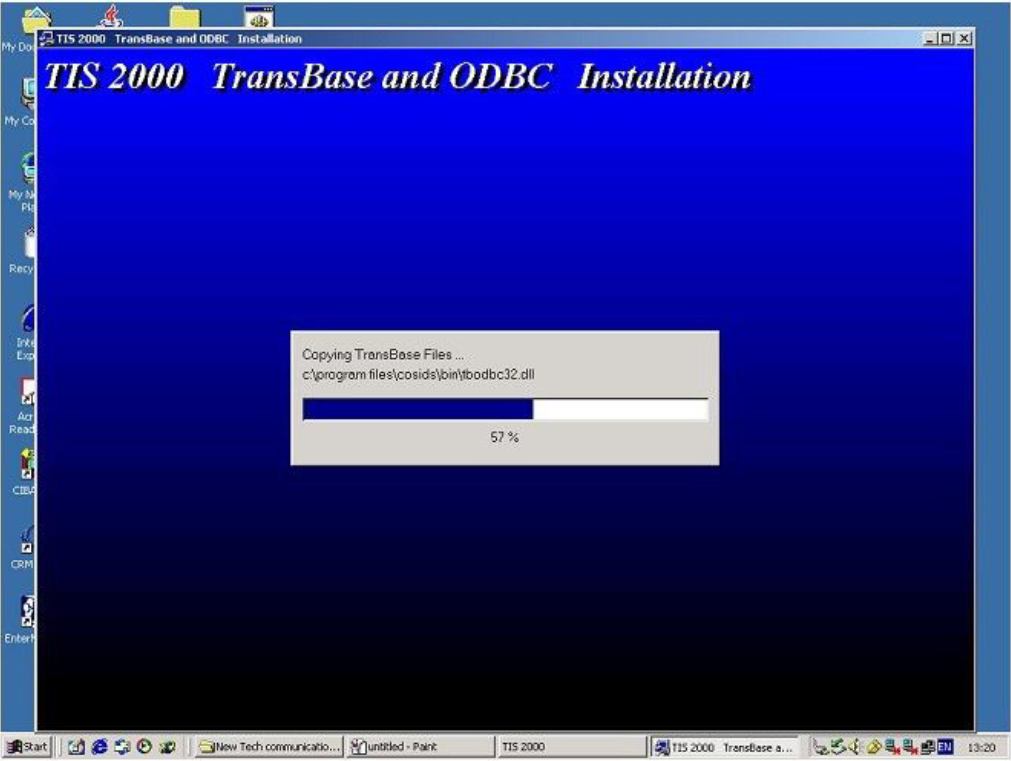
10. The following interface will display the installation process of the system

11.
12. The entire installation process will take more than ten minutes;
at this time, the “TIS 2000″ icon will appear on the desktop of the
computer
Note: Please close the computer’s screen report program before installing the TIS 2000 system;
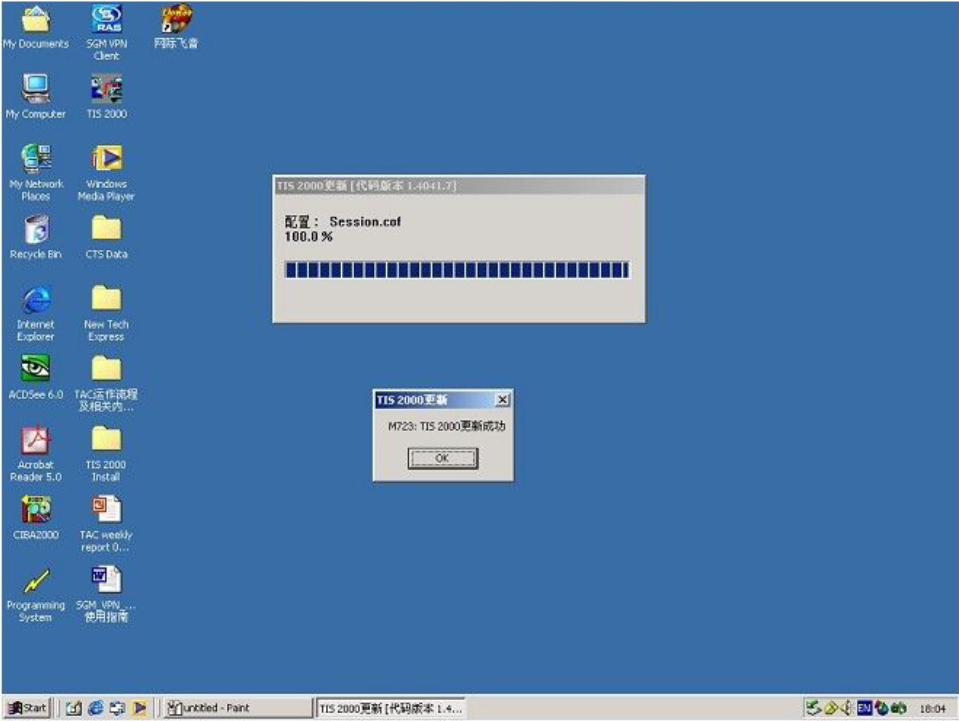
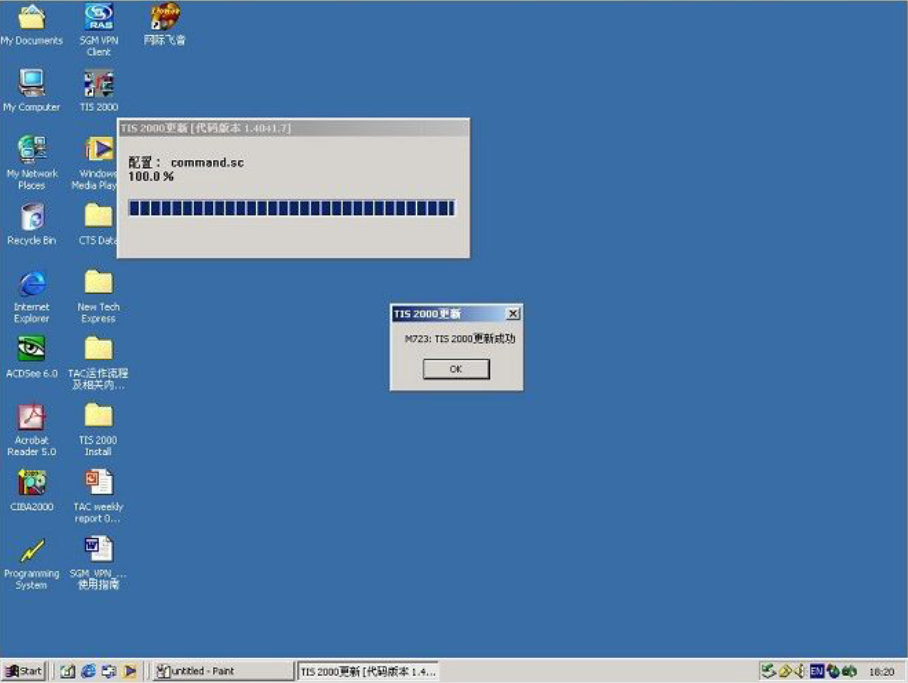
13. If all goes well, the installation user will prompt “M732, TIS 2000 updated successfully” after completing the relevant procedures on the TIS 2000 installation CD
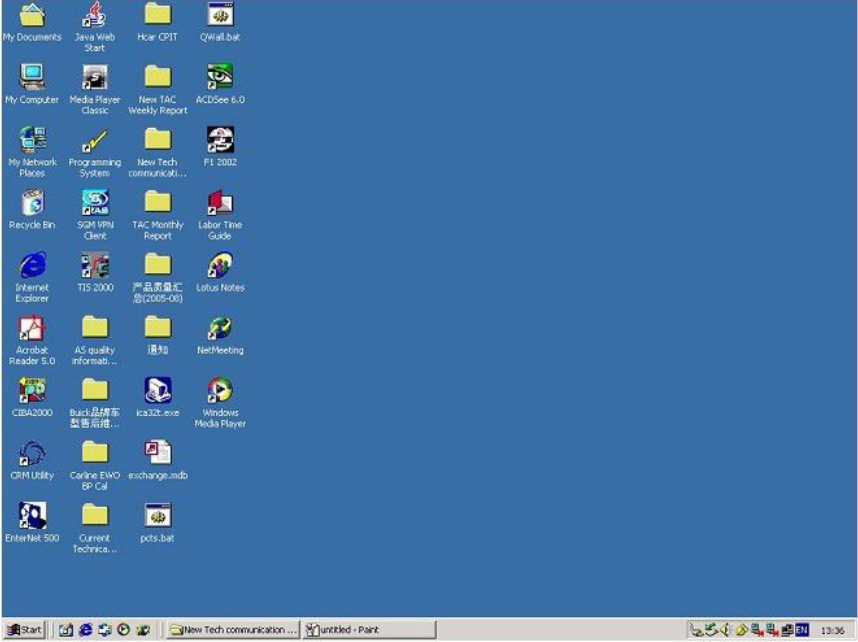
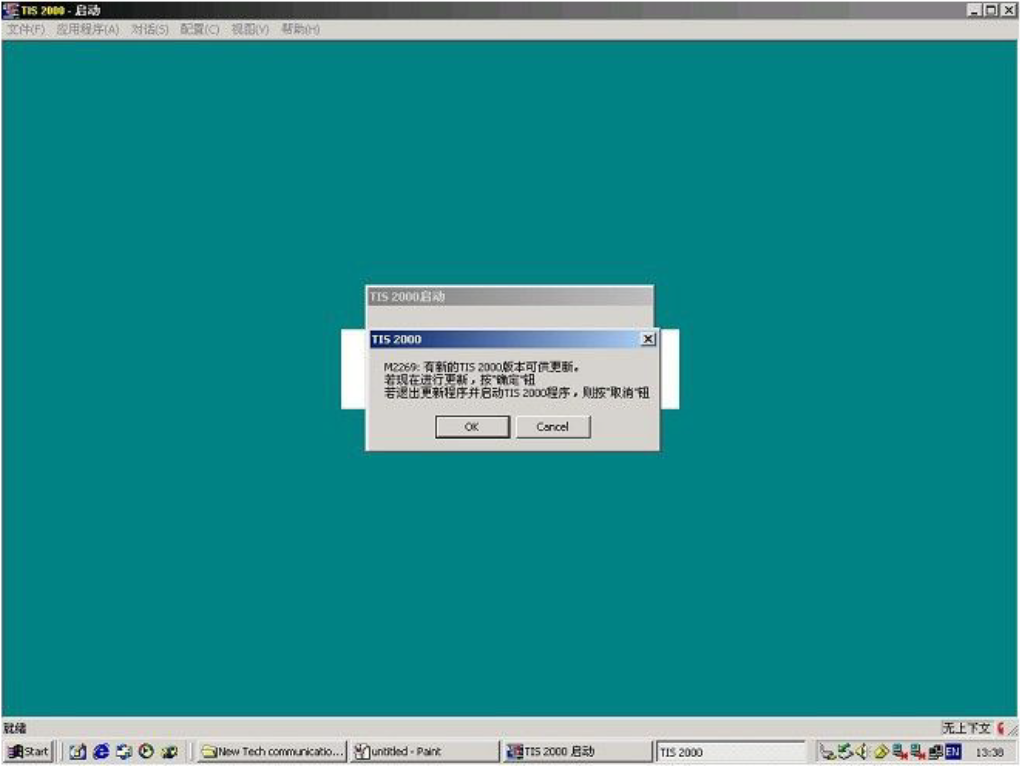
14. After removing the “TIS 2000″ installation CD, insert the “TIS 2000″ data CD to perform data update
Note: After inserting the “TIS 2000″ data CD, wait for the CD drive to
run for 10 seconds or stop running, and then click the “TIS 2000″ icon
on the computer desktop
15. The system will display a dialog box after searching for updated data, click “OK” to complete the operation
16. If all goes well, the installation user will prompt “M732, TIS 2000 updated successfully” after completing the relevant procedures on the TIS 2000 installation CD
At this point, the TIS 2000 system has completed all installation operations and can perform various functions.
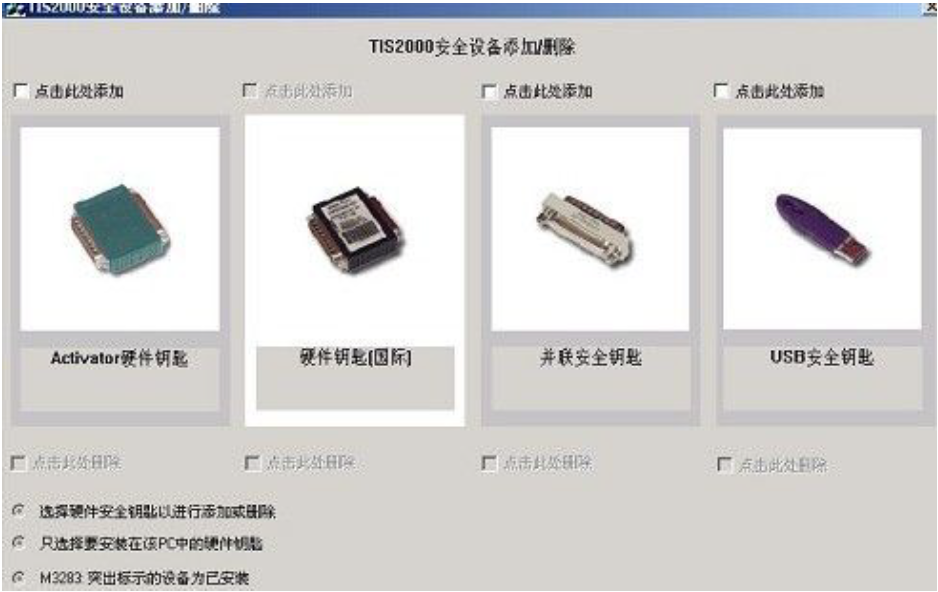
17 Please select the TIS 2000 hardware key according to the actual
situation in the following interface, and you can select it through
“click here to add”;
(1) The green “Activator hardware key” is the hardware key (Hardware Key) used by GM early;
(2) The purple “USB Security Key” is a commonly used hardware key;
18.
Mercedes-Benz won’t start,Step by Step Troubleshooting by Benz Star Diagnosis Tool
Mercedes-Benz won’t start,Step by Step Troubleshooting by Benz Star Diagnosis Tool
Mercedes won’t start or turn over? Are you experiencing Mercedes-Benz no
start problems? Key won’t turn at all? Engine turning over but the car
will not start? Maybe it finally starts, runs for a few seconds and then
dies. These are common Mercedes-Benz starting problems.
This comprehensive step by step guide is written to help you with
Mercedes-Benz no start issues. While in few cases troubleshooting by a
professional is required, there are several test that you can perform
yourself to avoid a repair bill. In order for your Mercedes-Benz to
start there are several conditions that need to be met and also needs:
1.Start enable by Drive Authorization System
2.It requires electrical power to crank the engine.
3.Requires fuel
4.Requires spark
Top 5 Mercedes-Benz no start problems
1.Engine Click, No Start
2.Engine Dies Right After It Starts
3.Car turns over, but it won’t start
4.The car makes a clicking noise but won’t start. Hint: Starter Problem or Low Battery
5.Key will not turn the ignition
Step 1: Verify that battery is fully charged
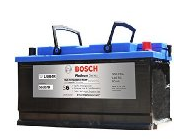
bosch batteryThis may seem obvious, but an old battery is the root of
many headaches and can cause all sorts of malfunctions on Mercedes-Benz
cars. How old is the battery on your Mercedes-Benz?
While some MB owners have pushed over 10 years on an original battery,
the battery should be considered for replacement around 6 or 7 years. If
you have an old battery replace it before you move to the next
troubleshooting step. If you want to save on the price of the battery,
head over to Amazon and check out these batteries that fit
Mercedes-Benz. They cost much less than the battery you purchase at the
dealership.
This Mercedes-Benz is not starting because of a low battery. In this case, what you need to do is trickle charge your battery using any of these 12 volt battery trickle chargers.
Step 2: Check fuses and relays
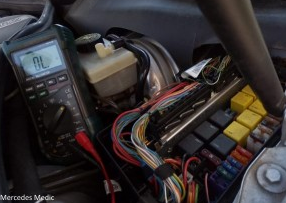
Mercedes won’t start, and it’s not the battery.
Next, you should check the fuses on your car.
You would want to check fuses for systems such as: Starter Circuit,
Ignition, EIS, Fuel Pump. There could be more circuits that impact the
starting depending on the model. You can easily check all the fuses if
you are not sure, to make sure none of them are not burned out. Keep in
mind that fuses are there to protect systems when they malfunction. Make
sure to replace the fuse with the same ampere rating fuse. There is a
chance the fuse could blow gain, shortly after that.
To test the fuses, you can use any digital multimeter to easily and quickly check the fuses without removing them.
Step 3: Check Gear Selector / Brake Light Switch
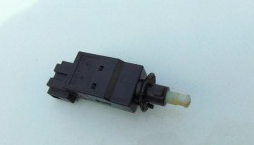
Install new brake light switchThe brake light switch is a common culprit
and frequently fail on Mercedes-Benz cars. The Drive Authorization
System will not allow starting the car if the brake light switch is not
working properly. In some cases, you will notice this problem because
you can’t get the car out of park. Gear shift stuck is one of the most
common problems with Mercedes-Benz cars. Unfortunately, looking to see
if the brake lights turns on while you press the brake pad, is not a
good test to tell if the brake light switch is working properly. This is
because the brake light switch has two or more micro-switches inside
and only one of them controls the rear brake lights.
Another way to verify if the gear selector module is working properly is to look at the instrument cluster. Now, as you move the shifter from Park to Reverse to Neutral, do you see the gear indicator also change on the instrument cluster? If you don’t see the letters on the cluster change from P to R to N, it is a good sign that the gear selector module is defective.
If you replaced the brake light switch and your car won’t start move on to Step 4.
Step 4: Fuel Problems, Mercedes Won’t Start
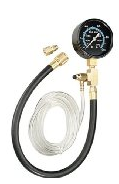
Fuel Pressure Test Gauge Troubleshoot no start problemsIs the engine
turning over? Let’s eliminate the possibility of a fuel system problems.
Troubleshooting fuel related problems is not very difficult and you can
check the fuel pressure yourself. Checking the fuel pressure is very
simple.
For this test, you will need a fuel pressure gauge. What you need is a fuel pressure gauge with Schrader valve adapter. A great and affordable gauge that we have used in the past is this Actron Fuel Pressure Gauge which works on Mercedes-Benz cars. Turn the engine off and connect this gauge to the Schrader valve test port shown in the picture below. Start the car and you should be able to get around 60 psi. When the engine is running and when you turn off the engine the pressure should stay steady. Always perform this test on a cold engine.
Next, make sure that the fuel injector connections are secure and not loose.
test fuel pressure at schrader valveCheck the fuel pump and the fuel pump relay. In some Mercedes-Benz models you will be able to hear the fuel pump when you listen carefully near the fuel tank. While one of your friends turn the key to position II, all dash lights on but car is not started; listen carefully at these locations. Under or behind the rear seat, listen inside the trunk near the back of the back seat, listen through the fuel fill with the fuel cap removed. The fuel pump should run for several seconds every time you turn the key to position II.
Also check the fuel filter. Make sure that it is old and clogged. They can be easily replaced in most cases and don’t cost very much.
Step 5: Check engine fault codes
srs brake check engine service lightIf your Mercedes-Benz starts and
dies then another thing that you can do is retrieve the fault codes.
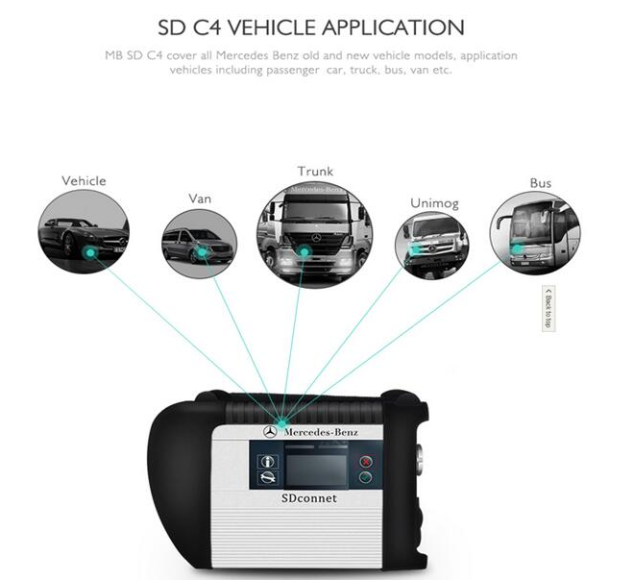
An MB SD Connect Compact C4 Diagnosis TOOL be all that you need to retrieve fault codes.
MB SD Connect Compact C4 Diagnosis TOOL will pull the fault codes from the ECU but also from TCU, SRS, ESP, ETS, BAS and several more control units.
Step 6: Starter Motor Problems – Mercedes won’t turn over
mercedes benz starter replacement change 01If the starter is defective
you will not be able to get the engine to turn. First check the starter
fuse. Often times, when the starter is defective or seizes up it will
blow out the fuse that protect the starter circuit. Another thing that
you can try is to hit the starter with a rubber hammer a couple of
times.
Depending what kind of starter problems you have, the starter may work a few more times. Even if the starter begins to work again, consider replacing it, as it is nearing the end of its life.
Step 7: Ignition system, Spark Plugs/Coils – Mercedes starts then dies
mercedes_benz_valve_cover_spark_plugs_coil packs V6 V8 engineIf your car
cranks but it does not start there are two things that you should check
first. One is that there is fuel and second that there is spark.
Checking for spark is very easy if you have an In-Line Spark Test Tool.
As you will see from the link, those tools are very inexpensive and a great tool to check for spark. You remove the spark plug boot from one of the spark plugs and install this tool in line. Crank the car and observe the spark plug test tool.
replace the spark plugs on a Mercedes-Benz
Step 8: Check Crankshaft position sensor – Crank No Start
If the crankshaft position sensor fails you may experience crank and no
start symptoms. In this video below you will see a Mercedes-Benz that
refuses to start due to a failed crankshaft position sensor.
When the crankshaft position sensor fails you may notice the following symptoms:
Check engine light is on.
Intermittent starting
Misfiring
Hesitation
Engine vibrations
Engine stall
you car see a Mercedes-Benz that cranks but won’t start do to failed crankshaft position sensor.
Don’t panic though. Replacing the crankshaft position sensor is easy and the sensor is very inexpensive.
Step 9: Driver Authorization System / Key won’t turn in igntion
The car may not start if you have a newer car with a SmartKey due to
Driver Authorization System (DAS) failure. The newer keys have a
transponder integrated in them. The key fob remote serves two purposes.
First it disables the anti-theft system when you unlock the car. Second,
Drive Authorization System verifies the key to make sure it is the
right key to start the car.
If your key does not turn the ignition, there are two things that are the most likely scenarios: The battery is fully or partially discharged. This doesn’t allow the electronic ignition system (EIS) to function at all. Make sure to verify that you don’t have a defective battery problem. Second, the Driver Authorization related problems. When you insert the key into the ignition, the key is verified and authorized to start the car.
Once the key is authorized the steering column is unlocked and the Engine Control Unit is allowed to start the engine. Replacing the electrical ignition module (EIS) can only be performed by the dealership and typically costs over $1000-$2500. Keep in mind that the key can often be the problem and not the DAS or EIS. So if you have a spare key, try that first before you replace the EIS. Keys do go bad more often than EIS modules do.
Step 10: Other possible problems – Mercedes-Benz will not start
 -
-
The list can go on and on as to what can cause a Mercedes-Benz to not
start. If you check all of the things above you have done most of the
work. For this last step you will need a professional diagnostic
scanner. Our top recommendation in this case is the Autel Maxisys Elite Professional Scanner, powerful scanner that works on most makes and models.
Once you hook up a professional OBD II scanner to the OBD-II port of your car, you will be able to scan multiple systems on your car to find out what is causing the problem.
Here are a few other items that may prevent your Mercedes-Benz from starting. In most cases you will get a fault code related to one of the following:
ECM / PCM computer failure
Camshaft position sensor
Shifter Selector module
Fault codes related to driver authorization or immobilizer
Electrical problems
In rare cases, you may also have a locked up engine due to lack or oil
or hydro lock. Low compression or blown head gasket can also cause a
Mercedes-Benz car not to start but are not very common problems.
We hope this guide helped you start your Mercedes-Benz. As you perform these test be careful to avoid injuries to yourself and damages to yourself. If you don’t feel comfortable with some of these test, it’s better to take your car to an auto repair shop.
Mercedes Benz Immobilizer Retrofit Coding DAS
This instruction in show you guide on Mercedes Benz immobilizer coding by DAS. If you want to know more about Benz projects, please refer to Benz Trouble Repair.
Steps:
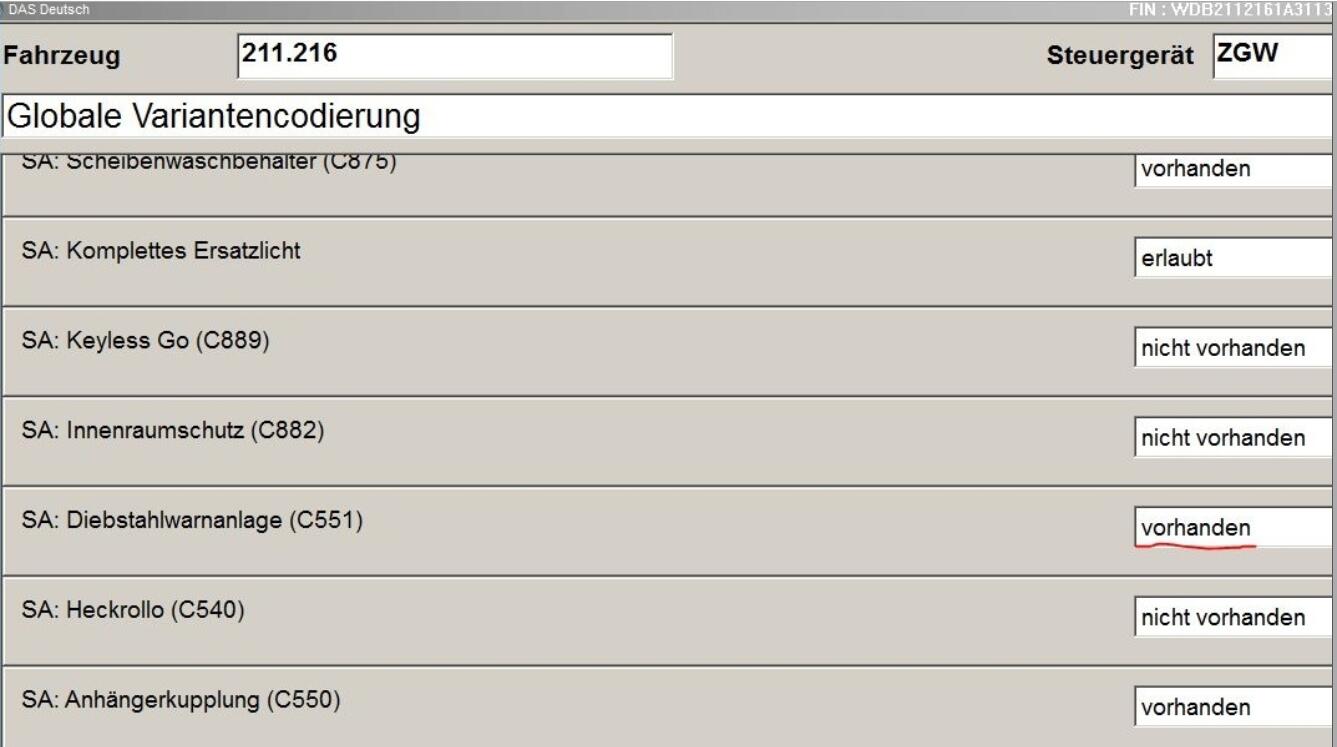
ZGW->Entwicklungsdaten->Steuergerate-Anpassungen->Variantencodierung->Global ->Steuergerat Reset
Funktionsprufung
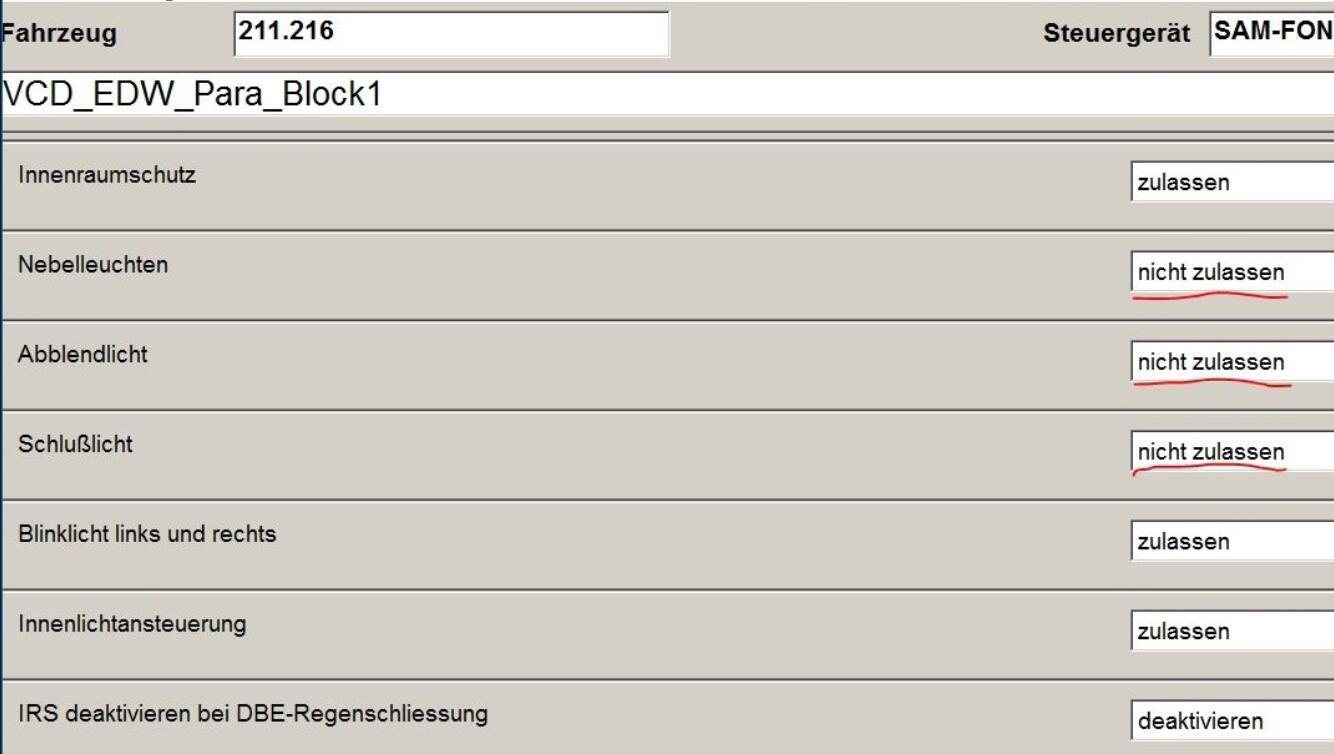
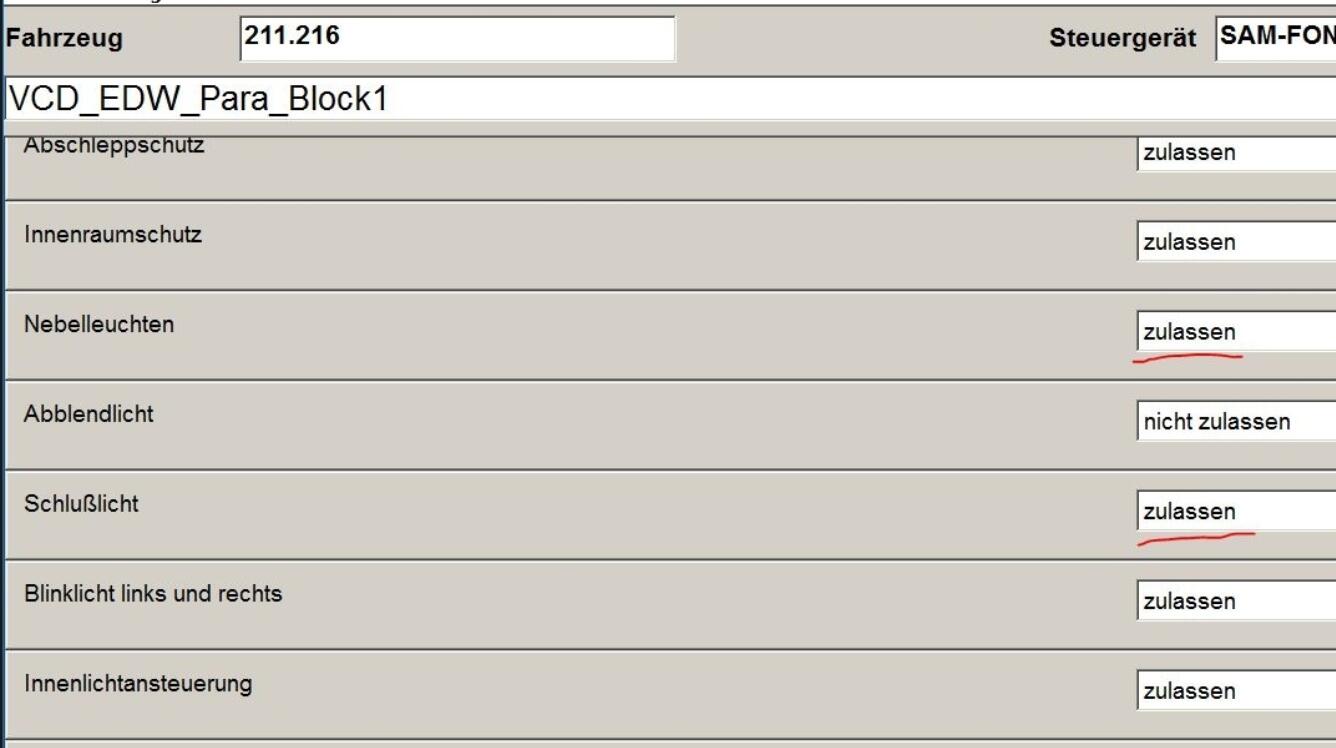
SAM-H->Entwicklungsdaten->Steuergerate-Anpassungen->Variantencodierung>VCD_EDW_Para_Block the needed variant coding search sensor B33 and horn H3 needs to be installed as well.
ZGW/CGW coding
 SAM-H before codin
SAM-H after coding
How To Fix Digimaster 3 Insufficient Memory or File Copy Error
If your Yanhua Digimaster III meet error like this below:
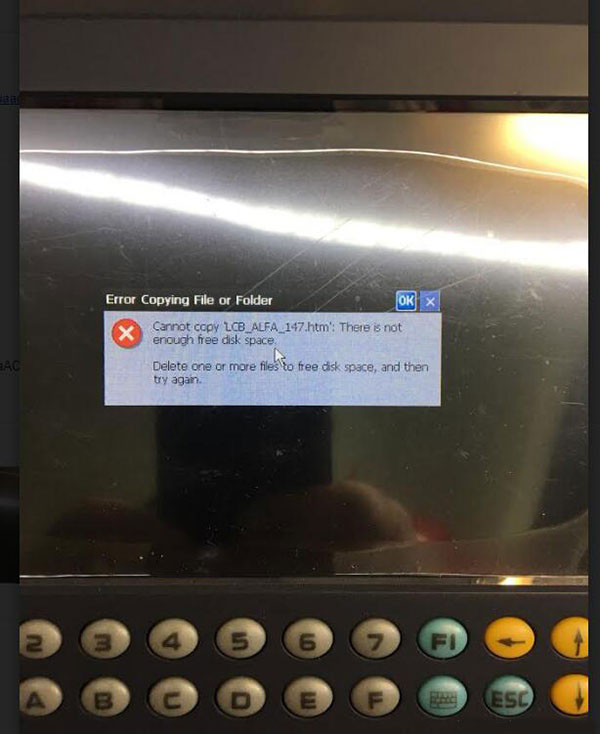
Error:
Cannot copy “LCB_ALFA_147.htm”. There is not enough free disk space.
Solution:
1. Turn off DigimasterIII and turn on again, when you enter Digimaster 3 system, there will be a notice asking to download a management program or black screen. Please ignore and press “keyboard” + “E” to enter the resource manager.
2. Find the “NandFlash” icon, double click “NandFlash”, delete the “YHTech” file folder. If the file folder cannot be deleted, please restart and try again.
3. After you delete the file, copy the necessary “YHTech” file folder and “NK_D3.ROM” file to SD card.
4. Press “1” + “Keyboard” and turn on the power switch, start to refresh the inner core.
5. When the inner core refresh is finished, and the Mileage Correction Digimaster III start icon can be seen, press the “F1” and “5” button in turn immediately, copy files from the SD card to FLASH.
6. When copy finished, you’ll be able to turn it on successfully.
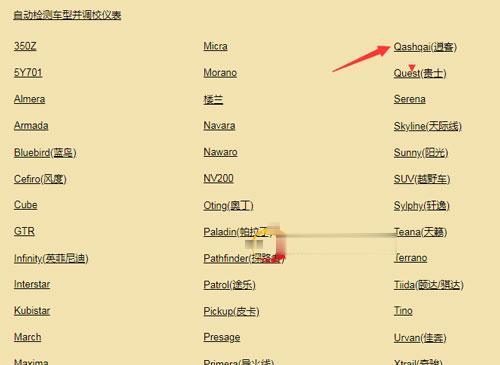
Will digimaster3 adjust nissan rogue 2015 mileage
Will Digimaster3 adjust nissan rogue 2015 mileage
Yes. Digimaster 3 mileage correction tool supports Nissan rogue 2015, Please try -> Japanese& Korean cars->Nissan->Qashqai
Digimaster3 odometer correction tool car list for Nissan cars
(Ctrl + F to search your car )
| Series | Manufacturer | Car Model | Method | Adapter | Storage Location | |
| Japan& Korea | Nissan | 350Z | 93C66 | Memory Directly | OBP | Cluster |
| Japan& Korea | Nissan | 5Y701 | 93C56 | Memory Directly | OBP | Cluster |
| Japan& Korea | Nissan | Almera | 2000 S220 | Memory Directly | OBP | Cluster |
| Japan& Korea | Nissan | Almera | 2000 S221 | Memory Directly | OBP | Cluster |
| Japan& Korea | Nissan | Almera | 2001 93C56 | Memory Directly | OBP | Cluster |
| Japan& Korea | Nissan | Almera | 2001 S330 | Memory Directly | OBP | Cluster |
| Japan& Korea | Nissan | Almera | 93C46 | Memory Directly | OBP | Cluster |
| Japan& Korea | Nissan | Armada | 2006 | Soldering Contacts | ICP | Cluster |
| Japan& Korea | Nissan | Cube | 95020 | Memory Directly | OBP | Cluster |
| Japan& Korea | Nissan | Bluebird | 93C46 | Soldering Contacts | ICP | Cluster |
| Japan& Korea | Nissan | Bluebird | 93C56 | Soldering Contacts | ICP | Cluster |
| Japan& Korea | Nissan | Cefiro | 93C46 | Memory Directly | OBP | Cluster |
| Japan& Korea | Nissan | Cefiro | 93C56 V1 | Soldering Contacts | ICP | Cluster |
| Japan& Korea | Nissan | Cefiro | 93C56 V2 | Soldering Contacts | ICP | Cluster |
| Japan& Korea | Nissan | GTR | 93C76 | Memory Directly | OBP | Cluster |
| Japan& Korea | Nissan | Infinity | 2006(MCU) | Soldering Contacts | ICP | Cluster |
| Japan& Korea | Nissan | Infinity | 93C46 | Memory Directly | OBP | Cluster |
| Japan& Korea | Nissan | Infinity | 93C66 V1 | Memory Directly | OBP | Cluster |
| Japan& Korea | Nissan | Infinity | 93C66 V2 | Memory Directly | OBP | Cluster |
| Japan& Korea | Nissan | Infinity | 93C86 | Memory Directly | OBP | Cluster |
| Series | Manufacturer | Car Model | Method | Adapter | Storage Location | |
| Japan& Korea | Nissan | Interstar | 93C66 | Memory Directly | OBP | Cluster |
| Japan& Korea | Nissan | Kubistar | 95020 | Memory Directly | OBP | Cluster |
| Japan& Korea | Nissan | Livina Geniss | 93C66 | Memory Directly | OBP | Cluster |
| Japan& Korea | Nissan | Livina Geniss | 93C86 | Memory Directly | OBP | Cluster |
| Japan& Korea | Nissan | March | 24C02 | Memory Directly | OBP | Cluster |
| Japan& Korea | Nissan | March | 93C66 | Memory Directly | OBP | Cluster |
| Japan& Korea | Nissan | Maxima | 93C46 | Memory Directly | OBP | Cluster |
| Japan& Korea | Nissan | Maxima | 93C56 | Memory Directly | OBP | Cluster |
| Japan& Korea | Nissan | Maxima | 93C66 | Memory Directly | OBP | Cluster |
| Japan& Korea | Nissan | Micra | -2003 | Memory Directly | OBP | Cluster |
| Japan& Korea | Nissan | Micra | 2003- 93C46 | Memory Directly | OBP | Cluster |
| Japan& Korea | Nissan | Micra | 2003- 93C56 | Memory Directly | OBP | Cluster |
| Japan& Korea | Nissan | Micra | 2003- 93C66 | Memory Directly | OBP | Cluster |
| Japan& Korea | Nissan | Morano | 93C66 | Memory Directly | OBP | Cluster |
| Japan& Korea | Nissan | Murano | 93C66 | Memory Directly | OBP | Cluster |
| Japan& Korea | Nissan | Navara | 93C46 | Memory Directly | OBP | Cluster |
| Japan& Korea | Nissan | Navara | 93C56 | Memory Directly | OBP | Cluster |
| Japan& Korea | Nissan | Nawaro | 93C46 | Memory Directly | OBP | Cluster |
| Japan& Korea | Nissan | Nawaro | 93C56 | Memory Directly | OBP | Cluster |
| Japan& Korea | Nissan | NV200 | 93C86 | Memory Directly | OBP | Cluster |
| Japan& Korea | Nissan | Oting | 93C56 | Memory Directly | OBP | Cluster |
| Japan& Korea | Nissan | Paladin | 2009 | Soldering Contacts | ICP | Cluster |
| Series | Manufacturer | Car Model | Method | Adapter | Storage Location | |
| Japan& Korea | Nissan | Paladin | 93C46 | Memory Directly | OBP | Cluster |
| Japan& Korea | Nissan | Paladin | 93C56 | Soldering Contacts | ICP | Cluster |
| Japan& Korea | Nissan | Pathfinder | 2000 | Memory Directly | OBP | Cluster |
| Japan& Korea | Nissan | Pathfinder | 2004 | Soldering Contacts | ICP | Cluster |
| Japan& Korea | Nissan | Pathfinder | 2005-2008 | Soldering Contacts | ICP | Cluster |
| Japan& Korea | Nissan | Pathfinder | 93C46 | Memory Directly | OBP | Cluster |
| Japan& Korea | Nissan | Pathfinder | 93C56 | Memory Directly | OBP | Cluster |
| Japan& Korea | Nissan | Patrol | 93C56 V1 | Memory Directly | OBP | Cluster |
| Japan& Korea | Nissan | Patrol | 93C56 V2 | Memory Directly | OBP | Cluster |
| Japan& Korea | Nissan | Patrol | 93C56 V3 | Memory Directly | OBP | Cluster |
| Japan& Korea | Nissan | Patrol | 93C66 V1 | Memory Directly | OBP | Cluster |
| Japan& Korea | Nissan | Patrol | 93C66 V2 | Memory Directly | OBP | Cluster |
| Japan& Korea | Nissan | Pickup | 93C46 | Memory Directly | OBP | Cluster |
| Japan& Korea | Nissan | Pickup | 93C56 V1 | Memory Directly | OBP | Cluster |
| Japan& Korea | Nissan | Pickup | 93C56 V2 | Memory Directly | OBP | Cluster |
| Japan& Korea | Nissan | Pickup | 93C56 V3 | Memory Directly | OBP | Cluster |
| Japan& Korea | Nissan | Presage | 93C56 | Memory Directly | OBP | Cluster |
| Japan& Korea | Nissan | Primera | -1999 | Memory Directly | OBP | Cluster |
| Japan& Korea | Nissan | Primera | 1999 | Memory Directly | OBP | Cluster |
| Japan& Korea | Nissan | Primera | 2000 S220 | Memory Directly | OBP | Cluster |
| Japan& Korea | Nissan | Primera | 2000 S221 | Memory Directly | OBP | Cluster |
| Japan& Korea | Nissan | Primera | 2001 | Memory Directly | OBP | Cluster |
| Series | Manufacturer | Car Model | Method | Adapter | Storage Location | |
| Japan& Korea | Nissan | Primera | 93C46 | Memory Directly | OBP | Cluster |
| Japan& Korea | Nissan | Qashqai | 93C66 | Soldering Contacts | ICP | Cluster |
| Japan& Korea | Nissan | Qashqai | 2011-(1M80F) | Soldering Contacts | CAS&BDM | Cluster |
| Japan& Korea | Nissan | Quest | 2006 V1 | Soldering Contacts | ICP | Cluster |
| Japan& Korea | Nissan | Quest | 2006 V2 | Soldering Contacts | ICP | Cluster |
| Japan& Korea | Nissan | Serena | 93C56 | Memory Directly | OBP | Cluster |
| Japan& Korea | Nissan | Skyline | 93C56 | Memory Directly | OBP | Cluster |
| Japan& Korea | Nissan | Skyline | 93C66 | Memory Directly | OBP | Cluster |
| Japan& Korea | Nissan | Skyline | R35 | Memory Directly | OBP | Cluster |
| Japan& Korea | Nissan | Sunny | 2007 | Memory Directly | OBP | Cluster |
| Japan& Korea | Nissan | Sunny | 2011 93C66 | Memory Directly | OBP | Cluster |
| Japan& Korea | Nissan | Sunny | 2011 93C86 | Memory Directly | OBP | Cluster |
| Japan& Korea | Nissan | Sunny | 93C56 | Memory Directly | OBP | Cluster |
| Japan& Korea | Nissan | SUV | 4500 | Memory Directly | OBP | Cluster |
| Japan& Korea | Nissan | SUV | 4800 | Memory Directly | OBP | Cluster |
| Japan& Korea | Nissan | Sylphy | 93C66 | Soldering Contacts | ICP | Cluster |
| Japan& Korea | Nissan | Sylphy | 93C86 | Memory Directly | OBP | Cluster |
| Japan& Korea | Nissan | Teana | 93C66 V1 | Soldering Contacts | ICP | Cluster |
| Japan& Korea | Nissan | Teana | 93C66 V2 | Soldering Contacts | ICP | Cluster |
| Japan& Korea | Nissan | Teana | 93C86 | Soldering Contacts | ICP | Cluster |
| Japan& Korea | Nissan | Teana | 2013 24C16 | Soldering Contacts | ICP | Cluster |
| Japan& Korea | Nissan | Terrano | 93C66 | Memory Directly | OBP | Cluster |
| Series | Manufacturer | Car Model | Method | Adapter | Storage Location | |
| Japan& Korea | Nissan | Tiida | 2008 | Soldering Contacts | ICP | Cluster |
| Japan& Korea | Nissan | Tiida | 93C66 | Soldering Contacts | ICP | Cluster |
| Japan& Korea | Nissan | Tiida | 2011 | Soldering Contacts | ICP | Cluster |
| Japan& Korea | Nissan | Tino | 93C56 | Memory Directly | OBP | Cluster |
| Japan& Korea | Nissan | Tino | 93C66 | Memory Directly | OBP | Cluster |
| Japan& Korea | Nissan | Urvan | 93C46 | Memory Directly | OBP | Cluster |
| Japan& Korea | Nissan | Xtrail | 93C56 | Memory Directly | OBP | Cluster |
| Japan& Korea | Nissan | Xtrail | 93C66 | Memory Directly | OBP | Cluster |
| Japan& Korea | Nissan | 370Z | 93C86 | Memory Directly | OBP | Cluster |
| Japan& Korea | Nissan | Juke | 93C86 | Memory Directly | OBP | Cluster |