Car diagnostic tools information by obd2tool

Welcome to my blog,here some auto diagnostic tools will be displayed. If you want to know more information,you can visit our official website: www.obd2tool.com.

Car diagnostic tools information by obd2tool

Welcome to my blog,here some auto diagnostic tools will be displayed. If you want to know more information,you can visit our official website: www.obd2tool.com.

MB Vito 2005 Start Error(solved)

I got a MB Vito 2005 with start error.
I manage to read ECU 24c04 eeprom but i can not read motorola from immo box.
I use clone carprog for this operation , everything as diagram shows but still can not read it.
Do you know if Carprog Clone read this Motorola HC08 0J66D?
Is there any way to start car without reading this?

Reply by rexercio:
ok i managed to fix your dump.
Put my fixed dump into ecu. open DAS and make ecu identification (hhtwin)
Enjoy!

You need Star Diagnosis.
Put my 24c04 into ecu and make idintifaction via HHTwin (using star diagnosis).

Reply by Badea Cristian
Clear now but I don’t have Star as well.
I’m helping a friend with this car and I don’t have tools for MB.
I will try to read that HC08 and make via eeprom programming .

solved …i read it with XPROG and sync them with ImmoKiller.

Solution for VXDIAG SUBARU SSM III error license for function

Here have collected the corresponding solution for VXDiag Subaru SSM-III error license for function. Now, let’s look below.

Error: Received a VXDIAG SUBARU SSM3 recently, but I found no license in the device when I tried to add Honda and Mazda licenses. Besides, I got the message “Error License for function: SUBARU 11:34:28Error License for function:”. Look at the following pictures:

fixed-vxdiag-subaru-ssm-iii-error-license-for-function-01

fixed-vxdiag-subaru-ssm-iii-error-license-for-function-02

fixed-vxdiag-subaru-ssm-iii-error-license-for-function-03

Solution: It’s suggested that you take the following steps:

Update VX Manager from http://www.vxdiag.net;
Download SSM3 & SSM4 2020.7 software and Subaru SSM3 patch;
Pay for the licenses that you want to add after mounting all the software mentioned above;
Give us your serial number, then we’ll add Honda and Mazda licenses for you.

Please be informed: you can only work on Win7, Win10 32 or 64 bit.

Download SSM3 & SSM4 2020.7 software:

https://mega.nz/folder/ucIEhR7J#QUGAbagyLLsCslE585Fu2Q

Download Subaru SSM3 patch:

https://mega.nz/folder/zJASHJ6b#FgXQQluqoFyVSKkQ2k5KMw

OBDSTAR X300 DP PLUS ODOMETER CORRECTION FOR 2019 NISSAN TEANA TEST

OBDSTAR X300 DP PLUS inherits from OBDSTAR advanced diagnosing technology and covers wide range of vehicles, with itself featuring powerful function, and providing precise test results. Through vehicle diagnostic OBD connector and variant mobile intelligent terminals, it achieves vehicle trouble diagnosis for full car model and full system vehicle.

obdstar-x300-dp-plus-odometer-correction-2019-nissan-teana-1 (2)

Here we are talking about the most practical operation procedures of using OBDSTAR X300 DP Plus tablet to correct odometer for 2019 Nissan Teana. Come check below and I am sure you will learn a lot on this matter by your kind reading and strictly following the procedures.

Operation Procedures:

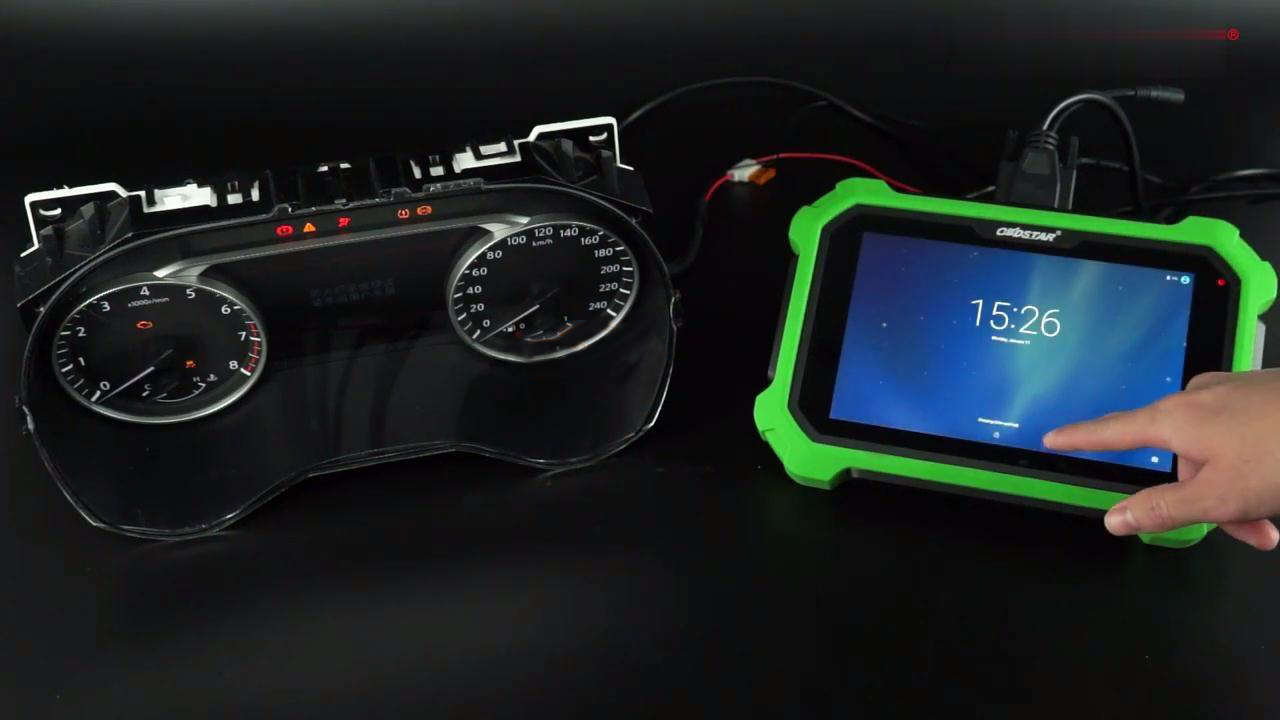
Before this test, please connect the device with the vehicles you want to diagnose via OBD2 port. This is very easy, so we are gonna waste our time on it.

Three main steps here I want to share for this odometer correction.

Step 1.Read EEPROM

Step 2.Mileage Calibration

Step 3.Write EEPROM

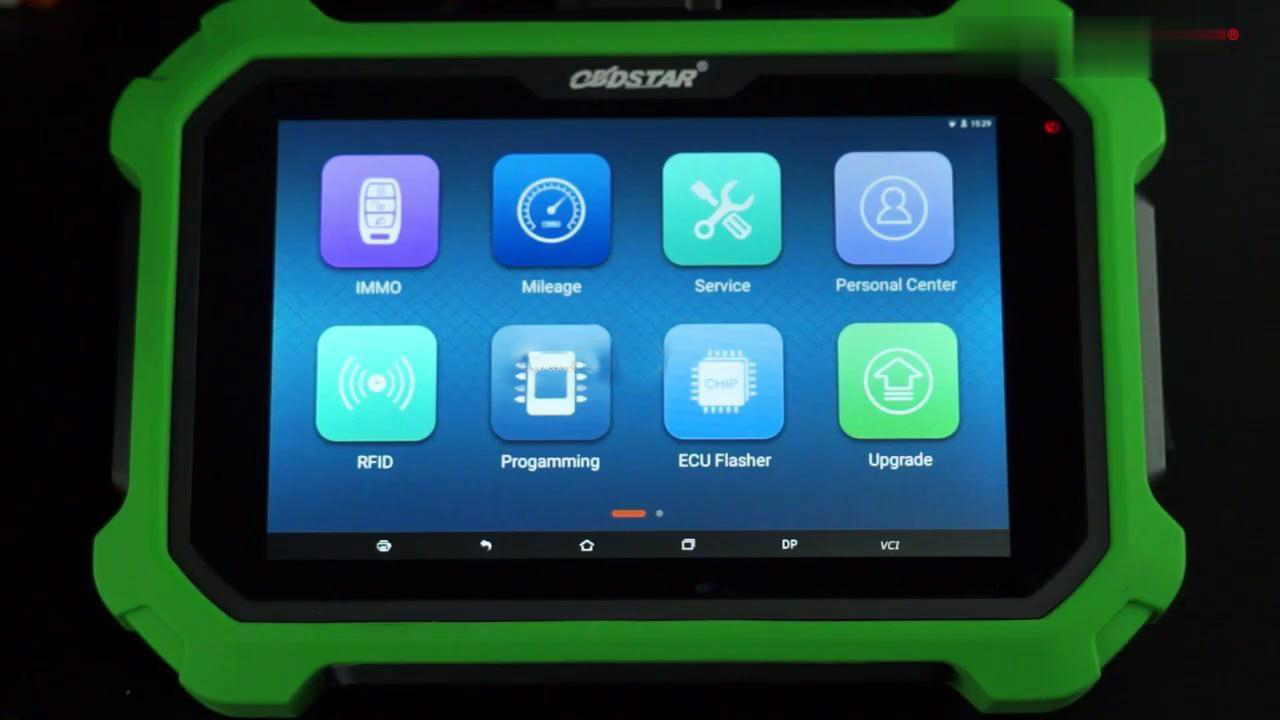
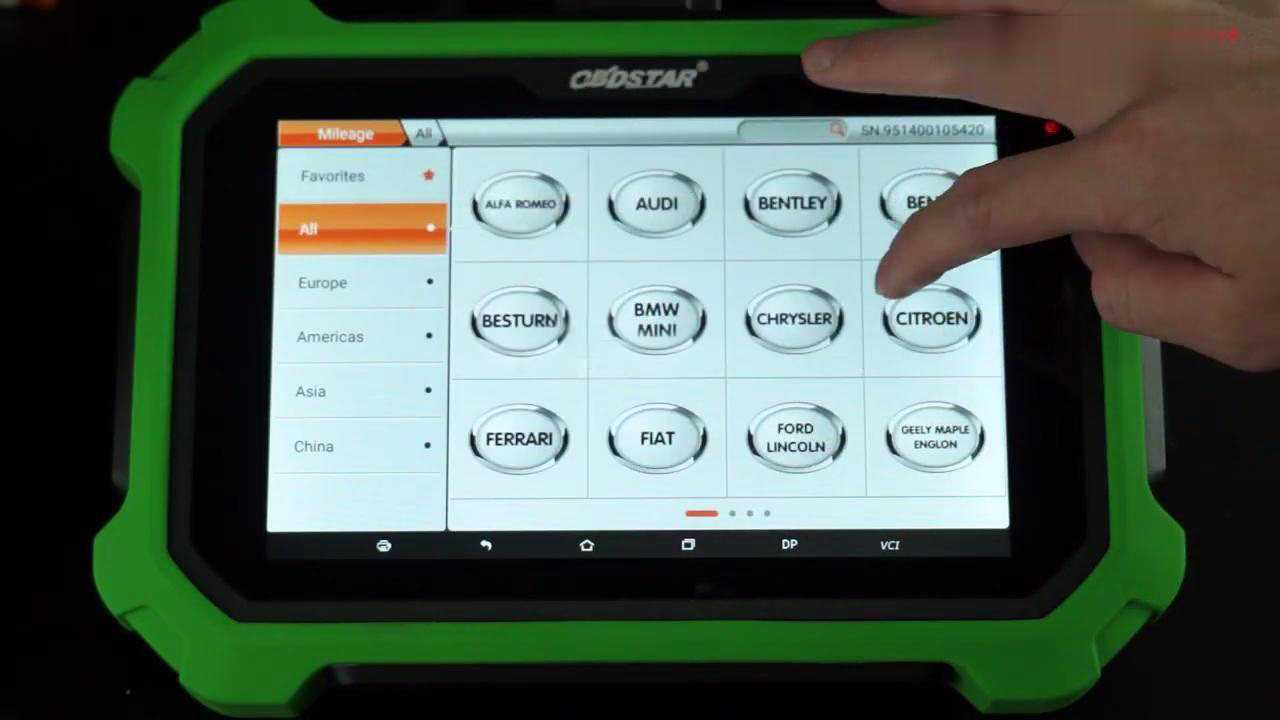
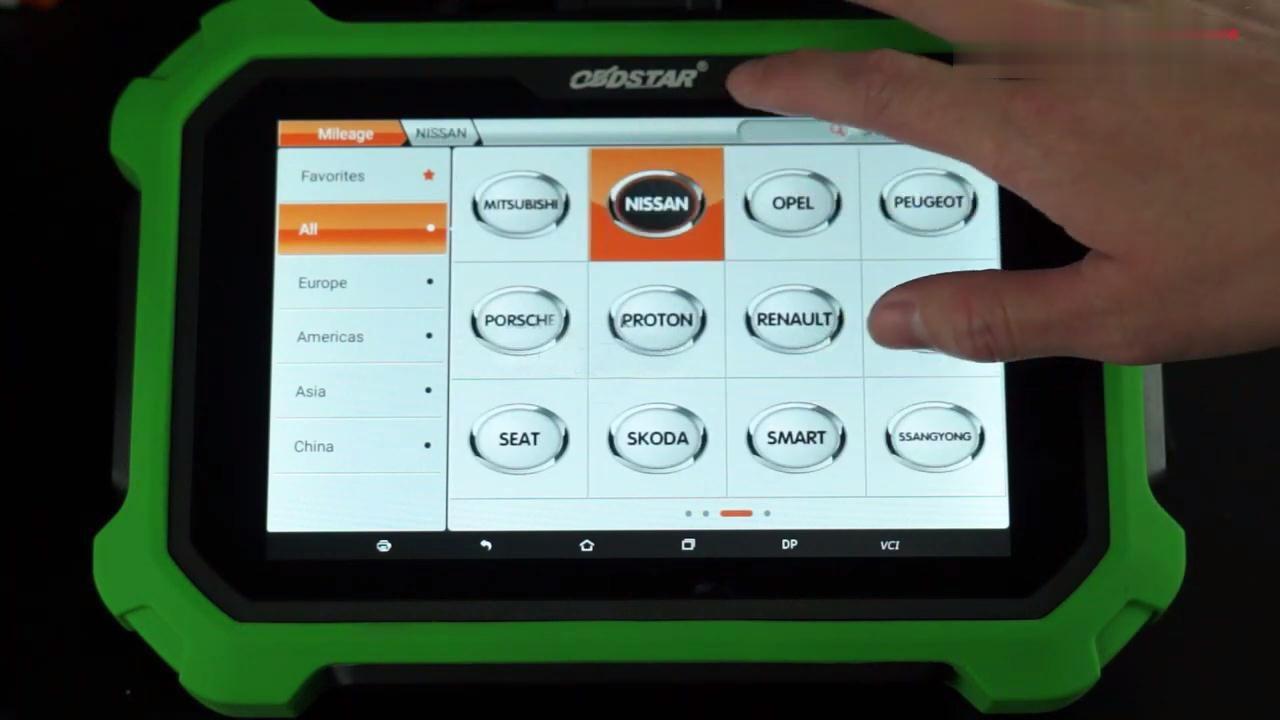
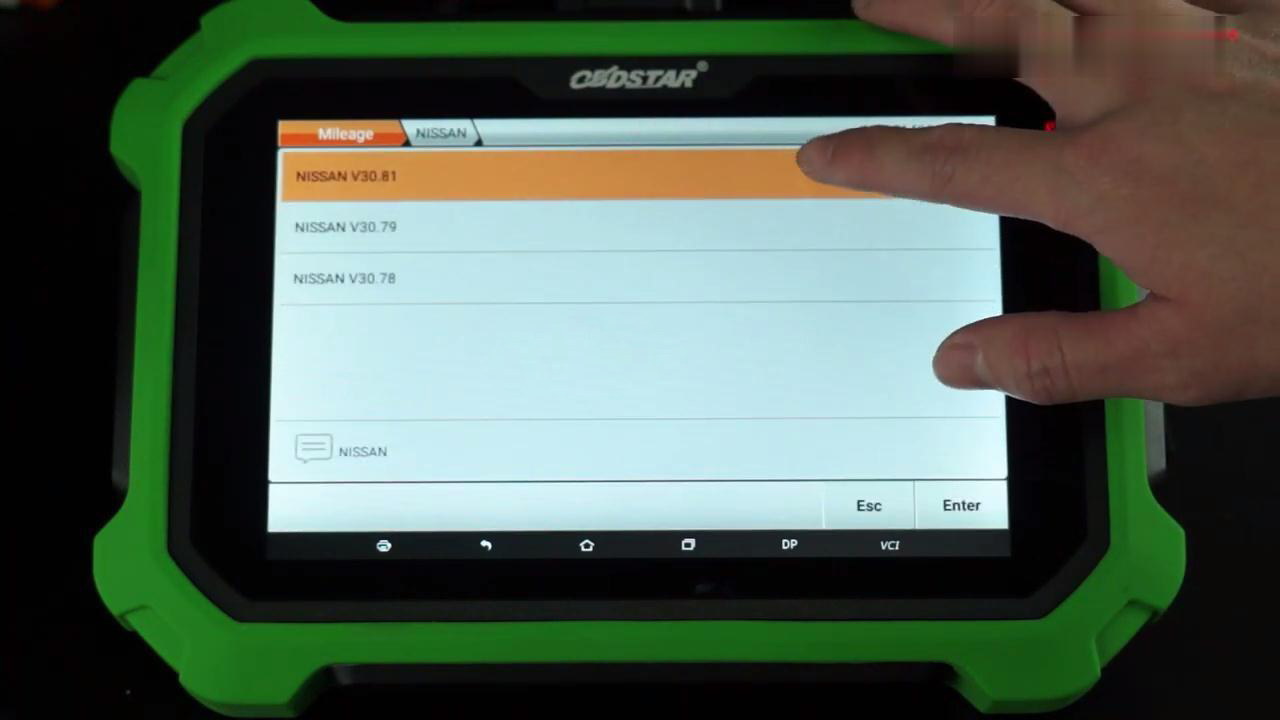
First, wake up your OBDSTAR X300 DP Plus unit and come to the menu-selection screen, you will see many icons listed up there. Choose “Mileage” button to move on. Select “All”>> “NISSAN”>> “NISSAN V30.81”

obdstar-x300-dp-plus-odometer-correction-2019-nissan-teana-2 (2)
obdstar-x300-dp-plus-odometer-correction-2019-nissan-teana-3 (2)
obdstar-x300-dp-plus-odometer-correction-2019-nissan-teana-4 (2)
obdstar-x300-dp-plus-odometer-correction-2019-nissan-teana-5 (2)

The screen will show “VCI is grading…VCI is grading…initializing…”, OK, we are good!!!

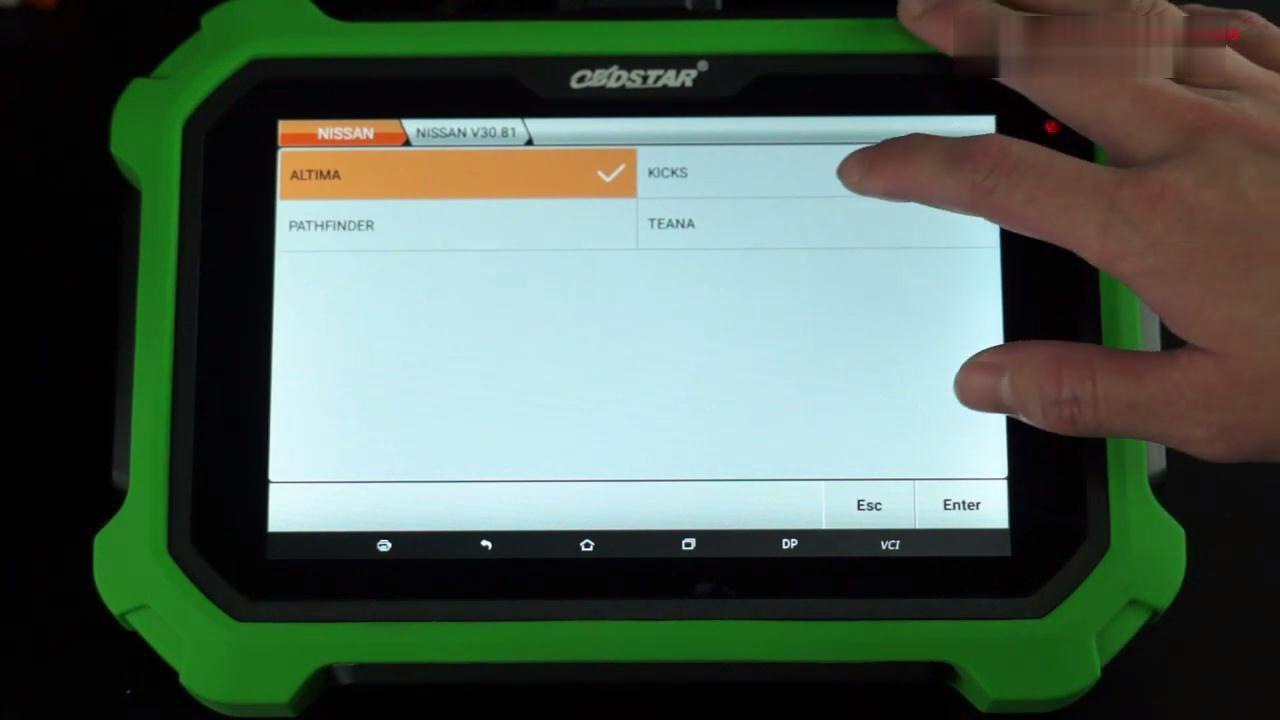
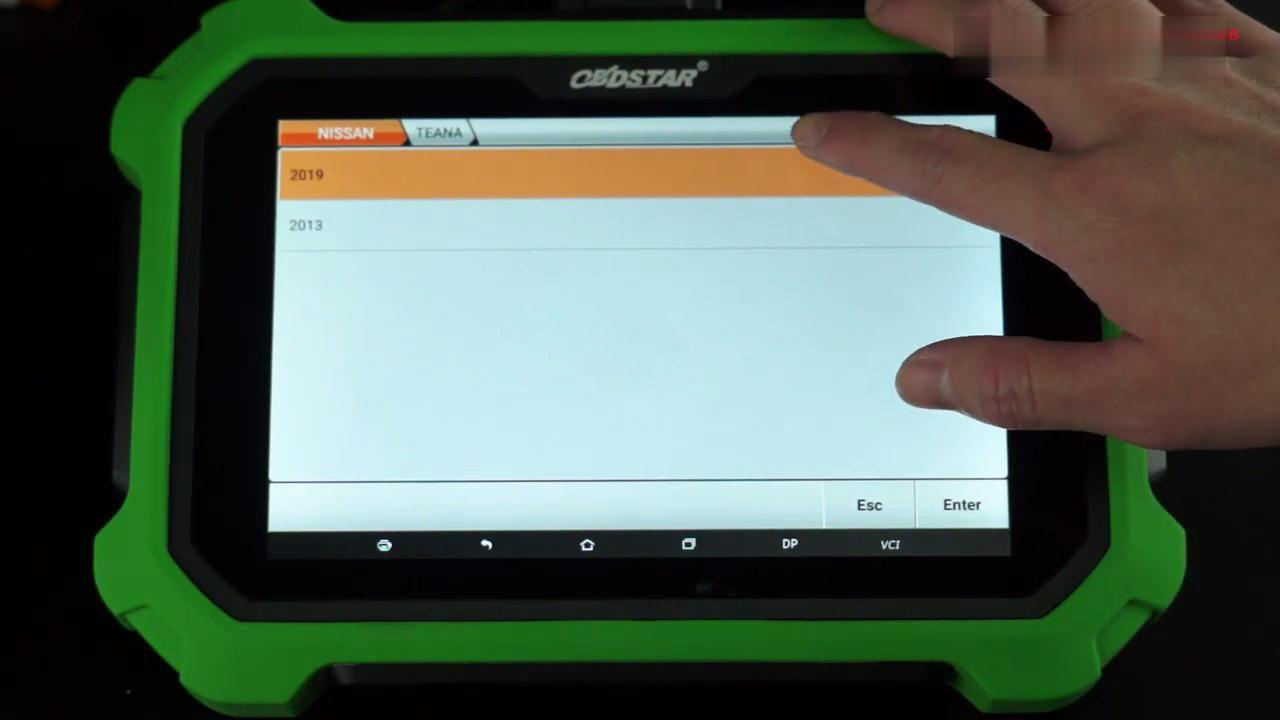
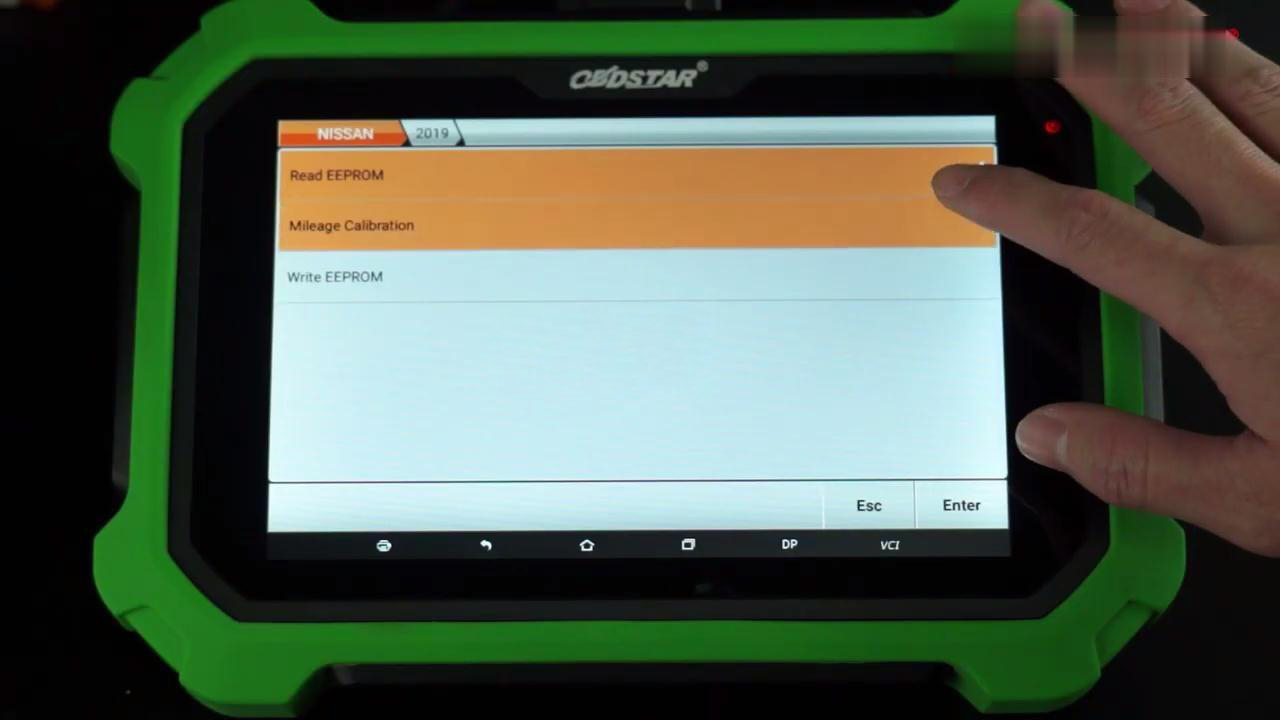
Select “TEANA”>> “2019”, we are gonna do the first step of Reading EEPROM.

Click “Read EEPROM” button on the screen and the unit will begin this procedure itself.

obdstar-x300-dp-plus-odometer-correction-2019-nissan-teana-6 (2)
obdstar-x300-dp-plus-odometer-correction-2019-nissan-teana-7 (2)
obdstar-x300-dp-plus-odometer-correction-2019-nissan-teana-8 (2)
obdstar-x300-dp-plus-odometer-correction-2019-nissan-teana-9 (2)

Then ,we have to input the name of file to save in this device, just do it. Here, for example, we will input “TEANE1EE”.

obdstar-x300-dp-plus-odometer-correction-2019-nissan-teana-10 (2)

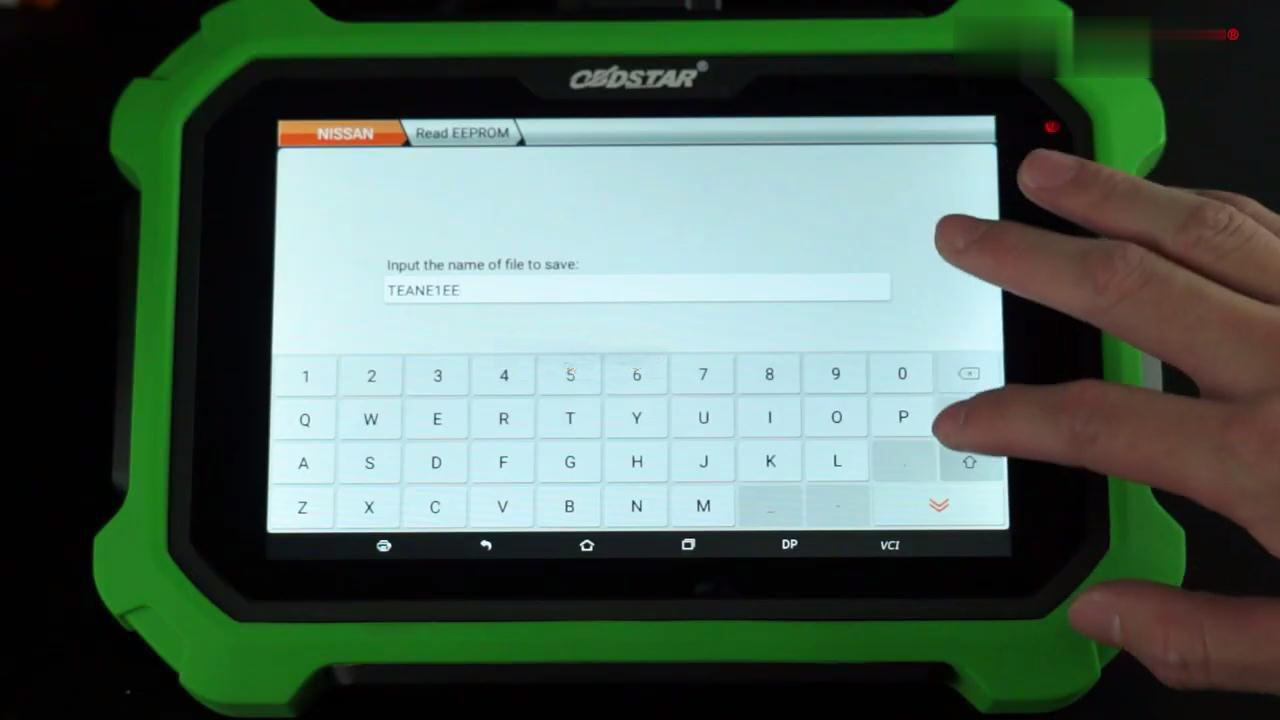
Click “ENTER” AND it will show us “Operation success”.

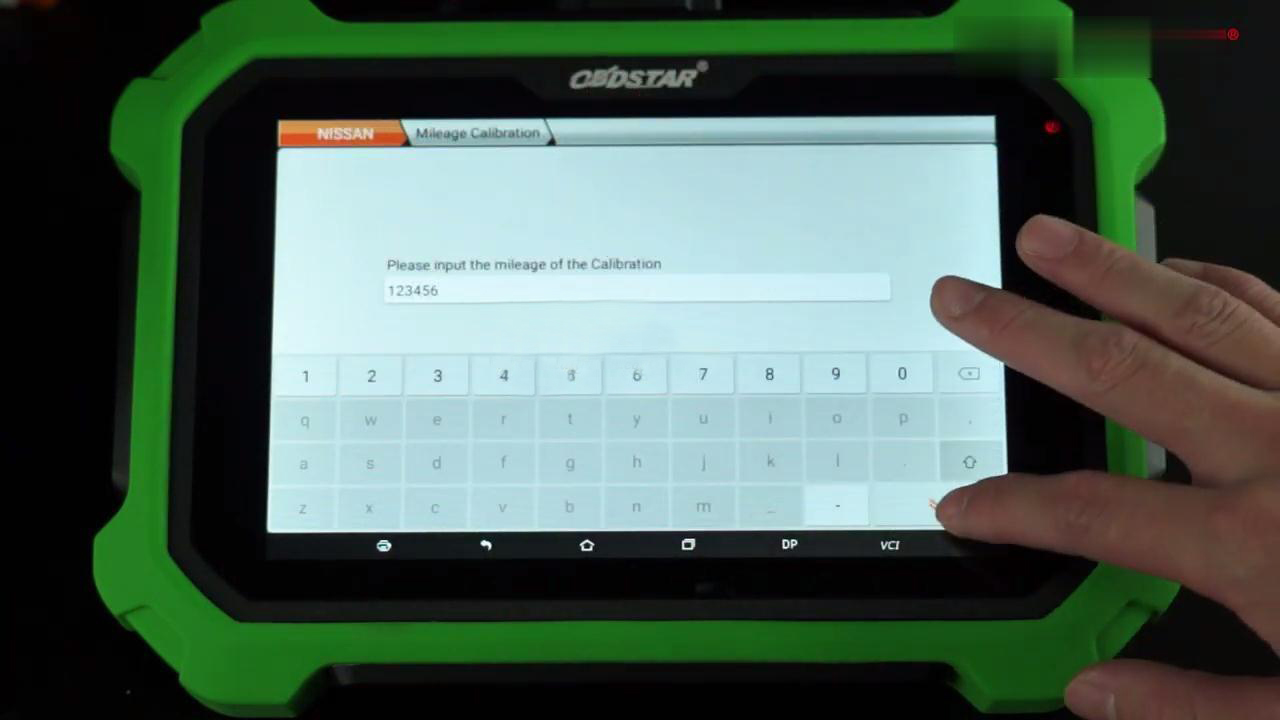
Next step is “Mileage Calibration”. Click it and the screen prompt the message below.

obdstar-x300-dp-plus-odometer-correction-2019-nissan-teana-11 (2)
obdstar-x300-dp-plus-odometer-correction-2019-nissan-teana-12 (2)

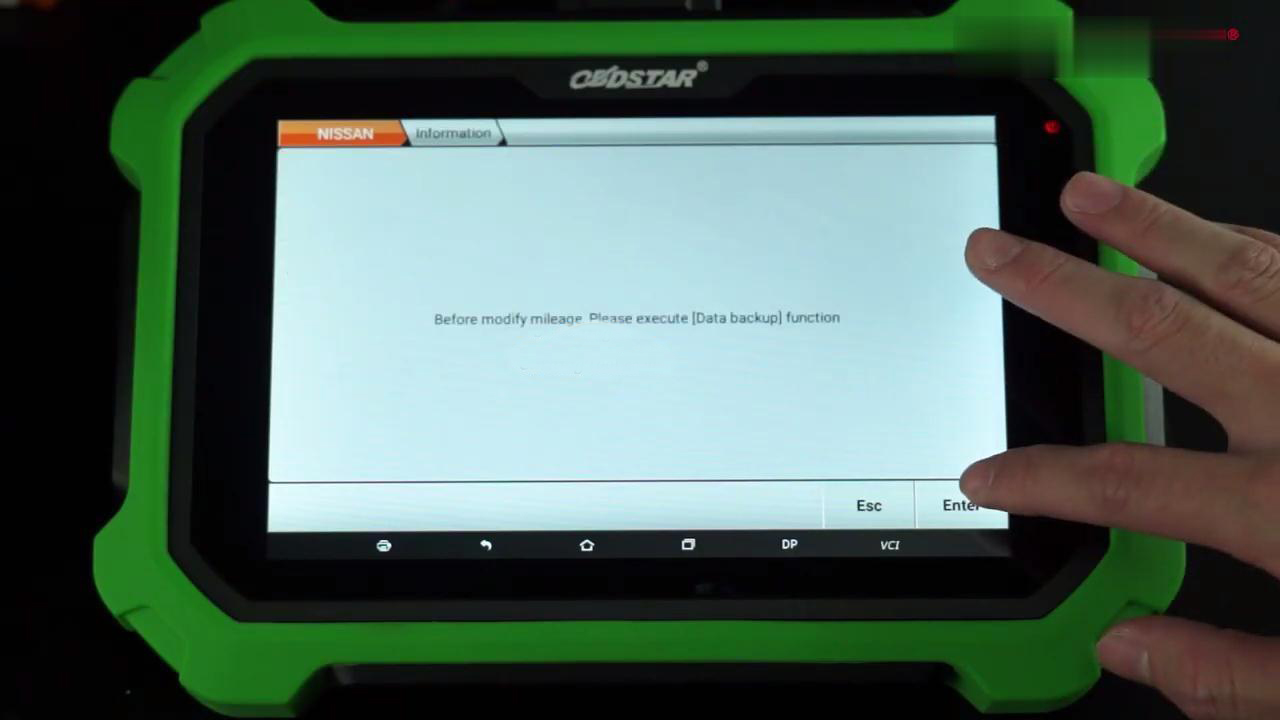
Click “ENTER” AND IT will tell you the current mileage of your vehicle and ask if you want to make a backup. Click “ENTER” to confirm.

After backup the data, we will get to “Mileage Calibration”, for example, here, we input “123456 km”.

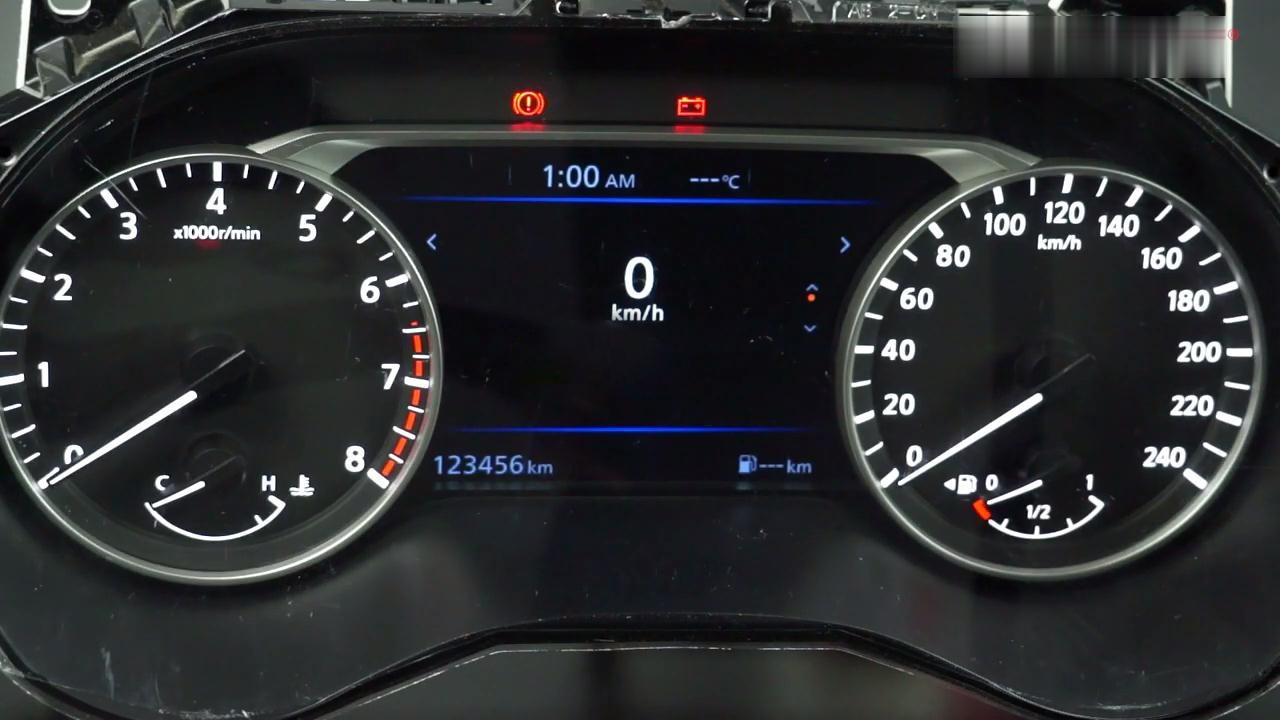
Click “ENTER” and the dashboard of your vehicle will restart. It shows the data of “123456 km” that we just modified, which means we did it!

obdstar-x300-dp-plus-odometer-correction-2019-nissan-teana-13 (2)
obdstar-x300-dp-plus-odometer-correction-2019-nissan-teana-14 (2)
obdstar-x300-dp-plus-odometer-correction-2019-nissan-teana-15 (2)

After this procedure, remember we make a backup of the data before correcting it?

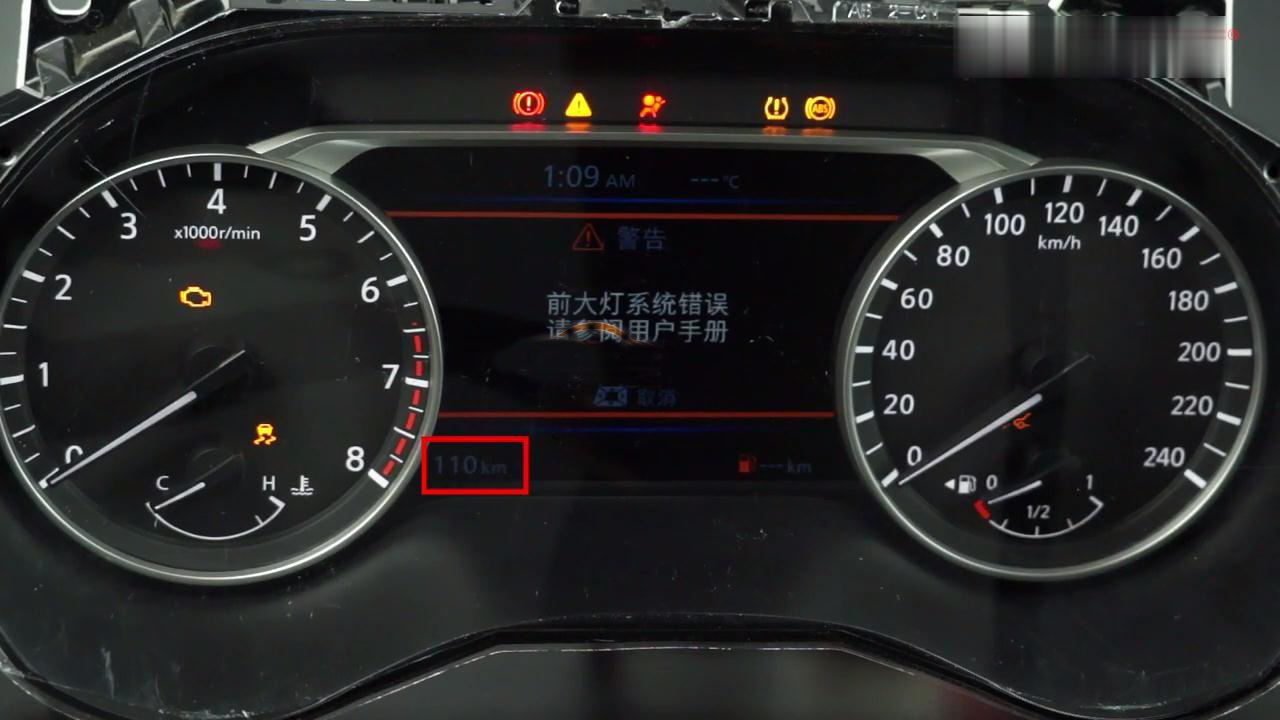
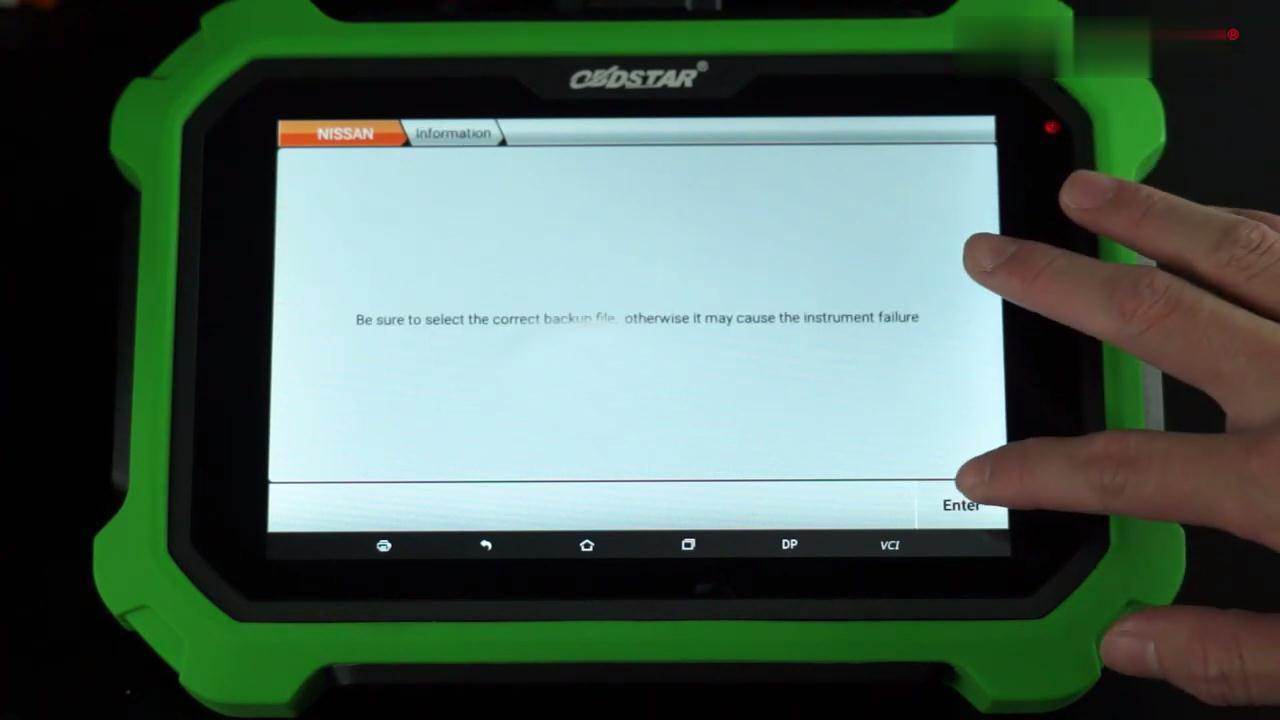
YES. So we are gonna click “Write EEPROM” and choose the correct backup file.

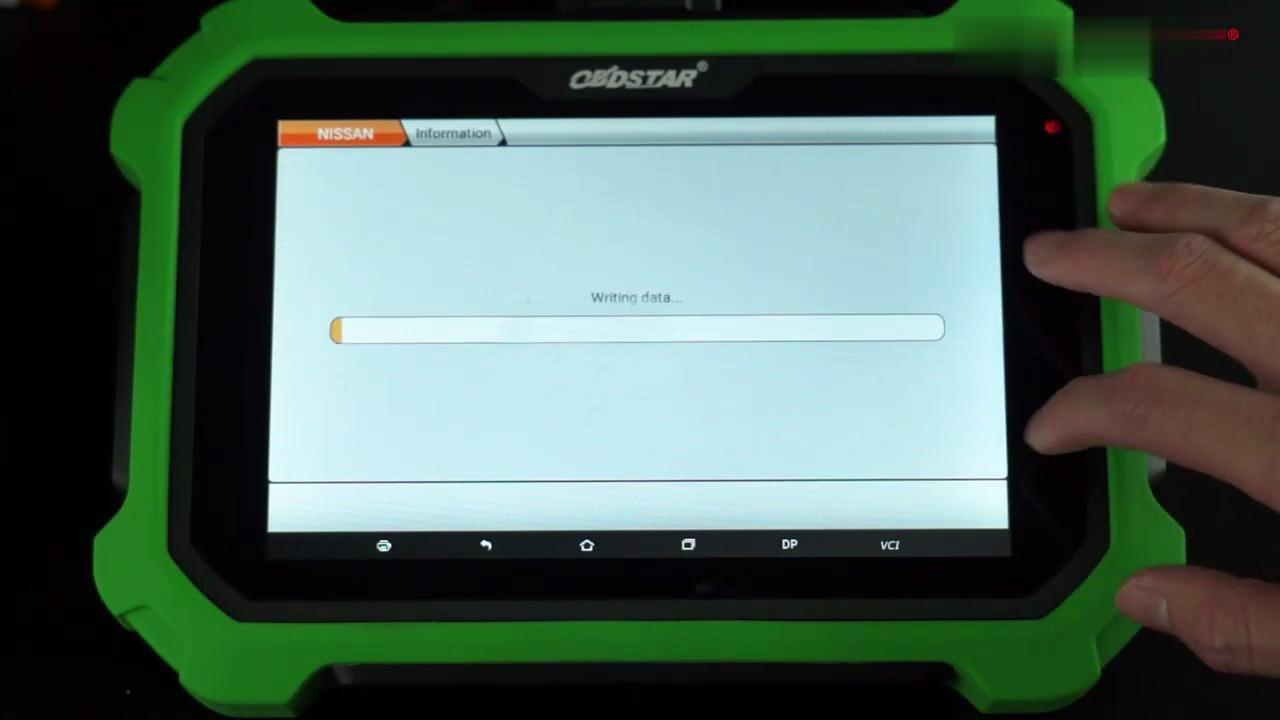
Find the file named “TEANE1EE.BIN” and click it..ENTER…wait until the dashboard restarts itself. It shows the original data of “110km”.

obdstar-x300-dp-plus-odometer-correction-2019-nissan-teana-16 (2)
obdstar-x300-dp-plus-odometer-correction-2019-nissan-teana-17 (2)
obdstar-x300-dp-plus-odometer-correction-2019-nissan-teana-18 (2)

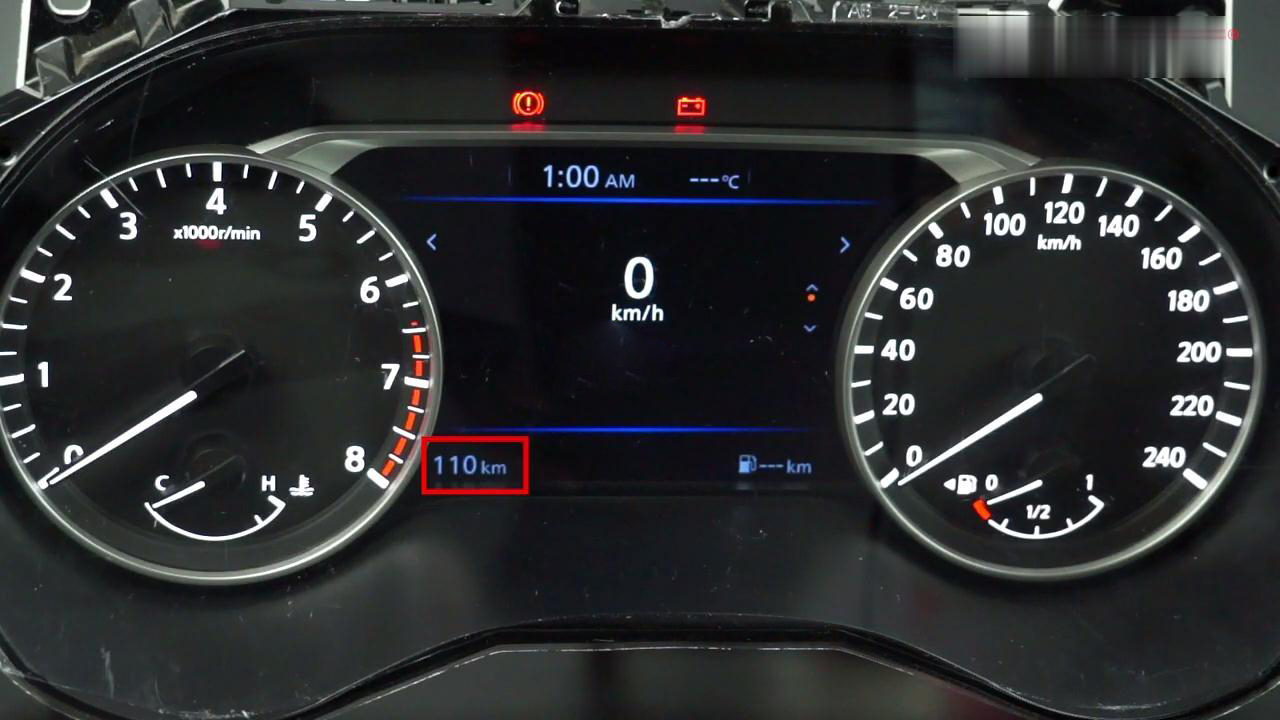
Congratulations! We did it together. Job was finished successfully.

Program VW New Beetle 2006 ID48 Key Chip by Autel IM508

Hello! Happy New Year 2021! OBD2TOOL is going to use Autel MaxiIM IM508 to program immobilizer key chip ID48 for a Volkswagen New Beetle 2006 .This will be done in expert mode.

Connect Autel IM508 with VW OBD2 interface, press button on scanner tablet:

IMMO >> Accept >> Volkswagen >> Expert mode >> Key learning >> Auto detect

program-vw-new-beetle-2006-id48-key-chip-by-autel-im508-1 (2)
program-vw-new-beetle-2006-id48-key-chip-by-autel-im508-2 (2)
program-vw-new-beetle-2006-id48-key-chip-by-autel-im508-3 (2)
program-vw-new-beetle-2006-id48-key-chip-by-autel-im508-4 (2)
program-vw-new-beetle-2006-id48-key-chip-by-autel-im508-5 (2)

Volkswagen/Lamborghini Gallardo-2005 (KWP2000) >> Auto obtain PIN/CS from engine >> OK >> Key learning

program-vw-new-beetle-2006-id48-key-chip-by-autel-im508-6 (2)
program-vw-new-beetle-2006-id48-key-chip-by-autel-im508-7 (2)
program-vw-new-beetle-2006-id48-key-chip-by-autel-im508-8 (2)
program-vw-new-beetle-2006-id48-key-chip-by-autel-im508-9 (2)

Enter number of keys to be learned, press “OK”.

Turn ignition off for 5s and then back to ON, press “OK” within 2s.

Key learning in progress…

program-vw-new-beetle-2006-id48-key-chip-by-autel-im508-10 (2)
program-vw-new-beetle-2006-id48-key-chip-by-autel-im508-11 (2)

Turn ignition off, insert each key that needs to be learned and turn ignition on for a continuous period of 2s, press “OK”.

Key learning completed!, press “OK”.

Turn ignition off, then back to ON and start the engine. If the ignition cannot be started, please wait for 5 min and then restart the engine. Press “OK”.

program-vw-new-beetle-2006-id48-key-chip-by-autel-im508-12 (2)
program-vw-new-beetle-2006-id48-key-chip-by-autel-im508-13 (2)
program-vw-new-beetle-2006-id48-key-chip-by-autel-im508-14 (2)

Test the keys works or not, all good, can work normally!

program-vw-new-beetle-2006-id48-key-chip-by-autel-im508-15 (2)

Job has done!

This is a procedure of ID48 key programming for a Volkswagen New Beetle 2006 with Autel IM508 Key Programmer. More vehicle tests to be updated…

How to Install Volvo Premium Tech Tool PTT Software

This article show the guide on how to install Volvo Premium Tech Tool PTT diagnostic software.

Before install Volvo PTT software,click: Volvo PTT Premium Tech Tool All Version Free Download

To download the Volvo Premium Tech Tool software,the article include:

Volvo Premium Tech Tool v2.05.20

Volvo Premium Tech Tool v2.04.87

Volvo Premium Tech Tool v2.04.55


Heavy Duty Truck diagnostic Scanner Volvo Premium Tech Tool Installation Guide:

Volvo PTT Installation Minimum Hardware Requirement:
Computer/Processor:     Intel Core 2 Duo(1.6GHz) or equivalent AMD Athlon64*2
Memory(RAM):      3GB,more memory improves performance
Hard Disk:      20GB of free hard disk space
Optical Drive:      Internal/external DVD x8 drive
Display:      XGA(1024*768 PIXELS) or higher resolution monitor with 16 bit color settings
Input device:      Keyboard and mouse or compatible pointing device
Internet connection:      Network using 10 Mbps or higher speed network adapter and/or WLAN and/or 33.6 Kbps or higher speed moderm(not supported for Win7/8 clients)
Miscellaneous:      USB interface required.A battery-pack that may provide 500 mA via USB.

Volvo Premium Tech Tool PTT 2.04.87

1/ open in admin setClientID.exe, set ID: 190430

2/ TechToolInstaller_Dev.reg

3/ TT204-Prerequisites.cmd (client update ID: 190430)

4/ TT204-MainInstallationPackages.cmd

5/ TT204-MainInstallationPackages2.cmd

6/ TT204-Patches.cmd

(Don’t open tech tool)

Open client update and make all update 2.04.87(it is very long)

Copy and Replace APCIPLUSDATA.DLL

C:\Program Files (x86)\Tech Tool\Tech Tool\Apciplus

(Replace the file APCIPLUSDATA.DLL thas is on M151124 user)

BaldoLocal.Data.dll >>

C:\Program Files (x86)\Tech Tool\Tech Tool\BaldoLocal

VolvoIt.Waf.Login.Ui.dll >>

C:\Program Files (x86)\Tech Tool\Tech Tool\Login

BaldoLocal.sdf >>

C:\ProgramData\Tech Tool

Copy and replace apci+ update / in these paths:

C:\ProgramData\Tech Tool\Waf\DtR

and C:\ProgramData\Tech Tool\Waf\OtD

Open tech tool

Tech Tool and Update Product Information

Volvo ptt 2.04.55 installation guide:

Volvo ptt2.04.55 needs the updated operating system

disable antivirus and firewall

How-to-Install-Volvo-Premium-Tech-Tool-PTT-Software-1

mount the image file with Daemon tools ….
start the setup as an administrator ..

Click OK

Click Next

Click Install

Click Finish

Click Next

Client id:123456,click next

Click Install

Click Finish

Wait…installation….continue

Click Next

Click Next

Click Install

Click Finish

Wait…installation…continue…

Finish installing all applications… restart pc

How-to-Install-Volvo-Premium-Tech-Tool-PTT-Software-2

After reboot…Open client update

Search update

How-to-Install-Volvo-Premium-Tech-Tool-PTT-Software-3

Install all update

How-to-Install-Volvo-Premium-Tech-Tool-PTT-Software-4
How-to-Install-Volvo-Premium-Tech-Tool-PTT-Software-5

No other update available…close this window

How-to-Install-Volvo-Premium-Tech-Tool-PTT-Software-6

Open folder.. Patches, open folder.. 05

How-to-Install-Volvo-Premium-Tech-Tool-PTT-Software-7

install in order of appearance the various applications

when you have this warning, click on .. no.
continue installing all other applications ….. finished installing all … reboot the pc

After reboot… open folder 06….. install all

How-to-Install-Volvo-Premium-Tech-Tool-PTT-Software-8

Folder 15.. install all

How-to-Install-Volvo-Premium-Tech-Tool-PTT-Software-9

Folder 30.. install all

How-to-Install-Volvo-Premium-Tech-Tool-PTT-Software-10

when you have this warning, click on .. no.
continue installing all other applications ….. finished installing all … reboot the pc

How-to-Install-Volvo-Premium-Tech-Tool-PTT-Software-11

After reboot… open folder..31   install all

How-to-Install-Volvo-Premium-Tech-Tool-PTT-Software-12

Folder..32.. install all

when you have this warning, click on .. no.
continue installing all other applications ….. finished installing all … reboot the pc

How-to-Install-Volvo-Premium-Tech-Tool-PTT-Software-13

After reboot  open folder   35.. install all

How-to-Install-Volvo-Premium-Tech-Tool-PTT-Software-14

Folder.. 40 install all

..same for all….to the folder 55

when you have this warning, click on .. no.
continue installing all other applications ….. finished installing all … reboot the pc

How-to-Install-Volvo-Premium-Tech-Tool-PTT-Software-15

After reboot… click.. Start->all program->Tech tool->Log Manager…. run as administrator

How-to-Install-Volvo-Premium-Tech-Tool-PTT-Software-16

Click on… stop baf service..wait stop service…..

Ok… do not close the page.. ( minimize)

How-to-Install-Volvo-Premium-Tech-Tool-PTT-Software-17

Open folder ..activator , copy this file

How-to-Install-Volvo-Premium-Tech-Tool-PTT-Software-18

Paste in: C:\programdata\techtool   replace

How-to-Install-Volvo-Premium-Tech-Tool-PTT-Software-19

From folder activator… copy this file

How-to-Install-Volvo-Premium-Tech-Tool-PTT-Software-20

Paste in: C:\ program files\tech tool\tech tool\baldolocal   replace

How-to-Install-Volvo-Premium-Tech-Tool-PTT-Software-21

From folder activator 2.04.40, copy this file

How-to-Install-Volvo-Premium-Tech-Tool-PTT-Software-22

Paste in : C:\ program files\tech tool\ tech tool\ login   replace

How-to-Install-Volvo-Premium-Tech-Tool-PTT-Software-23

Click start baf service

Wait message

Click Ok

Close all

TechTool start from the desktop as administrator … to start … more

How-to-Install-Volvo-Premium-Tech-Tool-PTT-Software-24

Select.. work offline

User ID: xx40645   ok

How-to-Install-Volvo-Premium-Tech-Tool-PTT-Software-25 How-to-Install-Volvo-Premium-Tech-Tool-PTT-Software-26 How-to-Install-Volvo-Premium-Tech-Tool-PTT-Software-27 How-to-Install-Volvo-Premium-Tech-Tool-PTT-Software-28 How-to-Install-Volvo-Premium-Tech-Tool-PTT-Software-29 How-to-Install-Volvo-Premium-Tech-Tool-PTT-Software-30
How-to-Install-Volvo-Premium-Tech-Tool-PTT-Software-31 How-to-Install-Volvo-Premium-Tech-Tool-PTT-Software-32 How-to-Install-Volvo-Premium-Tech-Tool-PTT-Software-33

Work